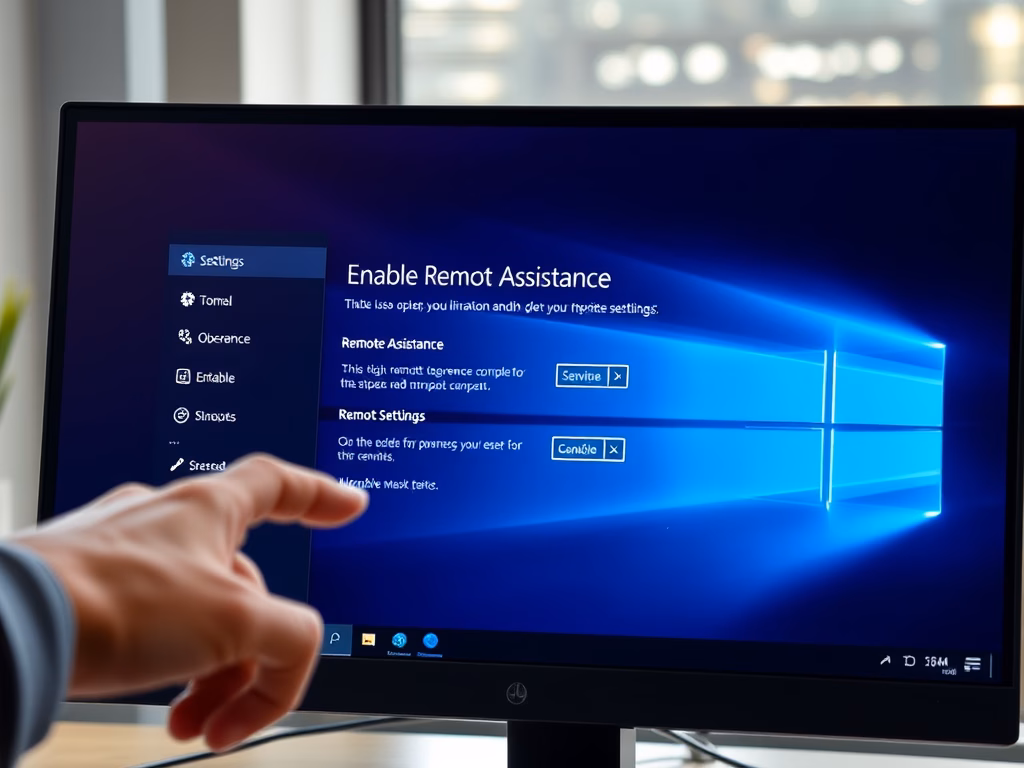
Remote Assistance is a tool in Windows 11 that lets someone you trust connect to your computer from far away to help fix problems. You don’t need to install extra software like TeamViewer if you use this built-in feature.
But before you can use it, you need to turn it on. If you don’t want anyone to connect remotely, you can also turn it off to keep your PC safer.
How to Turn On or Off Remote Assistance
Follow these simple steps:
- Click the Start button (the Windows icon in the bottom-left corner).
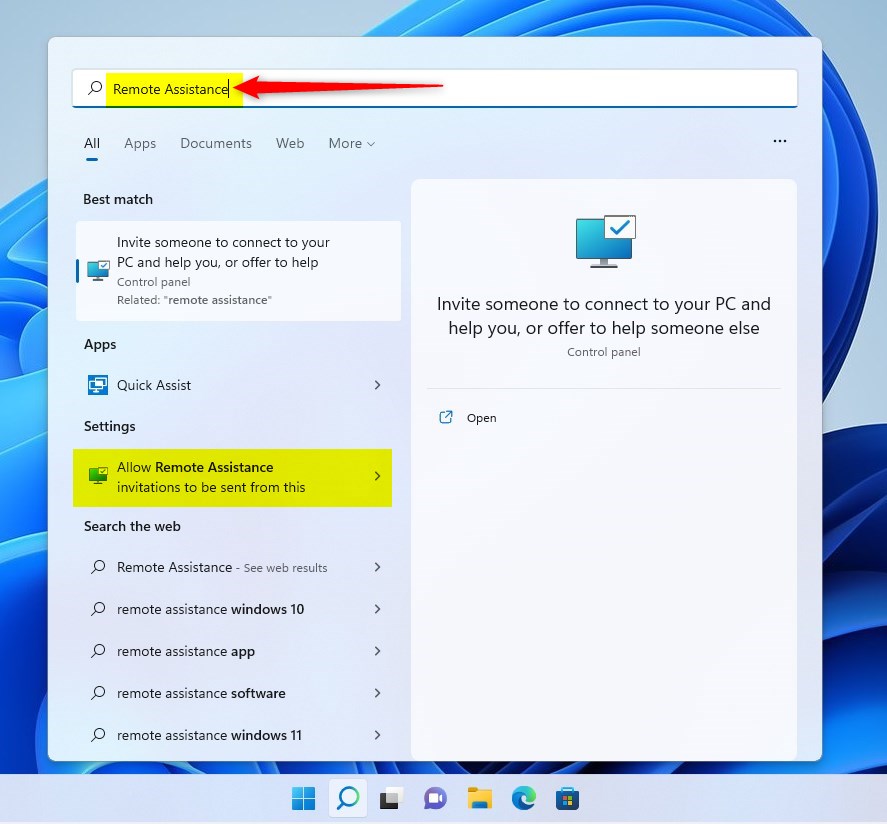
- Type remote assistance in the search box.
- Click on Allow Remote Assistance invitations to be sent from this computer from the search results.
You will see a window called System Properties open. Click the Remote tab at the top.
To turn on Remote Assistance, check the box next to Allow Remote Assistance connections to this computer.
To turn off, uncheck the box.

Click OK to save your changes.
Another Way: Using Local Group Policy Editor
If you want more control, you can use the Local Group Policy Editor. Here’s how:
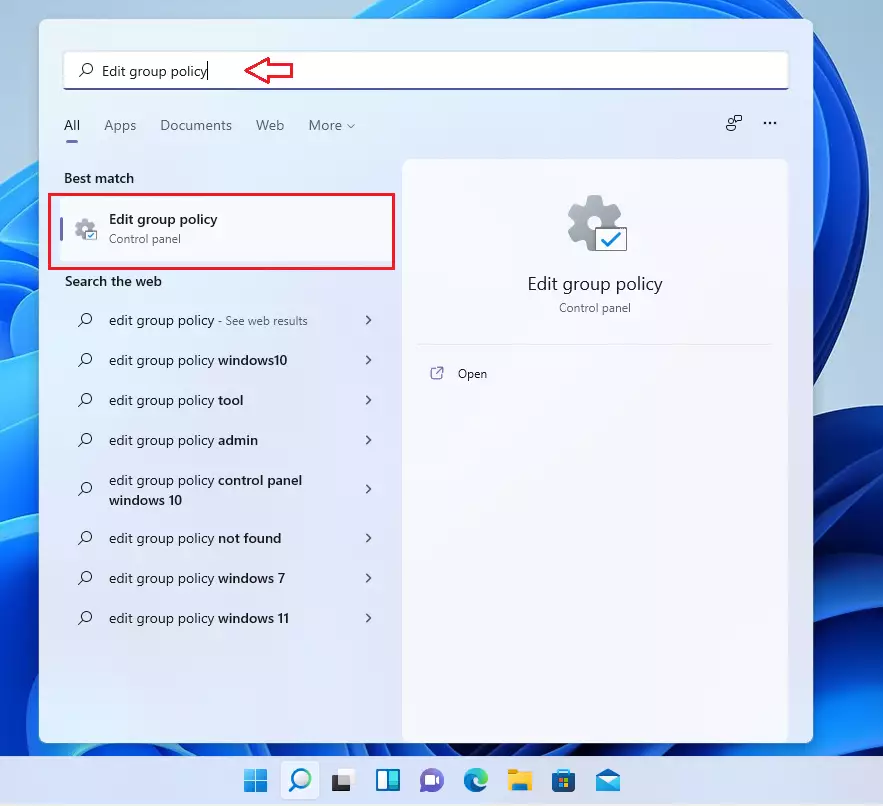
- Click the Start button and type Edit group policy.
- Select Edit group policy when it shows up.
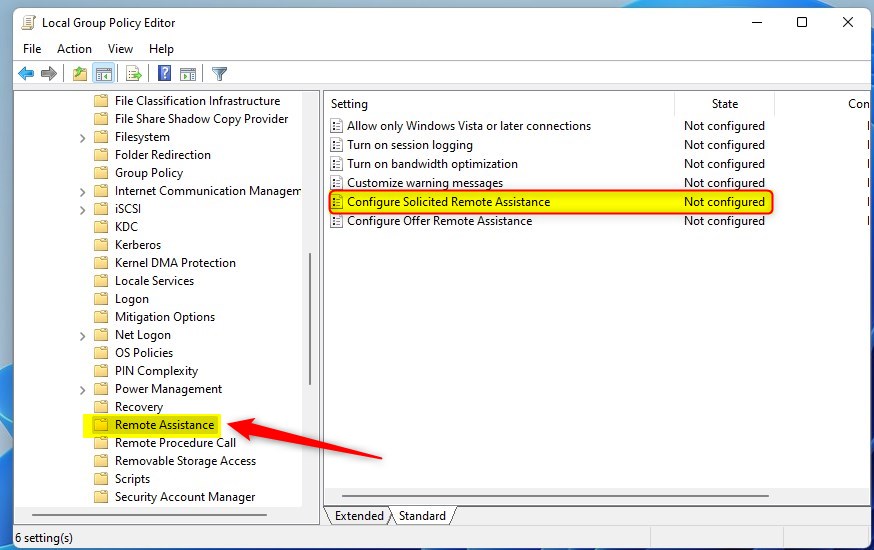
In the window that opens, on the left side, follow this path:
Computer Configuration > Administrative Templates > System > Remote Assistance
On the right side, find Configure Solicited Remote Assistance and double-click it.
You will see three options:
- Not Configured (default) – uses standard settings.
- Enabled – turns Remote Assistance on.
- Disabled – turns Remote Assistance off.

Choose the option you want, click OK, then close the Group Policy Editor.
Summary
- Windows 11 has a built-in Remote Assistance tool to help trusted people fix your PC remotely.
- You can turn this feature on or off through System Properties or the Local Group Policy Editor.
- Turning it off when not needed helps keep your computer safer.
If you want to learn more about remote help tools like TeamViewer, check out this guide: How to Install TeamViewer in Windows 11.
Leave a Reply