This article explains how to enable or disable mobile hotspots in Windows 11.
Windows 11 devices with built-in mobile hotspots can share their internet connection with other devices over WiFi.
This is useful when you are in a remote area with a mobile (cellular) network only and wish to share your internet connection with other devices so they can connect.
With your cellular-equipped device, you can turn your WiFi adapter into a wireless hotspot so others can connect to it, sharing the same mobile internet connection. However, beware, if you share your cellular internet, your network data plan will be used and may cost a lot, depending on your location.
Once you share your WiFi adapter as a hotspot, other devices will see it as a regular WiFi network that they’re used to. When you give them the username and password, and no time, they’ll be connected to your Windows 11 device, sharing your mobile internet connection.
How to turn on mobile hotspots in Windows 11
As mentioned above, using hotspots, Windows 11 can share its Network with other devices. Therefore, sharing your internet as a hotspot will appear like a regular WiFi network to other devices.
Below is how to turn it on in Windows 11.
Windows 11 has a centralized location for the majority of its settings. From system configurations to creating new users and updating Windows, all can be done from the System Settings pane.
To get to System Settings, you can use the Windows key + I shortcut or click on Start ==> Settings, as shown in the image below:

Alternatively, you can use the search box on the taskbar and search for Settings. Then select to open it.
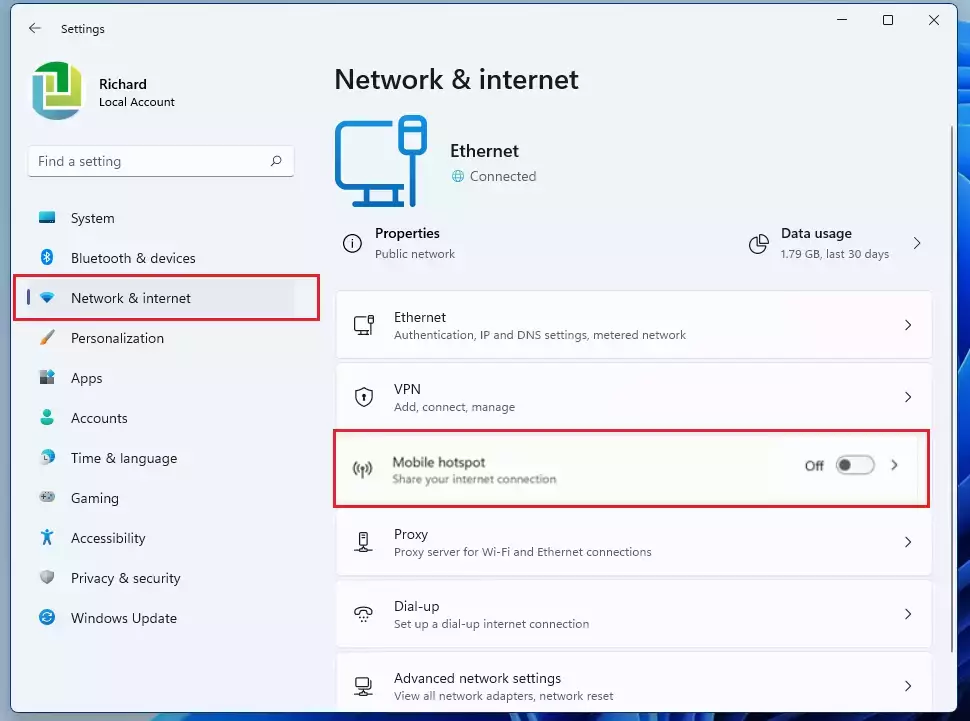
In Windows Settings, click Network & Internet, and select the Mobile hotspot tile on the right pane, as shown in the image below.
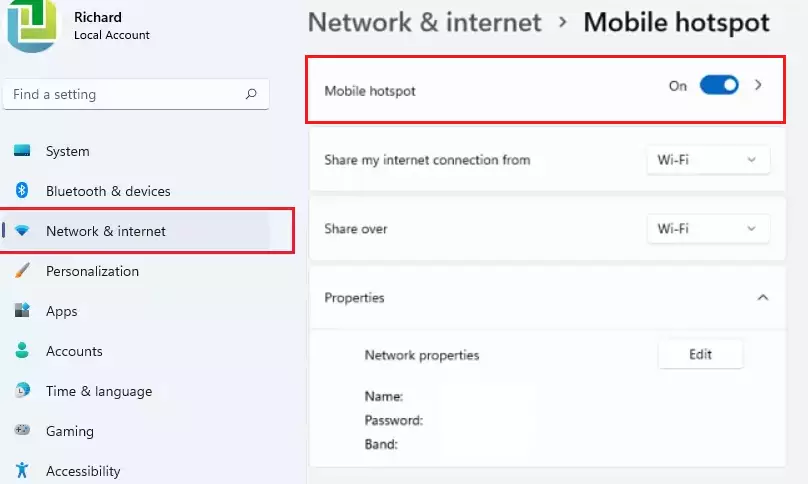
On the Mobile hotspot settings pane, toggle the button to the On position to enable Mobile hotspot in Windows 11.
How to turn off mobile hotspots in Windows 11
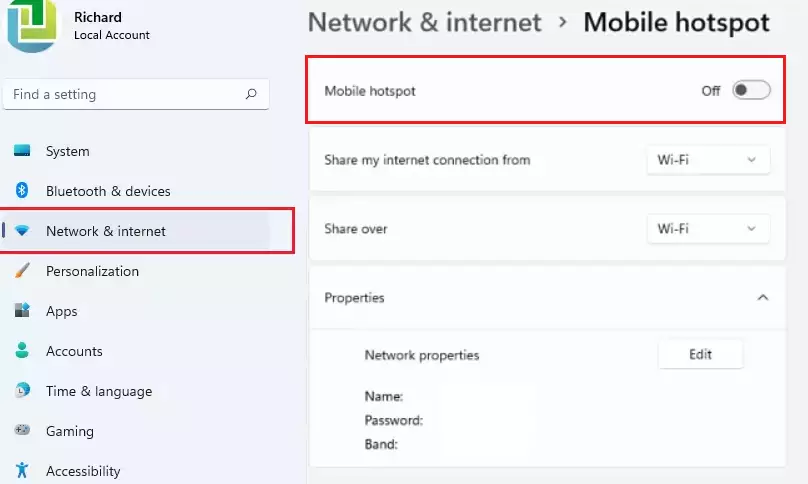
If the mobile hotspot is turned on and you want to turn it off, reverse the steps above by going to the Start menu ==> Settings ==> Network & Internet ==> Mobile hotspot. Then, select the tile and toggle the button to the Off position to deactivate it.
How to set up a Mobile hotspot on Windows 11
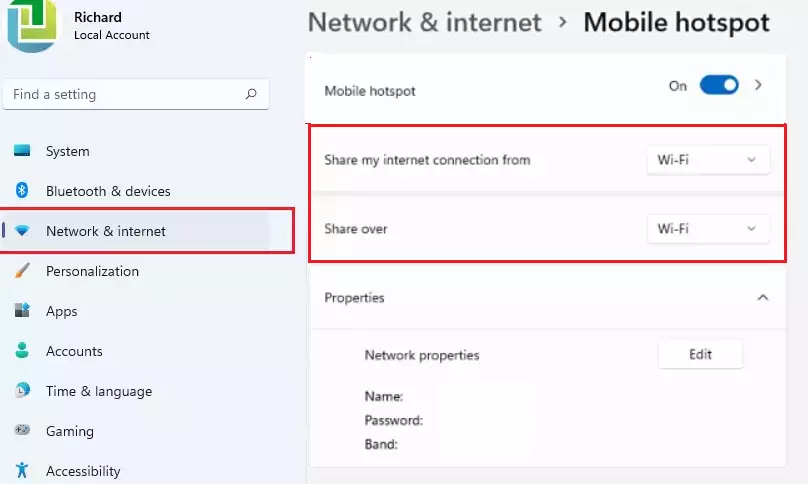
If a Mobile hotspot is enabled and you want other devices to connect to your hotspot, select Share my Internet connection and choose the source you want to share. (ex: Ethernet or WiFi).
Next, select the method you’d like to use to share the internet connection with other devices in the Share Over drop-down option. The options are WiFi or Bluetooth. WiFi is a typical choice here.
By default, Windows will use the computer name as the WiFi SSID and select a password to connect to it. If you want to change the default Network properties, click Edit under Properties, enter the WiFi name and password, and select the network band you want to use.
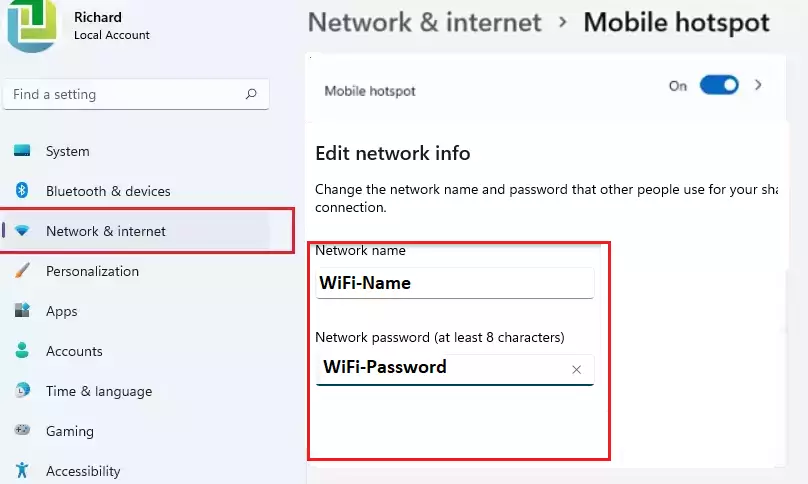
When you’re done, click on Save.
You can now exit the Settings app.
Another device should be able to find the WiFi hotspot you created above and connect to it using the password.
Below is how one can connect to a WiFi in Windows 11
How to join a WiFi network in Windows 11
That should do it!
Conclusion:
- Enabling a mobile hotspot on Windows 11 allows you to share your internet connection with other devices.
- The process is straightforward, requiring access to the System Settings and the Mobile hotspot options.
- You have control over the SSID and password for your hotspot, ensuring security and ease of access.
- Always monitor your data usage when sharing your cellular connection, as it may incur extra charges.
- With these simple steps, you can effectively create a mobile hotspot and connect multiple devices when needed.

Leave a Reply