
This article explains enabling or disabling website access to the language list in Windows 11.
When access to the language list is enabled in Windows 11, Windows will share your preferred language list with websites so that they can provide content based on your language preferences without you having to set them for each site independently.
Enabling or disabling website access to the language list in Windows 11 can be helpful for those who prioritize their online Privacy and want to prevent Windows from sharing their language preferences with websites. While access to the language list may help provide a better browsing experience and relevant content, it can also raise privacy concerns for some users.
By disabling this feature, users can have more control over their personal information and limit the data shared with websites. However, enabling this feature may be a better option for those prioritizing convenience over Privacy.
How to restrict website access to language list in Windows 11
As mentioned above, you can turn on or off website access to your preferred language list in Windows.
Here’s how to do it.
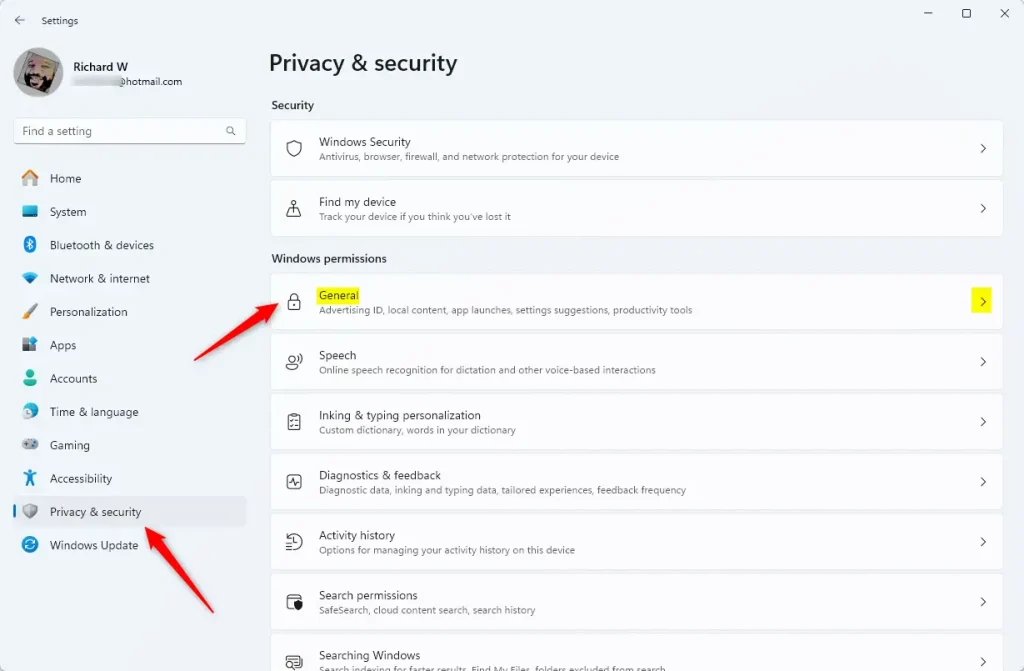
First, open the Windows Settings app.
Then, select Privacy and security on the left and the General tile on the right to expand it.
On the “Privacy and security > General” settings pane, select the “Let websites show me locally relevant content by accessing my language list” tile. Then, toggle the button switch to the On position to enable it.
To disable it, toggle the switch button to the Off position.
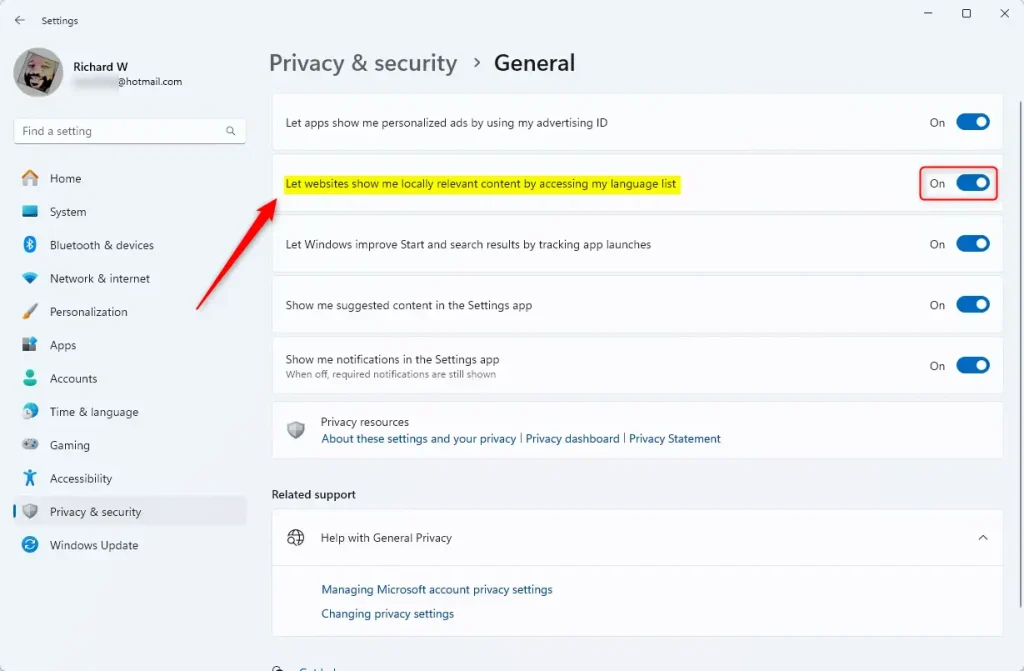
Exit the Settings app when you’re done.
Turn on or off website access to your language list using the Windows Registry Editor
Yet another way to enable or disable website access to your language list is to use the Windows Registry editor.
First, open the Windows Registry and navigate to the folder key path below.
Disable or enable for current user:
Computer\HKEY_CURRENT_USER\Control Panel\International\User Profile
Next, double-click the HttpAcceptLanguageOptOut (REG_DWORD) name on the User Profile key’s right pane to open it.
Then, enter a value 1 to turn off website access to your language list.
If you do not see the “HttpAcceptLanguageOptOut” item, right-click a blank area and create a new DWORD (32-bit) registry item.
Then, enter the name “HttpAcceptLanguageOptOut” and enter 1 to disable it.
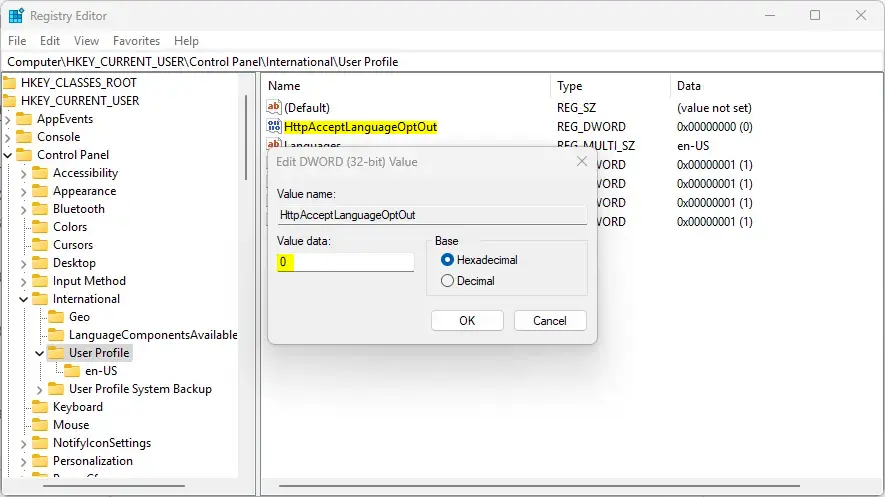
To restore the default behavior and allow website access to your language list, delete the “HttpAcceptLanguageOptOut” created above.
Warning: Editing the Registry can be risky and may cause irreversible damage to your installation if not done correctly. It’s recommended that you back up your PC before proceeding.
Save your changes and restart your computer.
That should do it!
Conclusion:
- Enabling website access to your language list enhances browsing convenience by allowing sites to tailor content to your preferences.
- Disabling this feature provides greater control over your personal information and addresses privacy concerns.
- Users can adjust settings easily through the Windows Settings app or the Registry Editor.
- Always back up your system before making changes to the Registry to avoid potential issues.
- Ultimately, the choice between convenience and privacy depends on individual user needs and preferences.


Leave a Reply