
This article explains how to disable the Windows 11 lock screen so it does not lock or go to sleep when idle.
When you step away from your computer, the lock screen automatically activates and may go to sleep. This feature conserves battery life and prevents unauthorized access to your files and programs.
Turning off the lock screen can be beneficial for users who prefer their computer not to automatically lock or go to sleep when idle, as this could disrupt their workflow.
It’s important to understand that disabling the lock screen can decrease your computer’s security by removing a critical layer of protection against unauthorized access to your files and applications.
Turn off the lock screen in Windows 11
To disable the Windows 11 lock screen, click on Start and select the Settings gear, as shown in the image below.

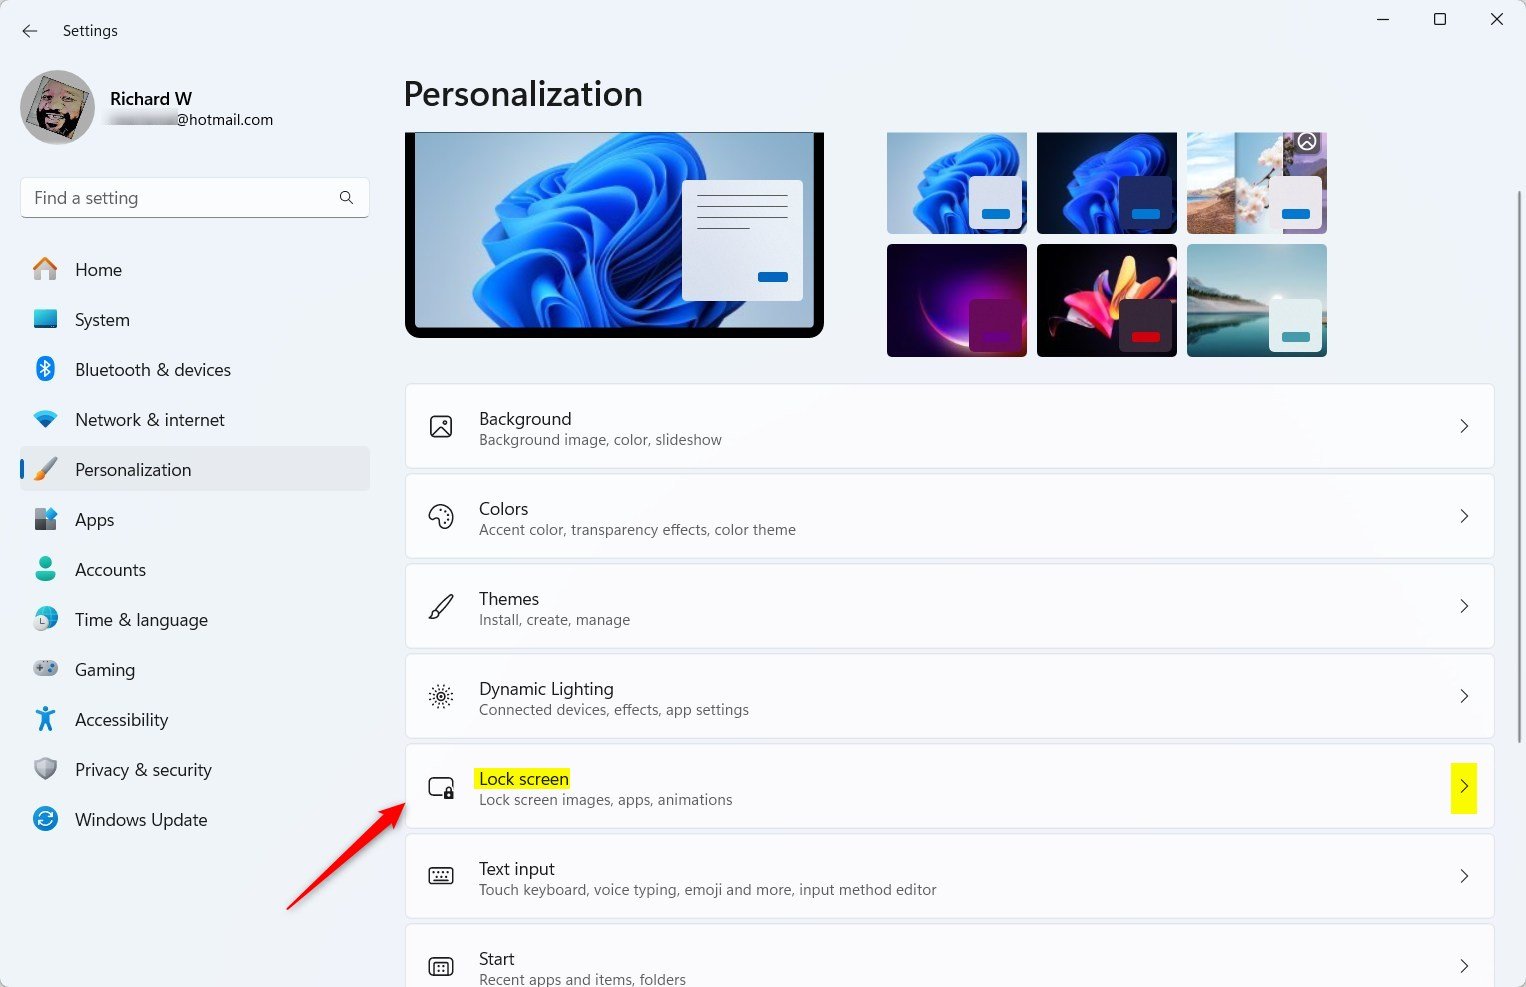
Next, select Personalization from the left menu and expand it to the Lock screen tile on the right.
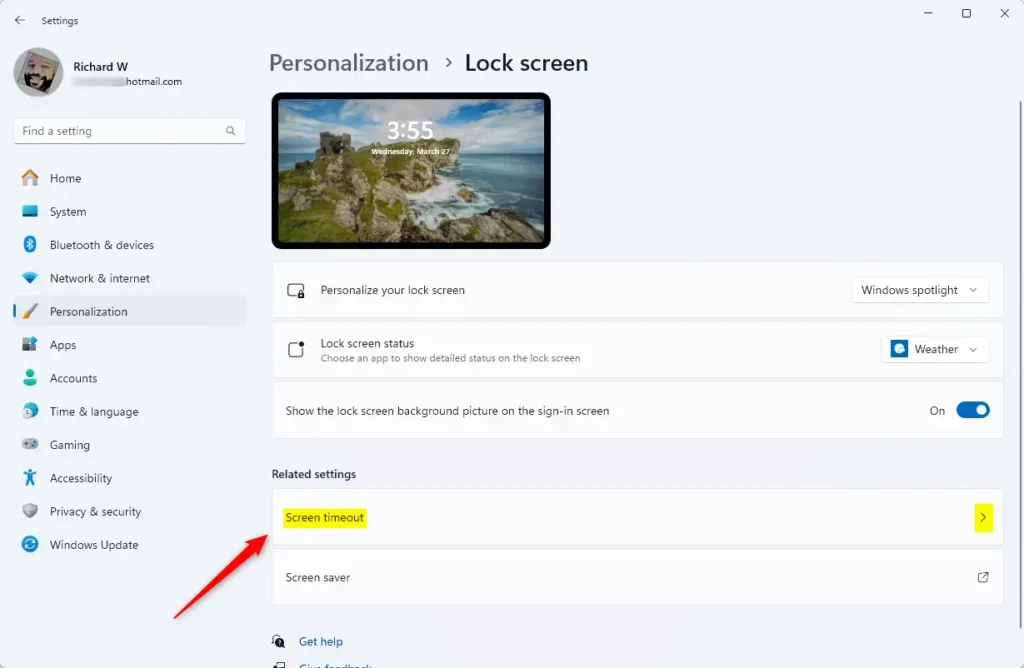
Click on the Screen timeout tile under Related settings on the Lock screen to expand it.
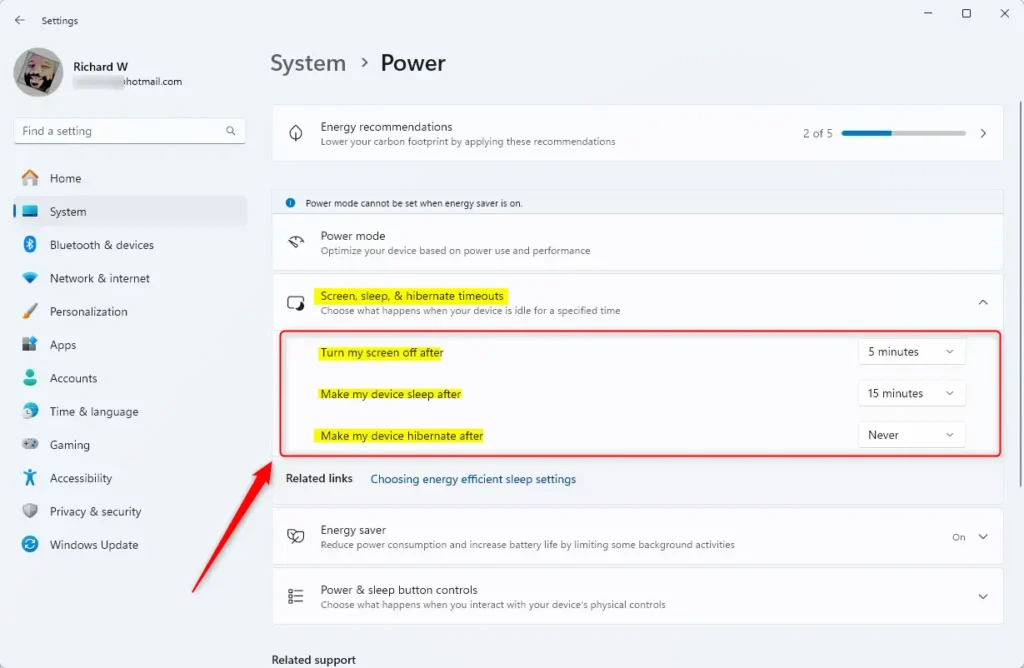
Next, expand the Screen, sleep, & hibernate timeouts tile. Then, use the drop-down options to change how soon your computer’s screen turns off when idle.
If you choose [Never], the computer and screen will never turn off.
Your settings should automatically save when done.
If the steps above do not work, you may find the post below helpful. The post below will work on Windows 10 and Windows 11 and will change the power settings even if the device is controlled in a corporate environment.
How to keep Windows awake with PowerToys
Conclusion:
- Disabling the Windows 11 lock screen can enhance convenience by preventing interruptions during your workflow.
- Adjusting the screen timeout settings allows for greater customization of your device’s behavior when idle.
- Consider the trade-off between security and convenience; removing the lock screen can expose your files and programs to unauthorized access.
- Always ensure that you have alternative security measures in place if you choose to disable the lock screen.
- Explore additional tips and resources, like using PowerToys, to manage power settings more effectively.
Leave a Reply