
This article explains how to turn “Disappearing messages” on or off in the Signal desktop app on Windows 11.
Signal is a cross-platform popular messaging app. It allows users to send and receive encrypted messages, make voice and video calls, and share files from their devices, including computers.
When you install and set up the Signal Desktop app, you can choose to have it open automatically when you log in to your computer. The app also allows you to turn on or off call relay through Signals’ servers to avoid revealing your IP address to your contacts.
Users can also turn “Disappearing messages” on or off to keep their conversations private. When turned on, messages in a chat will automatically disappear after a set amount of time. This can be useful for sensitive conversations where you don’t want the chat history to be saved.
However, if you need to keep a record of your messages, you can turn off disappearing messages. It’s important to note that even when disappearing messages are turned on, the recipient can still take screenshots or copy the messages before they disappear.
Turn “Disappearing messages” on or off in the Signal desktop app
As mentioned above, users can turn “Disappearing messages” on or off in the Signal app on Windows 11.
Here’s how to do it.
First, launch the app by clicking the Start menu and selecting it on the All Apps list.
You can also launch the app from the Taskbar or Taskbar overflow.
When the app opens, click File and select Preferences ( CTRL + , ) on the menu. You can also get the Preferences window by clicking the Settings (gear) button at the bottom left.

On the Preferences window, select Privacy on the left menu. On the right, under Messinging, select the “Disappearing messages” tile. Then, set a default disappearing message timer for all new chats started by you.
To disable it, select Off.
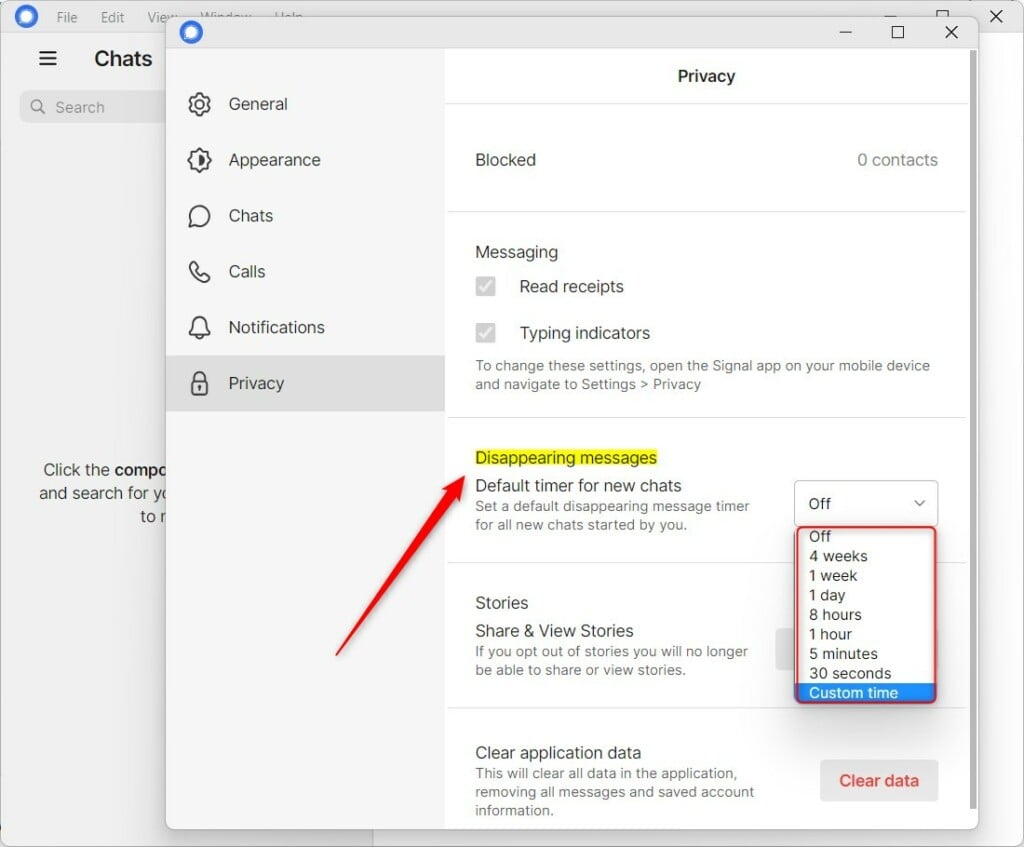
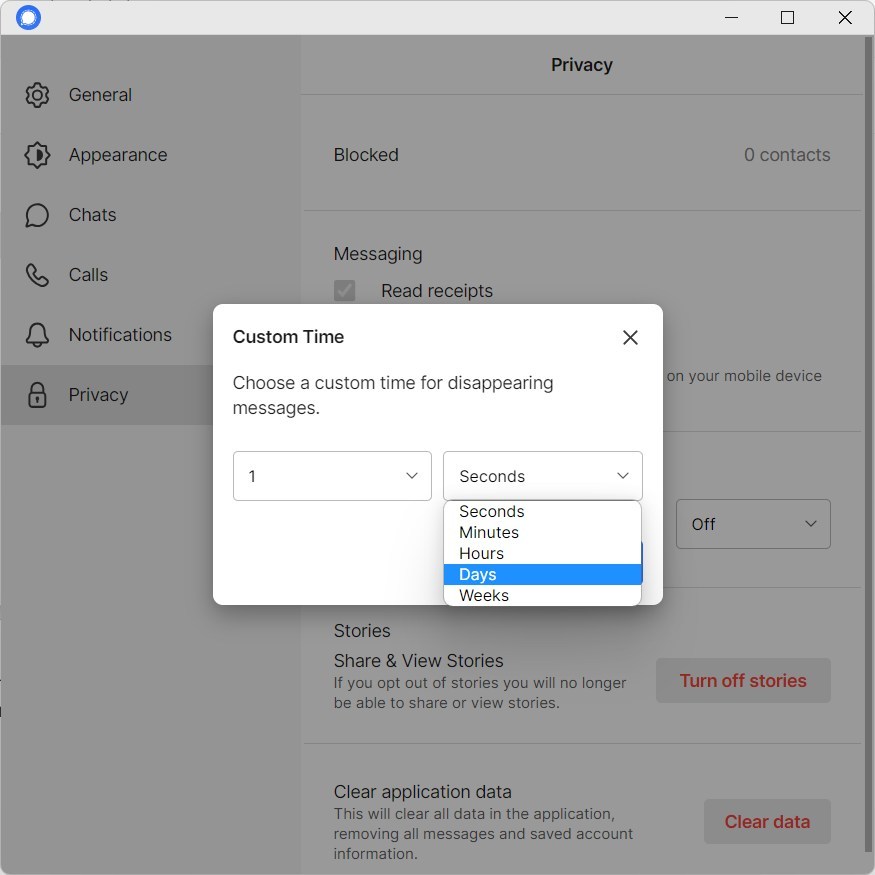
If you select “Custom time“, you can select the number of seconds, minutes, hours, days and, up to 59 weeks.
When you turn it on, your new messages will automatically disappear after the time you choose above.
That will do it!
Conclusion:
- This article details the step-by-step process for turning “Disappearing messages” on or off in the Signal desktop app on Windows 11.
- By following these instructions, users can enhance the privacy of their conversations by enabling disappearing messages or choosing to keep a record of their chat history.
- It’s important to consider the implications of using disappearing messages, as recipients can still take screenshots or copy messages before they vanish.
- We encourage you to use the comments section below for feedback, corrections, or additional insights.
Leave a Reply