How to turn Auto Color Management on or off in Windows 11
You can turn Auto Color Management on or off in Windows 11 to ensure accurate and consistent colors on your display.
Auto Color Management is a Windows 11 feature designed to calibrate your monitor’s color output, making sure the colors you see are true-to-life and match across different applications.
This setting is particularly beneficial for creative professionals and enthusiasts who demand precise color accuracy, but it can also enhance the visual experience for general users, making images appear richer and reducing issues like color banding.
For instance, Windows 11’s Auto Color Management can help solve discrepancies where a photo looks different in your editing software compared to how it appears on a website.
By managing colors system-wide, this feature ensures compatible screens display them correctly, improving how both new and older programs render images.
Enabling Automatic Color Management in 🪟 Windows 11
Turning this feature on is a process you can manage from your display settings.
- Open Settings: Click the Start button on your taskbar. Then, click the Settings icon (it looks like a gear). You can also press the Windows key + I on your keyboard.
- Go to Display Settings: In the Settings window, click on System in the left menu. Then, click on Display on the right side.
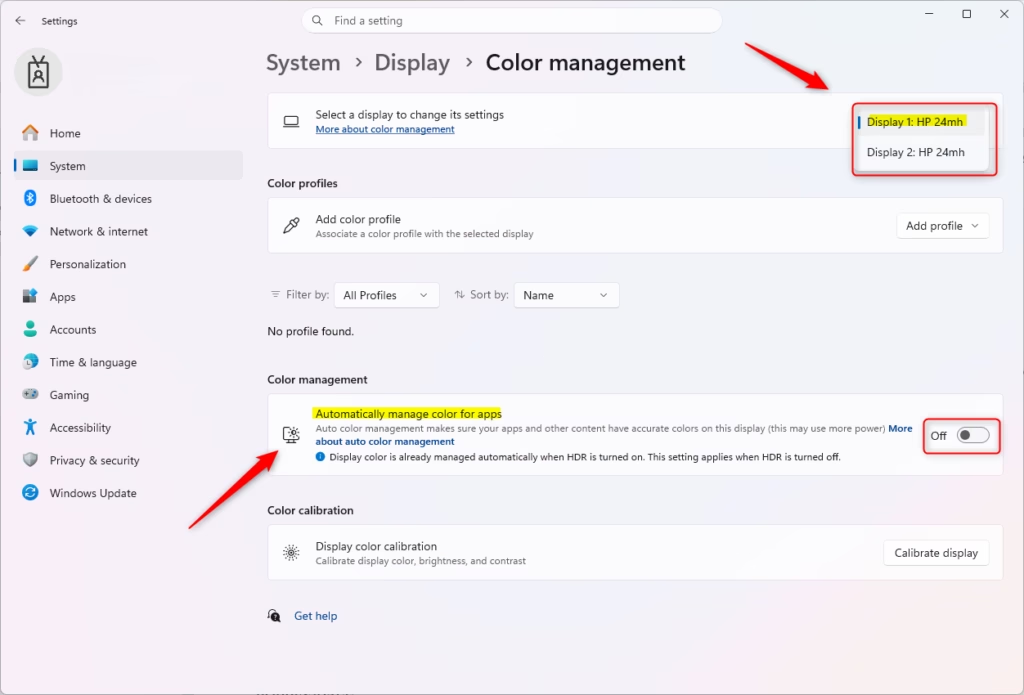
- Choose Your Screen: If you have more than one monitor, you will see an option to select your display at the top of this screen. Make sure you pick the screen you want to adjust.
- Find Color Settings: Scroll down in the Display settings. Look for the Color profile option. Click on it.
- Turn on Automatic Color Management: Look for the setting that says Automatically manage color for apps. Toggle the button next to it to turn it on.


After you check the box, Windows will begin managing colors for your selected screen automatically. This means that even if an application doesn’t have its own color settings, Windows will help make sure the colors it shows are as accurate as possible.
A Quick Tip for Multiple Screens
If you use more than one monitor, remember you need to repeat these steps for each screen you want automatic color management on. You can select each screen from the list at the top of the Color profile settings page and enable the option for each one separately.
Reference:
Summary
Auto Color Management in Windows 11 is a powerful tool for making sure colors look just right across all your apps and on your screen. This is especially beneficial for creative professionals and anyone who values precise color reproduction. By enabling this feature through the Display settings, you can enhance your visual experience, leading to more true-to-life images and fewer color-related visual glitches. You need to repeat the process for each monitor if you have multiple displays connected.
Was this guide helpful?

About the Author
Richard
Tech Writer, IT Professional
Richard, a writer for Geek Rewind, is a tech enthusiast who loves breaking down complex IT topics into simple, easy-to-understand ideas. With years of hands-on experience in system administration and enterprise IT operations, he’s developed a knack for offering practical tips and solutions. Richard aims to make technology more accessible and actionable. He's deeply committed to the Geek Rewind community, always ready to answer questions and engage in discussions.


No comments yet — be the first to share your thoughts!