How to Switch to Local Account from Microsoft Account in Windows 11
Switching from a Microsoft account to a local account in Windows 11 is a common task. Here’s how you can do it.
Why Switch Accounts?
You can sign in to Windows 11 using either a local account or a Microsoft account. You can switch between the two whenever you want.
When you switch to a local account from a Microsoft account, your profile folder stays the same. Your account folder name won’t change.
Benefits of Using a Microsoft Account:
- Download apps from the Microsoft Store.
- Get your online content automatically in Microsoft apps.
- Sync your settings across all your computers. This includes your browser history, account picture, and color choices.
Benefits of Using a Local Account:
- You create a unique username and account for each computer you use.
- You can remove the password if you choose (though this is not recommended).
- You’ll still need a Microsoft account to download apps from the Microsoft Store.
- Your settings won’t sync across your computers.
Using a local account on your Windows 11 PC gives you more control over your privacy, letting you set up a unique username and password just for that computer.
Learn how to change your Windows sign in from a local account to a Microsoft account to sync your settings across all your devices.
How to Switch to a Local Account
- Open Settings by pressing
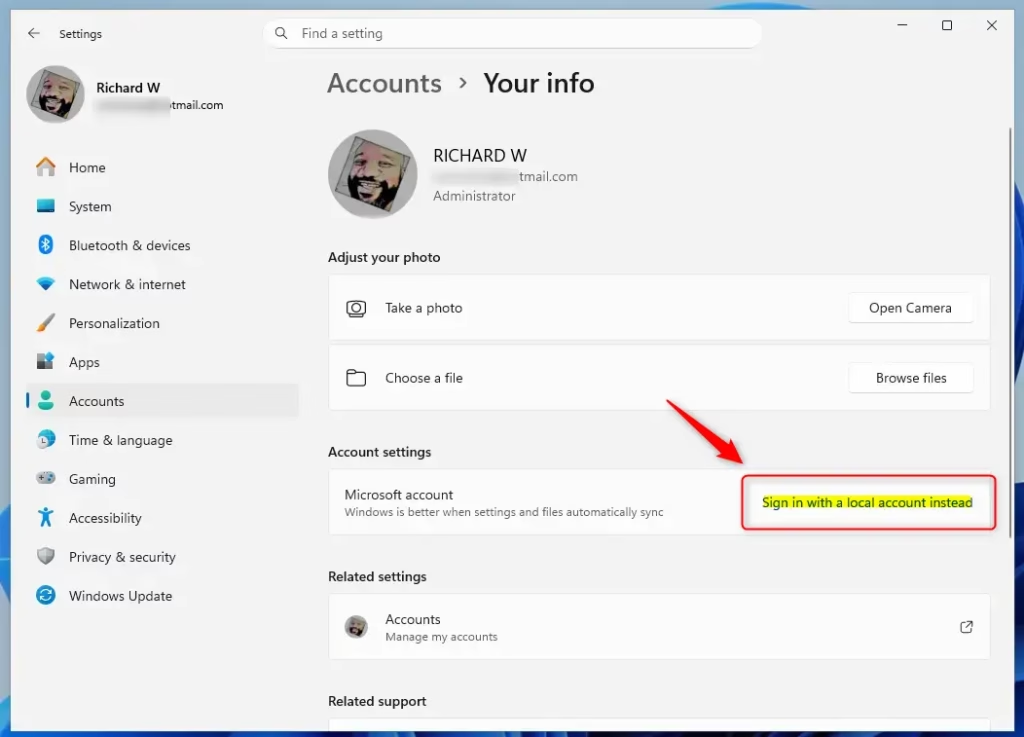
Win+I. - Click on Accounts on the left side. Then click on Your info on the right side.
- Click on the Sign in with a local account instead link on the right side.
Switching to a local account in Windows 11 is straightforward and can be done right from the Settings app.
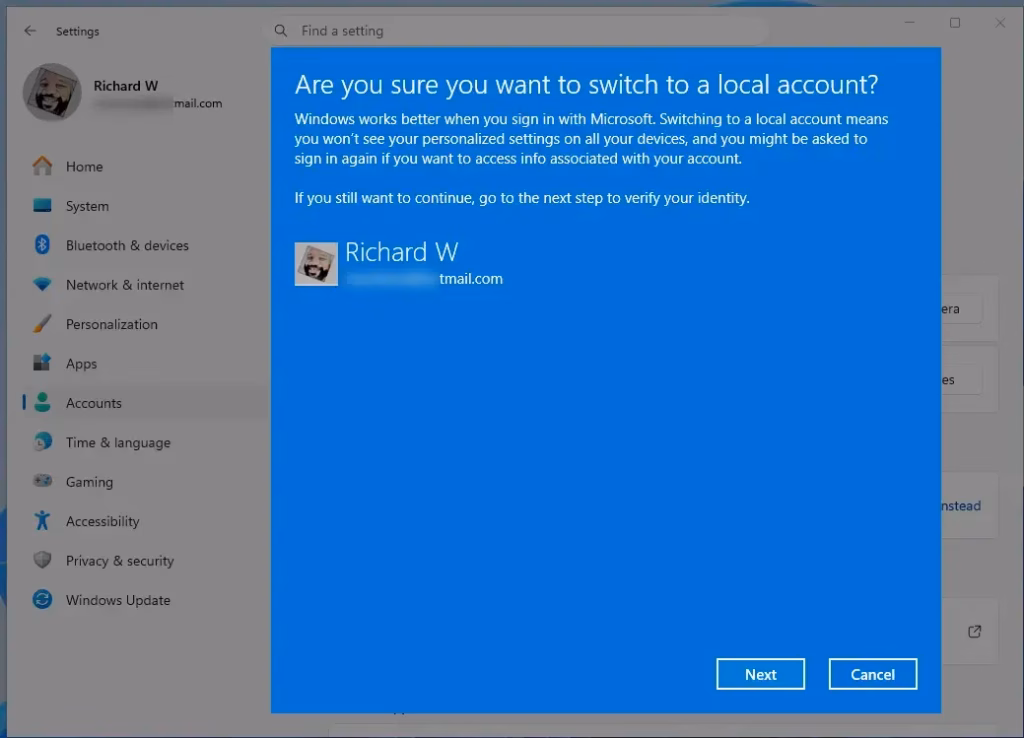
- Click Next to confirm.
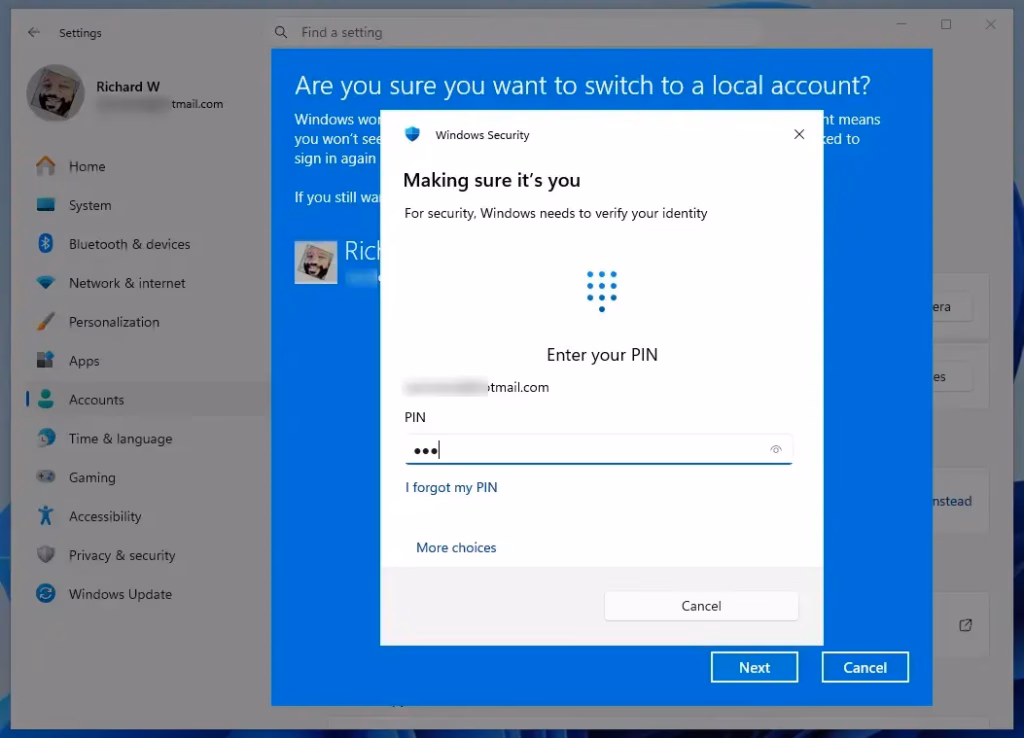
- Enter your Microsoft account password to verify your identity.
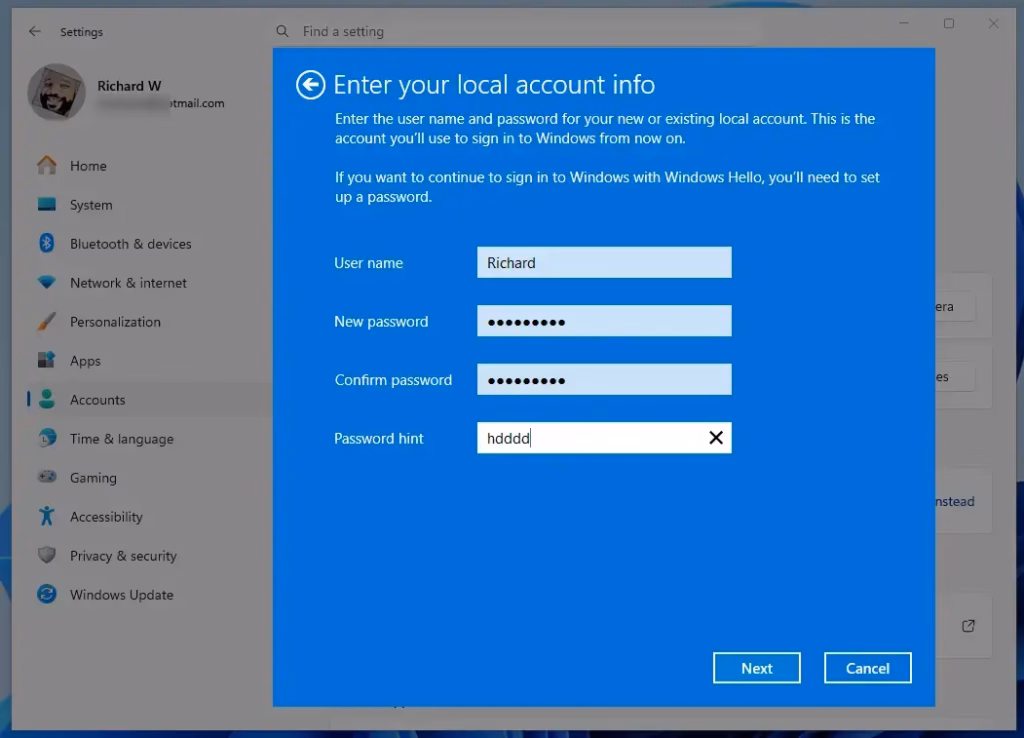
- Set up your local account by completing these steps:
- Enter a User name for your local account.
- Enter a New password for your local account.
- Type the password again in Confirm password.
- Type a Password hint you’ll remember.
- Click Next when finished.
You can leave the password fields empty if you don’t want a password. However, using a password is recommended for better security. You can also add security questions later for extra protection.
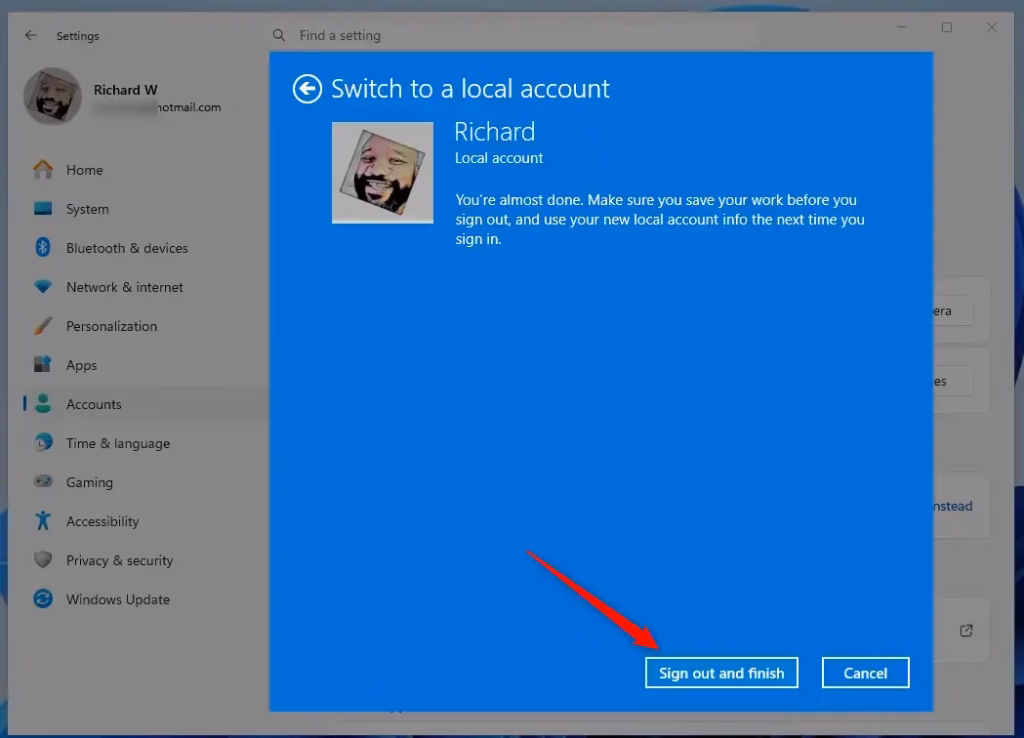
- ⚠️ ADMIN REQUIRED Click Sign out and finish when you’re ready to switch to your local account.
- The next time you sign in to Windows 11, you will use your new local account.
Summary
To switch to a local account in Windows 11, go to Settings > Accounts > Your info and select the option to sign in with a local account instead.
Can I switch from a Microsoft account to a local account?
Yes, you can switch from a Microsoft account to a local account in Windows 11. Navigate to Settings, select Accounts, then choose Your info. Click the ‘Sign in with a local account instead’ link and follow the on-screen prompts to complete the transition while keeping your profile folder intact.
Is Microsoft phasing out local accounts?
Microsoft hasn’t officially removed local accounts, but they do encourage using a Microsoft account for Windows 11. The option to create or switch to a local account is still available. Microsoft often hides this choice during initial setup to promote cloud-based features and cross-device synchronization.
How do I login locally instead of domain?
Logging into your Windows computer locally instead of using a domain involves a simple trick at the sign-in screen.
Is it better to have a local account or a Microsoft account?
Deciding whether a local account or a Microsoft account is better for you depends on how you use your Windows computer and what features you value most.
Was this guide helpful?

About the Author
Richard
Tech Writer, IT Professional
Richard, a writer for Geek Rewind, is a tech enthusiast who loves breaking down complex IT topics into simple, easy-to-understand ideas. With years of hands-on experience in system administration and enterprise IT operations, he’s developed a knack for offering practical tips and solutions. Richard aims to make technology more accessible and actionable. He's deeply committed to the Geek Rewind community, always ready to answer questions and engage in discussions.

No comments yet — be the first to share your thoughts!