
This article explains how to show or hide users from the Sign-in Screen in Windows 11.
The lock screen is the screen or curtain you see when you turn on your computer before the sign-in screen. It is also displayed once your computer is locked after you step away or press the Windows key + L.
When you dismiss the lock screen, the sign-in screen will appear and show all users at the bottom left corner. You can select a user from the list to sign into Windows.
Windows has a setting that lets you hide all users at the bottom of the Sign-in screen and replace it with a Switch user button.
Instead of listing all the user’s accounts, you will see a Switch user button. You will see the users list again once you click on the Switch user button.
Hiding all users on the sign-in screen will only hide them from view on the sign-in screen.
List or hide users on the sign-in screen
As described above, you can hide all users from displaying on the sign-in screen in Windows 11.
If you want to sign in as another user, simply click the Switch user button at the bottom left to see all users again.
Here’s how to do that.
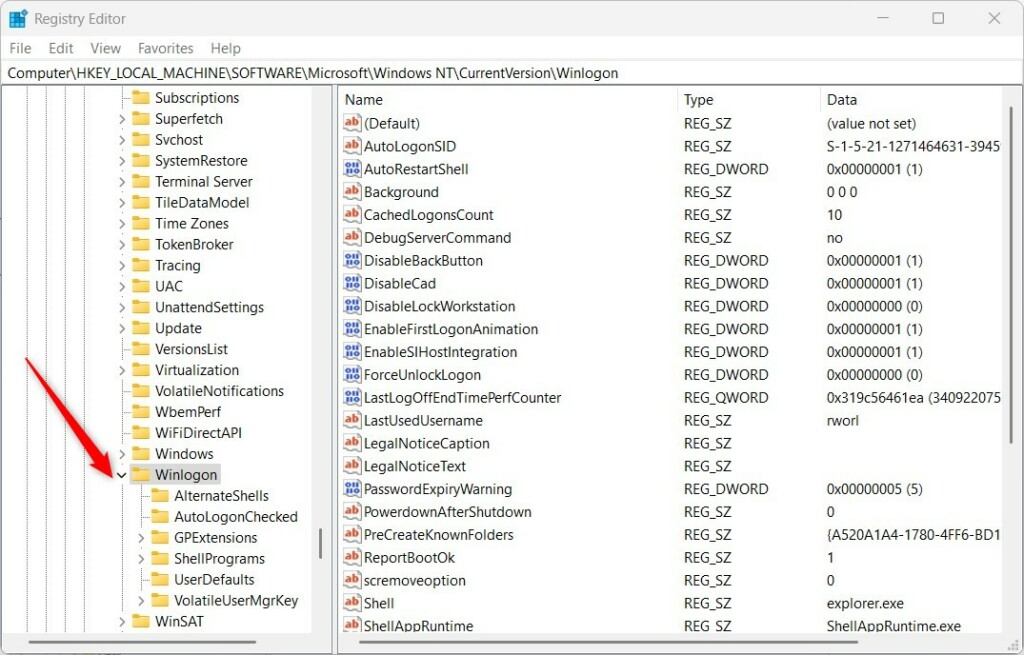
First, open the Windows Registry, and navigate to the folder key below.
HKEY_LOCAL_MACHINE\SOFTWARE\Microsoft\Windows NT\CurrentVersion\Winlogon
If you don’t see the Winlogon folder key, right-click on the CurrentVersion key, then create the subkey (Winlogon) folders.
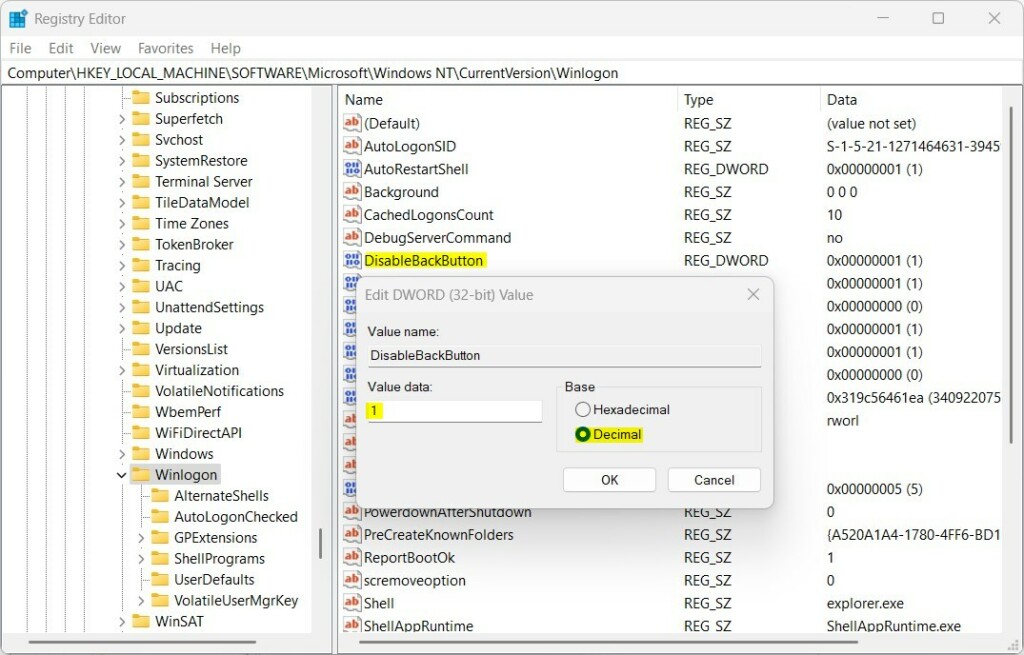
Right-click the Winlogon folder key’s right pane and select New -> DWORD (32-bit) Value. Type a new key named DisableBackButton.
Double-click the new key item name (DisableBackButton) and make sure the Base option is Decimal, and then update the Value data:
- To show all users on the sign-in screen, type 1.
- To hide all users on the sign-in screen, type 0.
Save your changes and restart your computer.
That should do it!
Conclusion:
- In conclusion, this article provided a detailed guide on how to modify the display of user accounts on the sign-in screen in Windows 11.
- The step-by-step instructions included accessing the Windows Registry and making changes to control the appearance of user accounts.
- This article addresses both options whether users prefer to show all accounts or hide them behind a “Switch user” button.
- Following these instructions allows users to customize the sign-in screen to their preferences, creating a more personalized experience.
- For any questions, corrections, or additional insights, readers can utilize the comments section below.
Leave a Reply