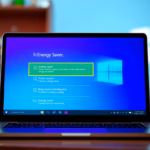
How to Save Battery Life Using Energy Saver in Windows
Windows Energy Saver is a built-in feature designed to extend your laptop’s battery life by reducing power consumption.
This mode intelligently manages your PC’s power settings, making your battery last longer when you’re away from an outlet.
You can activate Energy Saver manually through the Quick Settings menu, typically found by clicking the icons near your clock in the bottom-right corner of the screen.
Windows can also automatically turn on Energy Saver when your battery hits a certain point, like 20% or 30%. This way, your device stays powered longer without you needing to do anything.
Activate Energy Saver through Quick Settings or by navigating to Settings > System > Power & battery. You can then choose to turn it on manually or set a specific battery percentage for automatic activation. This feature reduces power consumption to extend your laptop’s battery life.
How to Set Energy Saver to Turn On Automatically
You can easily set Windows Energy Saver to turn on by itself when your laptop’s battery gets low, helping you save power without even thinking about it.
- Open Settings: Click the Start menu button (Windows icon) and select Settings, or press Windows key + I on your keyboard.
- In the Settings window, click System on the left side.
- Click on Power & battery (or just Power) on the right.
- Find the Energy saver section and click it to expand the options.
- Under Turn energy saver on automatically when battery level is at, pick the battery percentage you want from the dropdown menu:
- Never (Energy saver won’t turn on automatically)
- 10%
- 20%
- 30% (default)
- 40%
- 50%
- Always (Energy saver is always on)
- Close the Settings window. Your choice will save automatically!
Bonus: Use PowerShell to Set Energy Saver Automatically
If you’re comfortable with commands, you can use PowerShell to tell Windows exactly when to turn on Energy Saver to save your battery life.
- Open PowerShell on your computer.
- Type this command and press Enter:
powercfg /setdcvalueindex SCHEME_CURRENT SUB_ENERGYSAVER ESBATTTHRESHOLD <percentage>
Replace <percentage> with the number you want:
- 0 means Energy Saver will never turn on automatically.
- 30 is the default setting.
- 100 means Energy Saver is always on.
For example, to set Energy Saver to turn on at 20%, you’d type:
powercfg /setdcvalueindex SCHEME_CURRENT SUB_ENERGYSAVER ESBATTTHRESHOLD 20
And that’s it!
Summary
- Energy Saver helps your laptop use less power and keep your battery going longer.
- You can set it to turn on automatically when your battery hits a certain level, so you don’t have to remember to do it yourself.
- You can change this setting easily from Windows Settings or by using PowerShell commands if you prefer.
Windows Energy Saver is a handy tool that helps your laptop use less power, making your battery last much longer on a single charge.
Does the energy saver on Windows actually work?
It gently reduces energy consumption from key components such as the CPU (processor) and GPU (graphics chip), which are among the most power-hungry parts of any laptop. This means that while your device becomes more efficient, you likely won’t notice any difference in responsiveness or display quality.
What does Windows battery saver actually do?
To help your energy last longer, the Battery Saver mode feature makes several adjustments to your device, such as: lowering screen brightness, slowing down system performance, and reducing background activity.
How to limit PC charging to 80%?
To install it manually, open Start, then search for ‘Terminal.’ Right-click on the top result and select ‘Run as administrator.’ Then, type this command: winget install.
Was this guide helpful?

About the Author
Richard
Tech Writer, IT Professional
Richard, a writer for Geek Rewind, is a tech enthusiast who loves breaking down complex IT topics into simple, easy-to-understand ideas. With years of hands-on experience in system administration and enterprise IT operations, he’s developed a knack for offering practical tips and solutions. Richard aims to make technology more accessible and actionable. He's deeply committed to the Geek Rewind community, always ready to answer questions and engage in discussions.


No comments yet — be the first to share your thoughts!