How to Rename a Storage Pool in Windows 11
Let’s rename your Storage Pool in Windows 11 to make it easier to spot your combined drives.
Think of a Storage Pool as a way to group multiple physical disks into one big logical drive. This makes managing your storage and protecting your data much simpler. This feature is part of Windows Storage Spaces, a tool first introduced in Windows 8.
You can rename your Storage Pool directly through the Storage Spaces control panel. This helps you quickly tell it apart from other drives or pools, especially if you have several storage setups on your PC.
Open Settings, navigate to System, then Storage, and click Storage Spaces. Select your storage pool, click Rename, enter the new name, and click OK. Alternatively, use the Set-StoragePool command in PowerShell.
What is a Storage Pool?
A storage pool in Windows is like a big virtual drive made by combining several smaller hard drives together.
For instance, your computer can keep duplicate copies of your files within the pool. This means if one drive fails, your files remain safe on another.
Why Rename a Storage Pool?
Giving your storage pool a unique name helps you find it quickly, especially if you have more than one pool or manage storage on several computers.
How to Rename a Storage Pool Using Windows Settings
You can easily rename your storage pool using the Windows Settings app by opening Settings, then going to System, Storage, and finally Storage Spaces.
- Click the Start menu and select Settings, or
- Press Windows key + I on your keyboard.
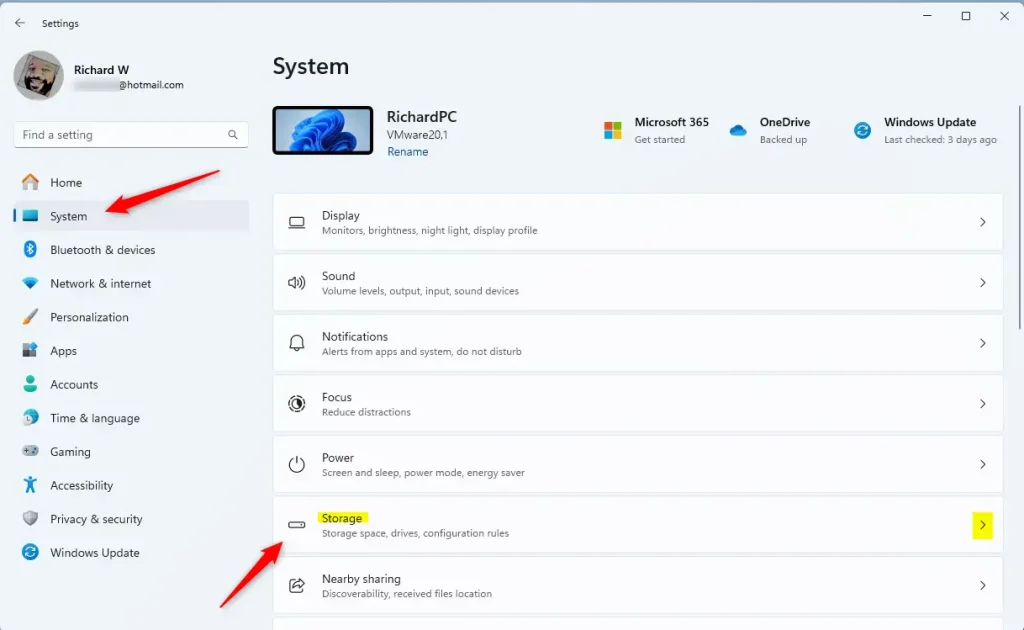
- In Settings, click System on the left side.
- Click on Storage on the right side.
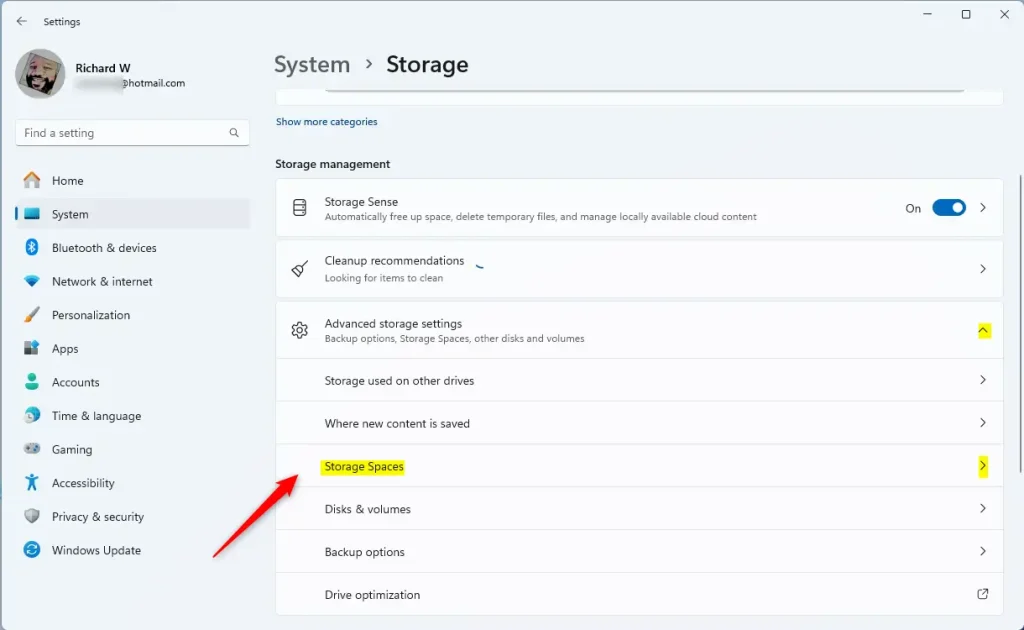
- Scroll down and expand Advanced storage settings, then click Storage Spaces.
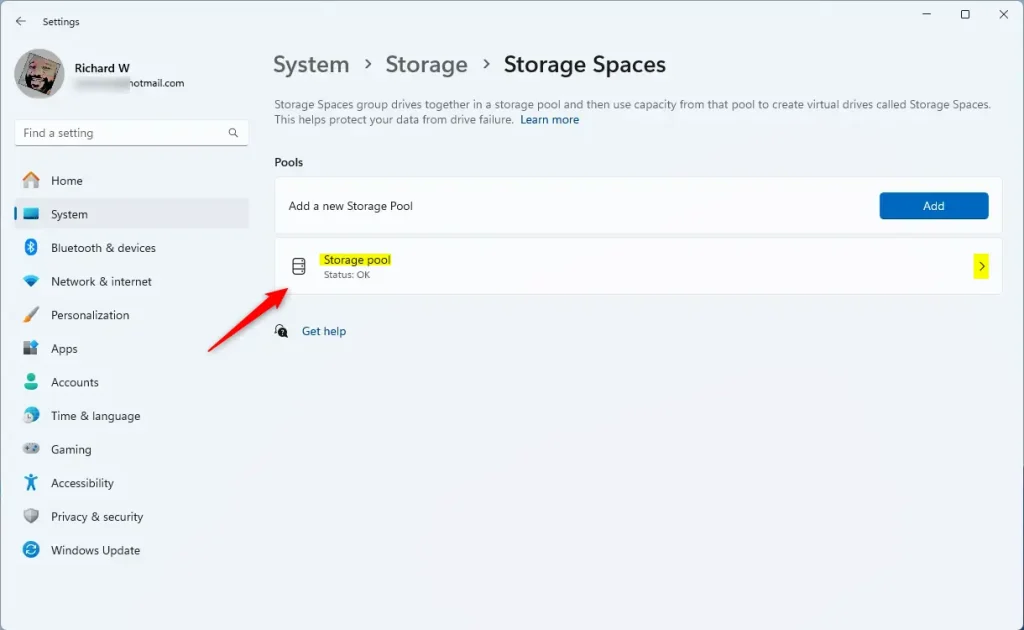
- Click on your storage pool to open its details.
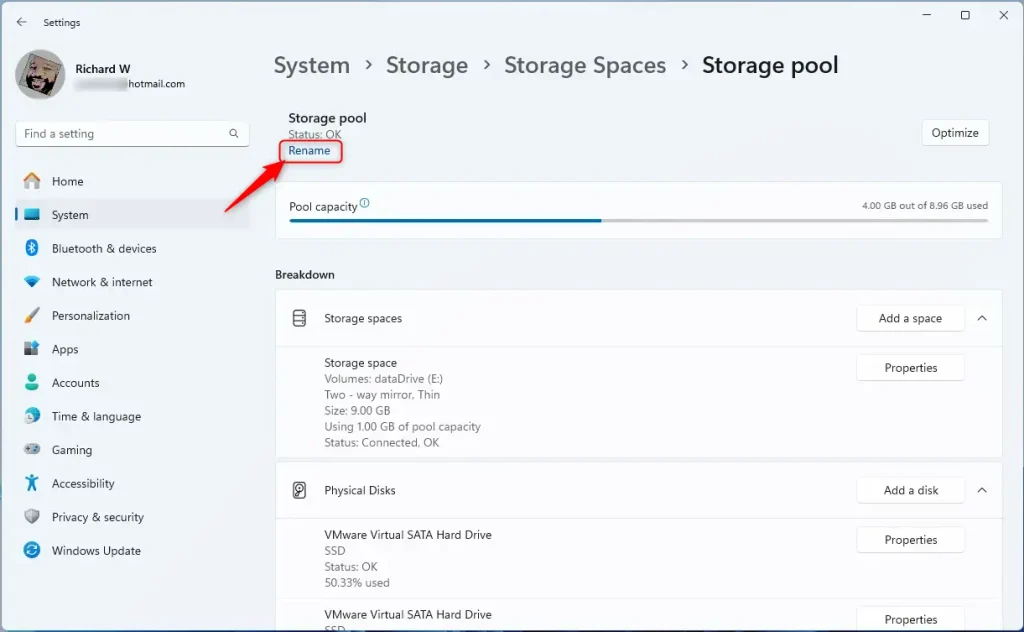
- Click the Rename link.
- Type the new name you want for your storage pool.
- Click OK to save the new name.
Here are some images to help you follow these steps:
How to Rename a Storage Pool Using PowerShell
Renaming a storage pool with PowerShell is quick if you prefer commands; you’ll need to open PowerShell as an administrator and use specific commands to see and change your pool’s name.
Open PowerShell as Administrator (Admin privileges required):
- Right-click the Start button and select Windows Terminal (Admin) or Windows PowerShell (Admin).
To see your current storage pools, type this command:
Get-StoragePoolUse this command to rename your storage pool:
Set-StoragePool -FriendlyName "CurrentPoolName" -NewFriendlyName "NewPoolName"For example, if your pool is currently named ‘Storage pool’ and you want to rename it to ‘MyNewStoragePool’, you would run this command:
Set-StoragePool -FriendlyName "Storage pool" -NewFriendlyName "MyNewStoragePool"That’s it! Your storage pool will have the new name.
Summary
Renaming your storage pool makes it much easier to keep track of your drives and manage your data, especially if you have several pools or help others with their computers.- Renaming your storage pool helps keep your storage organized and easy to manage.
- You can rename it through the Windows Settings app or by using PowerShell commands.
- This is especially helpful if you have multiple storage pools or manage other users’ computers.
- For more details on creating and managing storage pools, check out this Storage Pool creation guide.
Can you rename storage units?
No, this guide is about renaming digital storage pools within Windows. Renaming physical storage units like those rented from a storage facility involves a different process, usually requiring a visit to the facility and updated rental agreements with your documentation.
Is it okay to rename a drive?
It’s actually really good to rename your drives so you can more easily remember what has what. The only bad thing that will happen is the regret that you didn’t realize you could do that sooner.
Was this guide helpful?

About the Author
Richard
Tech Writer, IT Professional
Richard, a writer for Geek Rewind, is a tech enthusiast who loves breaking down complex IT topics into simple, easy-to-understand ideas. With years of hands-on experience in system administration and enterprise IT operations, he’s developed a knack for offering practical tips and solutions. Richard aims to make technology more accessible and actionable. He's deeply committed to the Geek Rewind community, always ready to answer questions and engage in discussions.


No comments yet — be the first to share your thoughts!