

This article describes the steps to move a hard disk drive from one computer to another in Windows 11.
Windows lets you take a disk from one computer and transfer it to another. However, the Disk must be a second disk drive, which means it cannot be the operating System or OS drive.
You can safely unplug the disks from the computer if they are external. If the disks are internal, turn off the computer and physically remove them.
Also, when you move a disk to another computer, a drive with primary volumes will receive the following available drive letter.
Below is how to do that on Windows 11.
Transfer a disk to another computer on Windows 11
As described above, Windows lets you take a disk from one computer and transfer it to another. If a data disk is attached to a computer and you want to transfer to another computer, the steps below show you how.
Before disconnecting a drive from a computer, ensure the drive is healthy. If not, repair it before disconnecting.
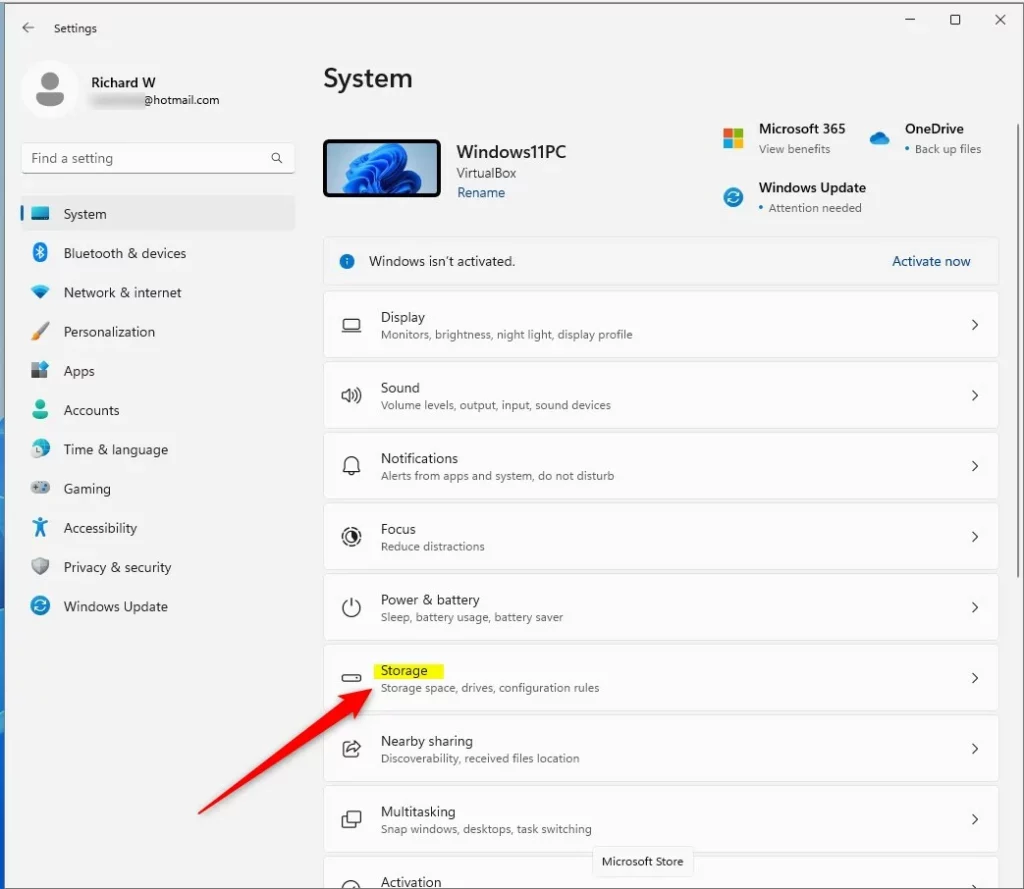
First, open the Windows Settings app.
You can do that by clicking on the Start menu and selecting the Settings app. Alternatively, use the keyboard shortcuts (Windows key + I) to launch the Settings app.

When the app opens, click the System -> Storage tile to expand.
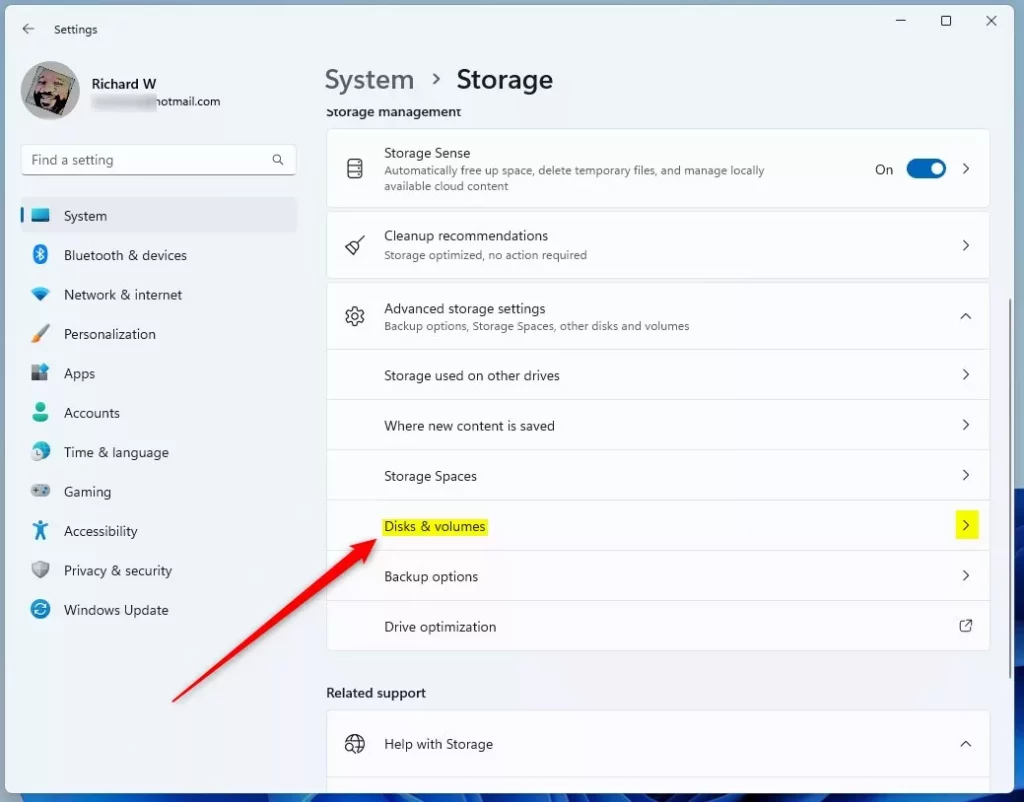
Expand the Advanced storage settings on the System -> Storage tile, then select the Disk and volumes tile to expand.
On the Disks and volumes settings pane, locate the Disk you want to move and confirm it’s healthy. Next, click the Disk’s Properties button.
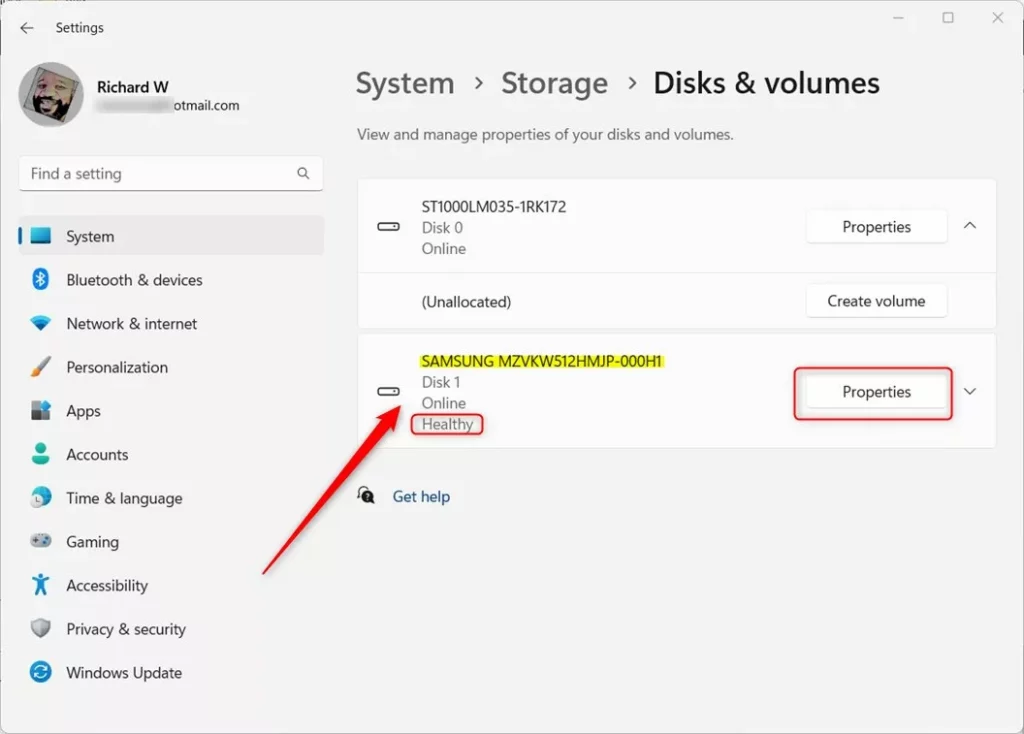
On the Disk’s Properties settings pane, under Status, click the Take offline button. This will take the Disk offline, so no activities are taking place.

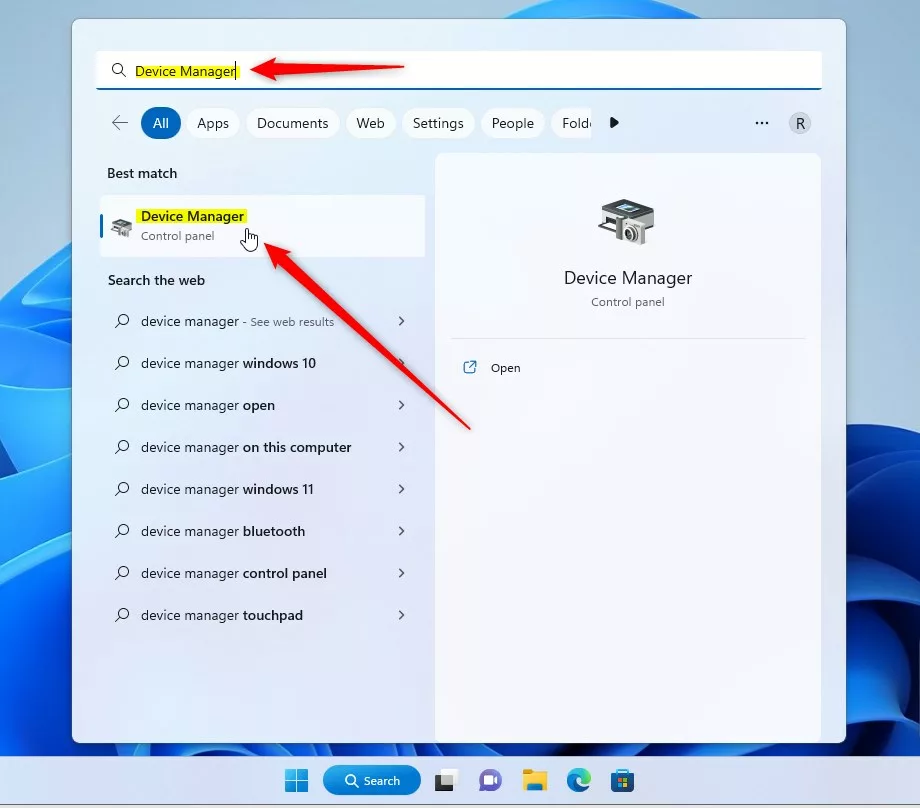
Uninstall a disk via Device Manager
Now that the Disk is offline, open the Device Manager to uninstall the Disk you want to transfer. To do that, click the Start menu button, search for Device Manager, and select it to open.
Double-click Disk drives to expand when the Device Manager app opens in the device list. Then select the drive you wish to transfer, right-click it, and select Uninstall device.
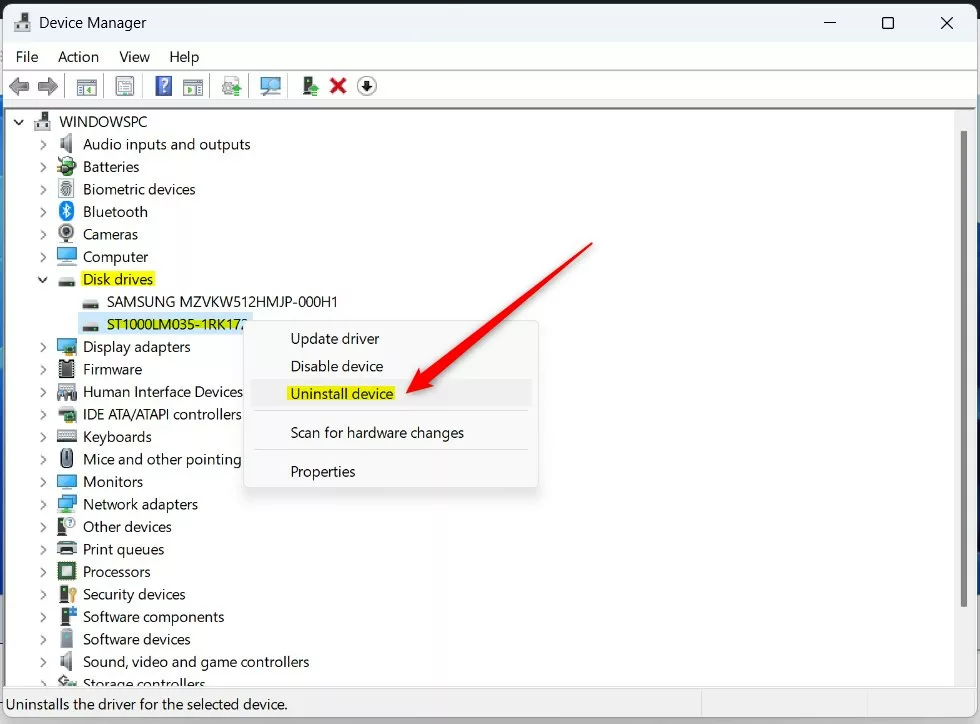
In the Confirm Device Removal dialog box, click OK.
If the disks you want to move are dynamic, in Disk Management, right-click the disks you want to move, and then click Remove Disk.
Install the Disk on a new computer
Once you remove the Disk from the old computer, please install it to the new one. If the disks are external, plug them into the computer. If the disks are internal, ensure the computer is turned off and then physically install the disks in that computer.
Turn on the computer, and Windows might most likely identify and install the Disk. If not, use the steps below to install.
On the new computer, open Disk Management.
Click Action and then click Rescan Disks.
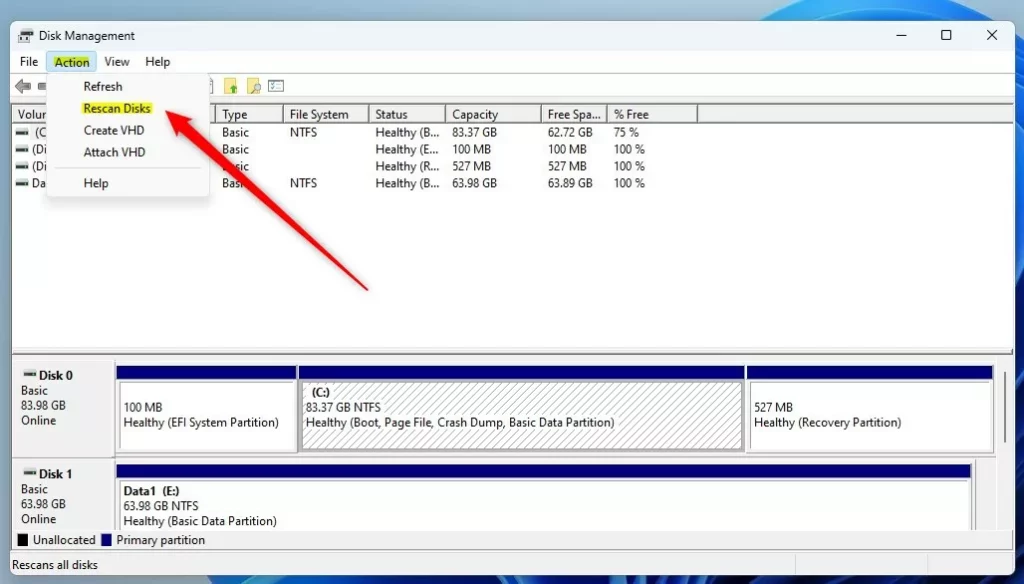
Right-click any disk marked Foreign. Next, click Import Foreign Disks and then follow the on-screen instructions.
That should do it!
Reference:
Conclusion:
- Moving a disk from one computer to another on Windows 11 is a manageable task with the right guidance.
- Following the steps outlined in this article, users can safely transfer a disk to a new computer without encountering major issues.
- It’s important to ensure the disk’s health before disconnecting it and to follow the recommended procedures for uninstalling and installing the disk in the new computer.
- For further details or to provide feedback on the process, readers are encouraged to utilize the comment section below the article.
- Refer to the provided Microsoft documentation for additional information on disk management and transferring disks between computers.


Leave a Reply Cancel reply