How to Connect or Disconnect Storage Spaces in Windows 11
What Is Storage Spaces?
Storage Spaces is a Windows 11 feature that lets you combine multiple hard drives or SSDs into one large virtual drive. Think of it like merging several storage containers into one big unit. This makes managing your storage much easier and gives you more control.
Why Use Storage Spaces?
- Group multiple drives together into one storage pool
- Add more drives to your pool whenever you need extra space
- Create virtual drives inside the pool
- Rename and organize your storage spaces
What Happens When You Create a Storage Space?
When you create a Storage Space in Windows 11, it acts like a new drive that you can see and use in File Explorer, just like any other drive on your computer.
You can also temporarily hide a Storage Space by disconnecting it. This doesn’t delete your files—it just hides the drive from view. You can reconnect it anytime to access your files again. This is helpful if you want to protect your data or fix storage problems without losing anything.
How to Connect or Disconnect a Storage Space in 🪟 Windows 11
You can connect or disconnect a Storage Space in Windows 11 by opening Settings, going to System, then Storage, then Advanced storage settings, and finally Storage Spaces, where you can choose to Connect or Disconnect your storage pool.
- Open the Settings app by clicking the Start menu and selecting Settings. Or press
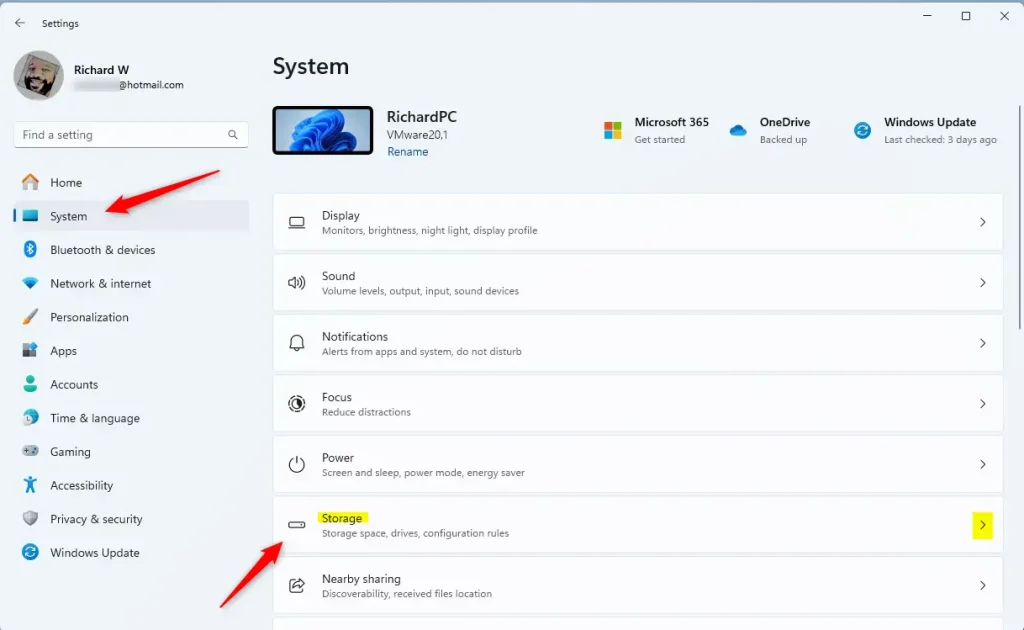
Windows key + Ion your keyboard. - In Settings, click System on the left side.
Windows 11 System button in Settings - On the right side, click Storage.
Windows 11 Storage tile in Settings app - Scroll down and expand Advanced storage settings, then click Storage Spaces.
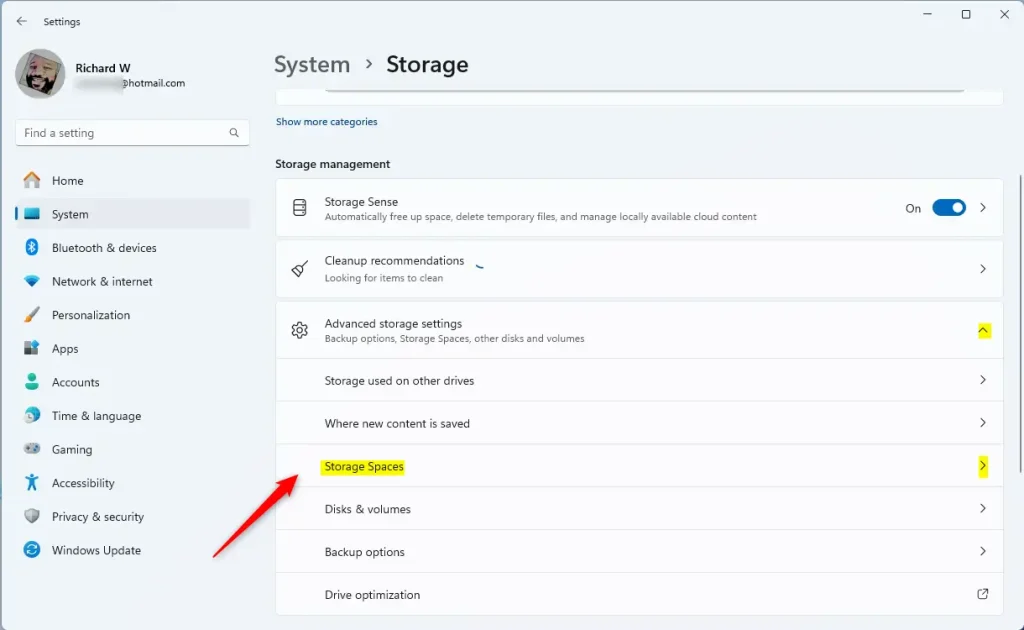
Windows 11 Storage Spaces tile - Click on the Storage pool you want to manage.
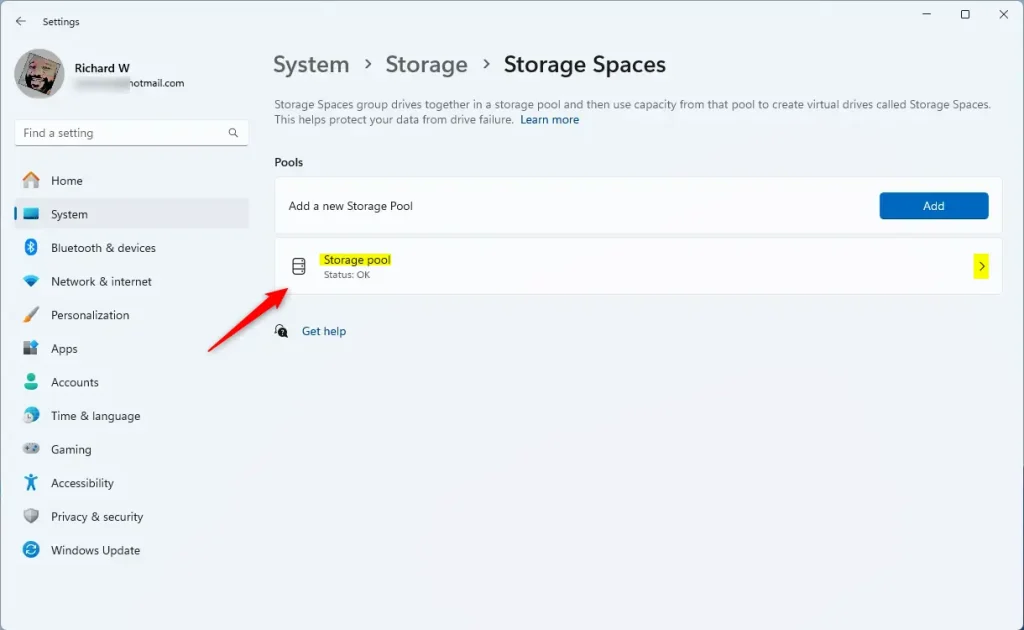
Windows 11 storage pool tile - Find the Storage Space you want to connect or disconnect, then click Properties.
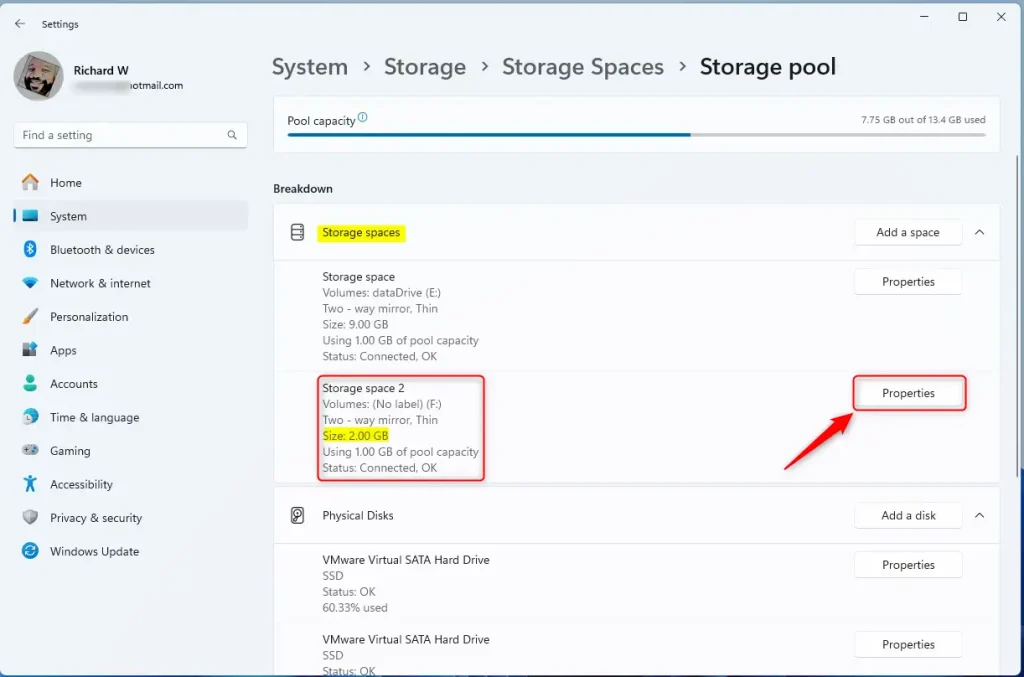
Storage space properties - In the Properties window, you’ll see if the Storage Space is connected or disconnected. To hide it, click Disconnect. To show it again, click Connect.
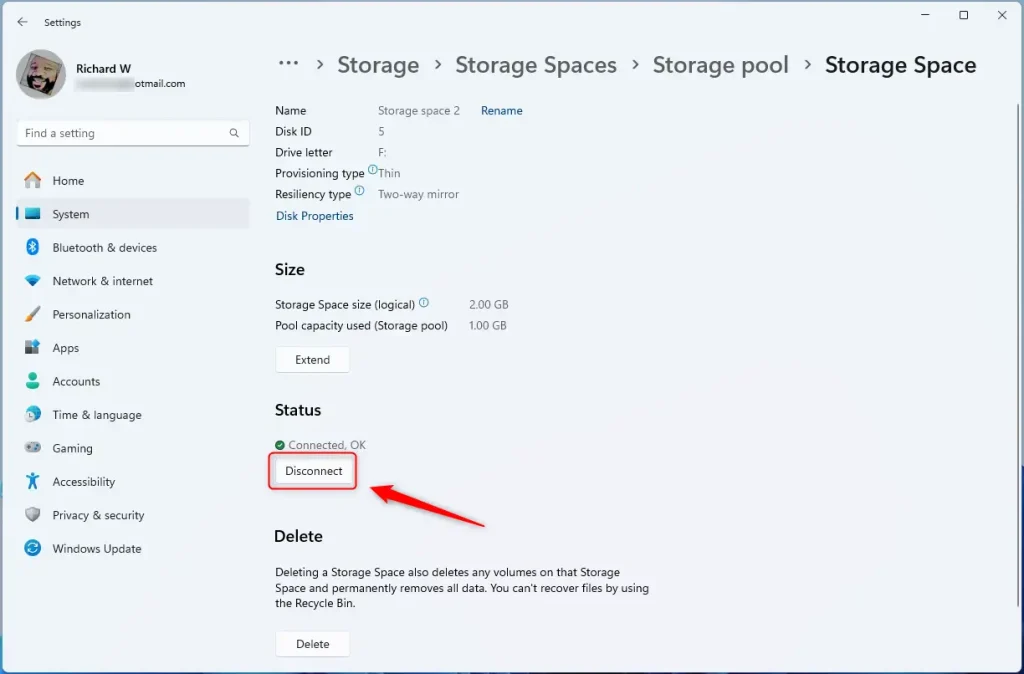
Storage space disconnect button - Close the Settings app when you’re finished.
Summary
Storage Spaces in Windows 11 lets you combine several hard drives into one large virtual drive, making it easier to manage your files and giving you more control over your storage.
Why use it? It makes managing your storage easier and gives you more flexibility with your files.
How do you use it? You can easily hide or show these virtual drives using the Settings app. This helps protect your files or troubleshoot storage problems without deleting anything.
Want to learn more? Check out this helpful guide: How to Create a New Storage Pool with Storage Spaces on Windows 11.
Does 🪟 Windows 11 support storage spaces?
Windows Storage Spaces lets you pool multiple drives into one in Windows 11 and 10. You can create virtual spaces from these pools, format them with your chosen resiliency, and use them as regular drives. Simple: A non-resilient space that's useful for temporary data.
What is taking up so much space on my PC 🪟 Windows 11?
On your Windows 11 PC, personal files like videos, music, photos, and documents often take up the most space, so checking these and moving them to an external drive can free up a lot of room.
How do I delete storage spaces in 🪟 Windows 11?
To delete a Storage Space in Windows 11, search for and open ‘Manage Storage Spaces’, then select the physical drives in your pool and choose to prepare them for removal.
Which 🪟 Windows 11 is killing SSD?
A specific Windows 11 update, KB5063878 for version 24H2, has caused some SSDs to disappear from the system, meaning they are no longer detected after the update is installed.
Was this guide helpful?

About the Author
Richard
Tech Writer, IT Professional
Richard, a writer for Geek Rewind, is a tech enthusiast who loves breaking down complex IT topics into simple, easy-to-understand ideas. With years of hands-on experience in system administration and enterprise IT operations, he’s developed a knack for offering practical tips and solutions. Richard aims to make technology more accessible and actionable. He's deeply committed to the Geek Rewind community, always ready to answer questions and engage in discussions.

No comments yet — be the first to share your thoughts!