
This article explains how to make a user an administrator in Windows 11.
The new Windows 11 includes two legacy account types: Standard and Administrator.
When you create a new user account in Windows 11, that account does not automatically have administrator privileges. Instead, the account is set up as a standard user account, which has limited rights and cannot change critical settings on the computer, such as installing or uninstalling programs.
Granting a user Administrator rights gives them full system access, allowing them to perform tasks that a standard user cannot.
Change Users to Administrator in Windows 11
As mentioned, you can make a standard user an administrator using the steps below.
First, open the Windows Settings app.
You can do that by clicking on the Start menu and selecting Settings. Or press the keyboard shortcut (Windows key + I) to launch the Settings app.
When the Settings app opens, click the Accounts button on the left. Then, select the Others Users tile on the right to expand it.
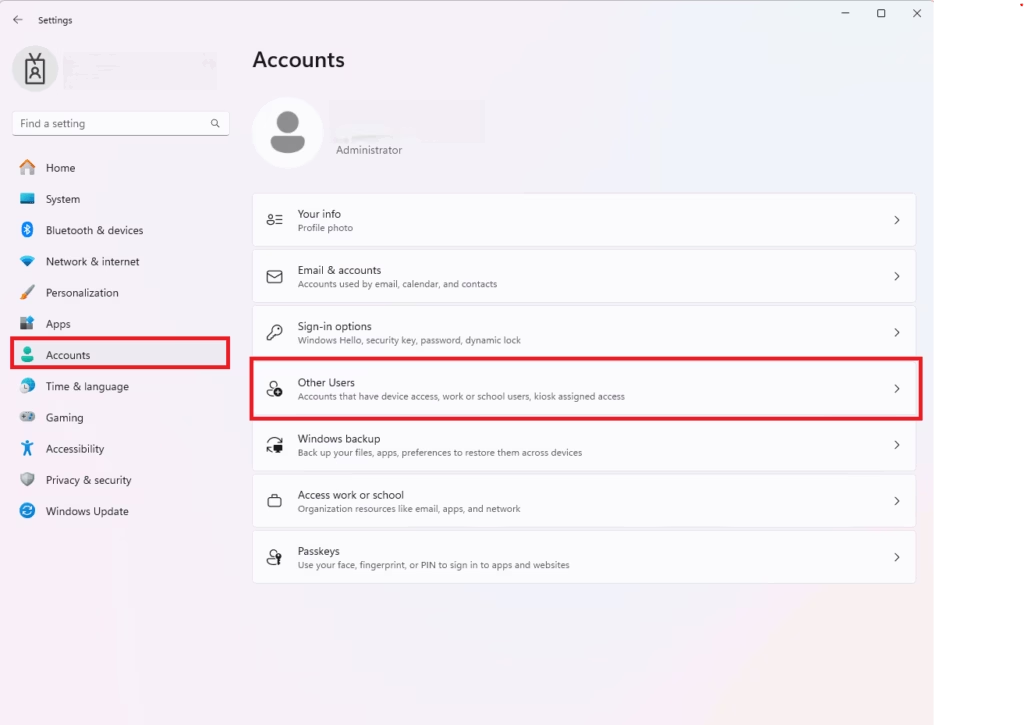
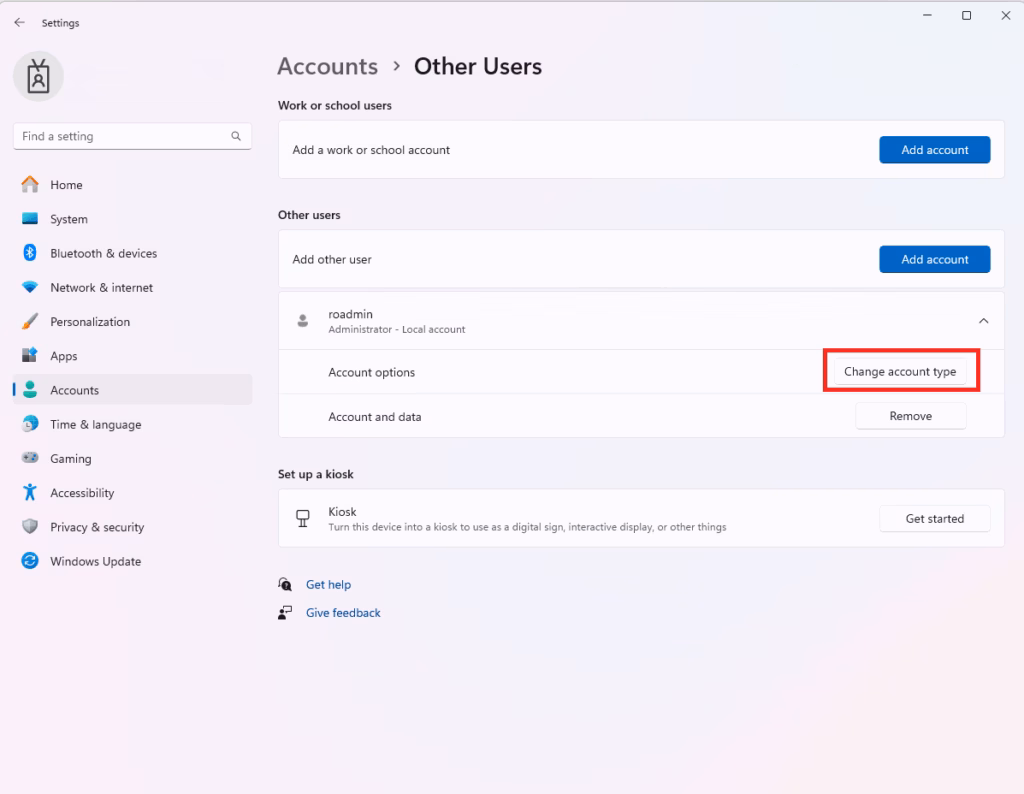
On the Accounts > Other Users settings page, under “Other users,” click the tile to expand it.
Next, click the Change account type button.
On the pop-up window, change the account type and click OK.
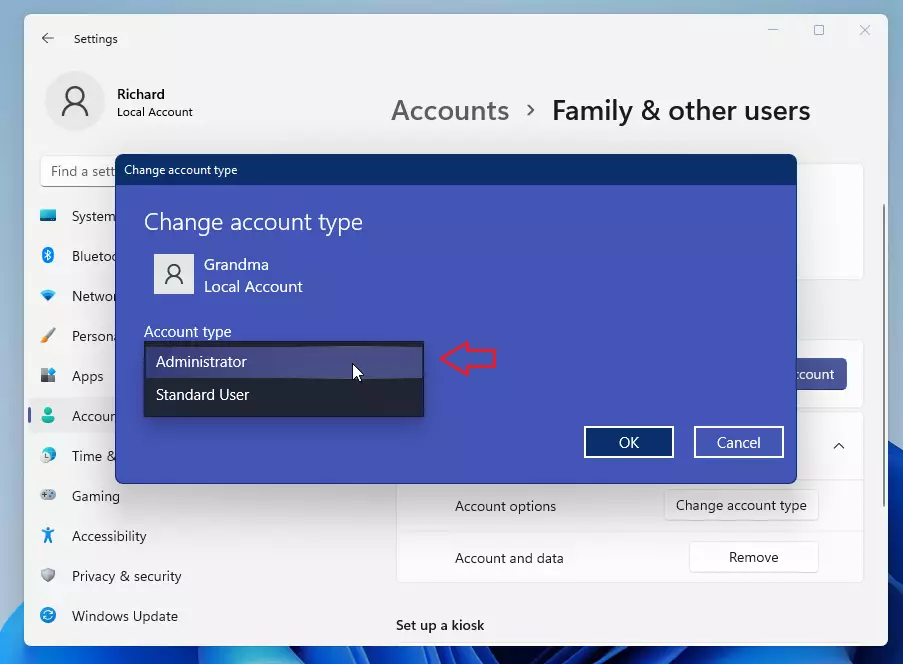
That should do it!
Conclusion:
- Making a standard user an Administrator in Windows 11 is a straightforward process.
- Administrator rights provide full system access, enabling users to perform essential tasks.
- Always ensure that the user you’re granting admin rights to is trusted, as they will have control over critical system settings.
- For future changes, revisit the Accounts > Other Users section to adjust user roles.
- Regularly review user permissions to maintain system security and integrity.


Leave a Reply Cancel reply