How to Enable UAC Administrator Display in Windows 11
This guide explains how to show or hide administrator accounts when a standard user triggers a security prompt in Windows 11.
You can enable the administrator display in Windows 11 by using the Group Policy Editor or Registry Editor. Open either tool, navigate to the relevant setting, and choose to enable it to show accounts or disable it to hide them. Restart your PC for changes to take effect.
Understanding UAC Administrator Display in 🪟 Windows 11
The UAC administrator display in Windows 11 decides if your administrator accounts appear when Windows needs permission for big changes, helping you balance security and ease of use.
Why does this matter? It helps you balance security and convenience. Showing accounts makes logging in faster. Hiding them adds a layer of security by forcing users to type both a username and password.
What happens when you are done? You will either see a list of available administrator accounts when a prompt appears, or you will be required to manually enter credentials every time.
When to Use This
Use the Group Policy method if you are on Windows 11 Pro or Enterprise. Use the Registry method if you are on Windows 11 Home, as it lacks the Group Policy Editor. Always back up your registry before making changes to avoid system errors.
Method 1Using Local Security Policy (secpol.msc)
You can change how the UAC administrator display works in Windows 11 using the Local Security Policy tool, also known as secpol.msc, by adjusting settings for administrator prompts.
- Press ⊞ Win+R, type
secpol.msc, and hit Enter. - Navigate to Local Policies > Security Options.
- Find User Account Control: Behavior of the elevation prompt for administrators in Admin Approval Mode.
- Double-click to set your preference for consent or credentials.
⚠️ Admin Privileges Required: You must be an administrator to modify these policies.
Method 2Using Group Policy Editor
The Group Policy Editor, or gpedit.msc, lets you control whether administrator accounts are shown on the UAC elevation prompt in Windows 11, affecting how you approve administrative tasks.
- Press ⊞ Win+R, type
gpedit.msc, and hit Enter. - Go to: Computer Configuration > Administrative Templates > Windows Components > Credential User Interface.
- Double-click Enumerate administrator accounts on elevation.
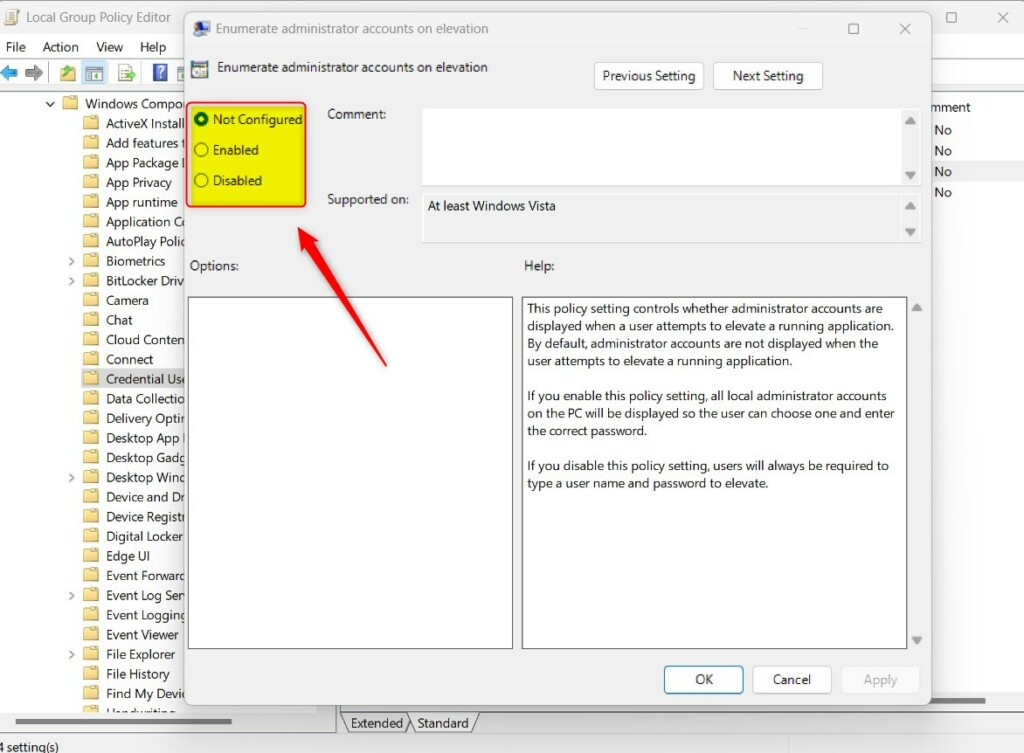
Display administrator accounts in the UAC prompt - Choose Enabled to show accounts or Disabled to hide them.
- Click OK and restart your PC.
Method 3Using Windows Registry Editor
Changing the UAC administrator display in Windows 11 using the Registry Editor (regedit) involves adding or changing a specific value to control administrator account visibility.
- Press ⊞ Win+R, type
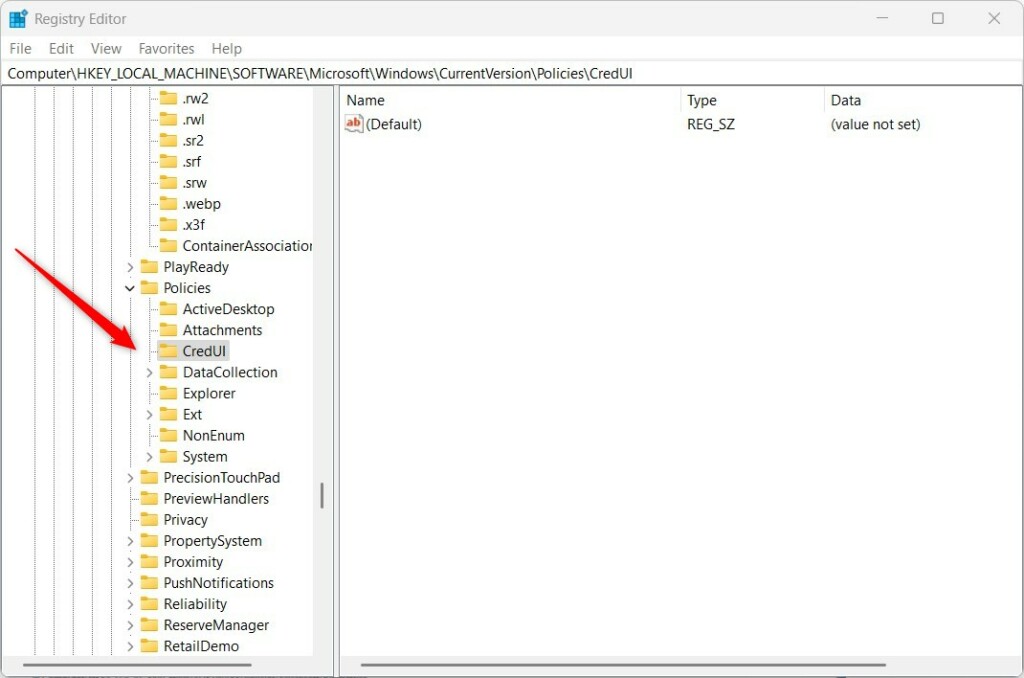
regedit, and hit Enter. - Navigate to
HKEY_LOCAL_MACHINE\SOFTWARE\Microsoft\Windows\CurrentVersion\Policies\CredUI. - Right-click in the right pane, select New > DWORD (32-bit) Value.
- Name it
EnumerateAdministrators.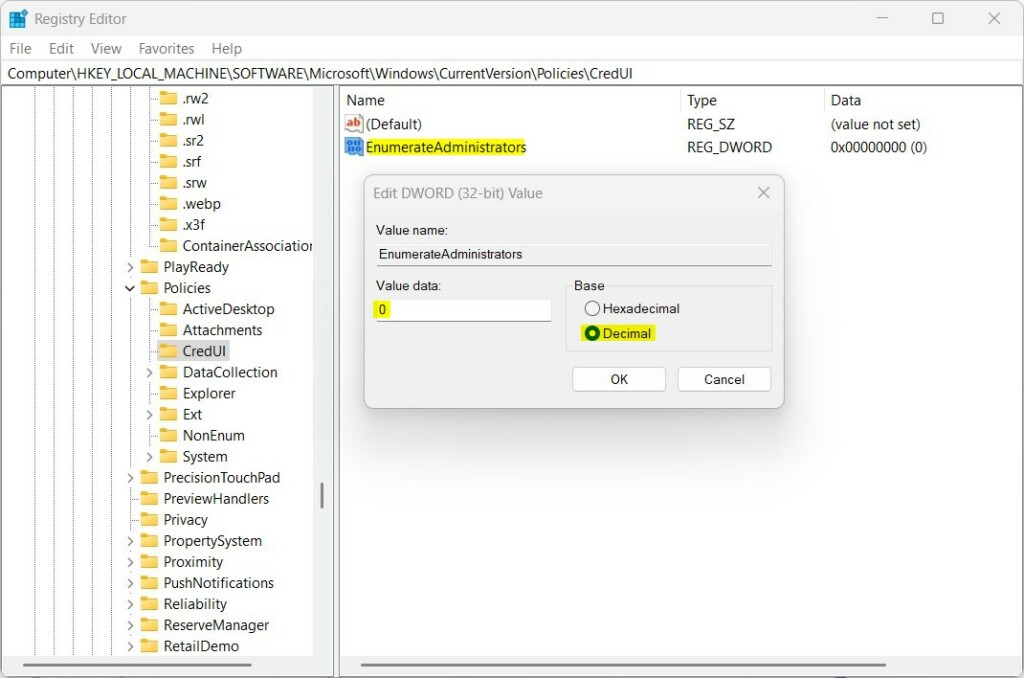
Display administrator accounts in the UAC prompt - Set the value to 1 to show accounts or 0 to hide them.
⚠️ Admin Privileges Required: Editing the registry incorrectly can damage your system. Proceed with caution.
Security Risks and Best Practices
Disabling UAC prompts or making admin accounts visible can expose your system to malware. Always keep UAC enabled at the default level. For more information, visit the official Microsoft UAC documentation.
Summary
You can manage how administrator accounts appear in Windows 11 using the Group Policy Editor or the Registry. Always remember to restart your computer to apply changes. Use the Local Security Policy for fine-tuned control over how UAC handles elevation requests. Prioritize security by keeping UAC enabled at all times.” }
Is it safe to disable UAC prompts for administrators?
It is generally not recommended to disable UAC prompts. Doing so removes a critical security barrier that prevents malicious software from gaining administrative control over your system without your explicit permission. Keeping UAC active ensures that you remain aware of any changes being made to your computer’s core settings.
Why does my UAC prompt keep appearing even after changing settings?
If your UAC prompt keeps showing up even after you’ve changed settings, it might be because of other policies interfering or because your computer needs a restart.
What is the difference between ‘Prompt for credentials’ and ‘Prompt for consent’?
The ‘Prompt for consent’ option means you just click ‘Yes’ to let an app make changes, while ‘Prompt for credentials’ asks for your username and password.
Was this guide helpful?

About the Author
Richard
Tech Writer, IT Professional
Richard, a writer for Geek Rewind, is a tech enthusiast who loves breaking down complex IT topics into simple, easy-to-understand ideas. With years of hands-on experience in system administration and enterprise IT operations, he’s developed a knack for offering practical tips and solutions. Richard aims to make technology more accessible and actionable. He's deeply committed to the Geek Rewind community, always ready to answer questions and engage in discussions.

No comments yet — be the first to share your thoughts!