This article explains how to install WordPress on Ubuntu Linux with Apache and Cloudflare support.
Installing WordPress with Apache and Cloudflare on Ubuntu Linux is a great way to create a new website while ensuring it is secure and fast. Apache is a widely used HTTP server known for its stability and reliability. At the same time, Cloudflare is a content delivery network that helps to speed up your website and protect it from attacks.
Additionally, WordPress is one of the most popular content management systems out there, making it an excellent choice for building a website quickly and easily.
By following the steps outlined in the tutorial, students and new users can set up a website with WordPress, Apache, and Cloudflare support in no time.
When you’re ready to set up your server and Cloudflare to use Origin Certificate, follow the steps below:
How to sign up for Cloudflare
The first step in this tutorial is to sign up for a Cloudflare account. This post assumes that you already have registered a domain name. If you don’t, then go and get one before continuing further.
If you already have a Cloudflare account, then skip the registration below.
https://dash.cloudflare.com/sign-up
Type in your email address and click Create Account.
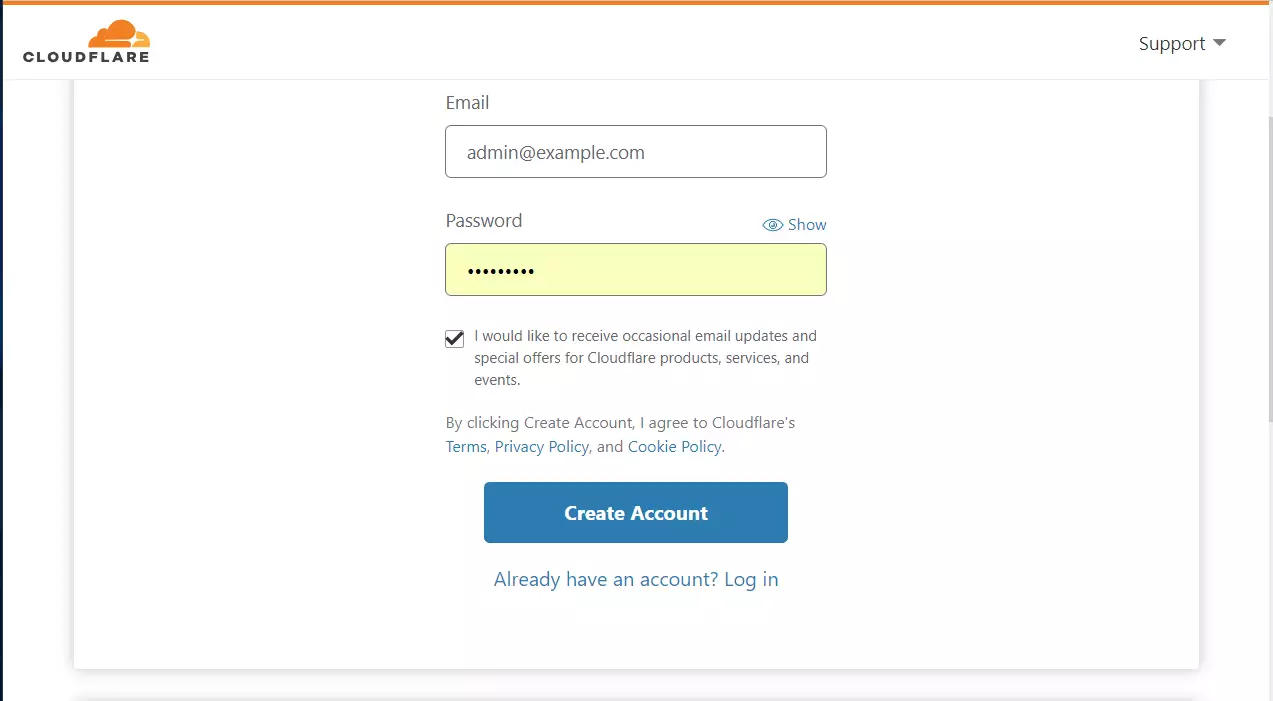
Once the account is created and you’ve verified your email address and logged back into the Cloudflare account, click the button or link (Add a Site) to add a site to your account.

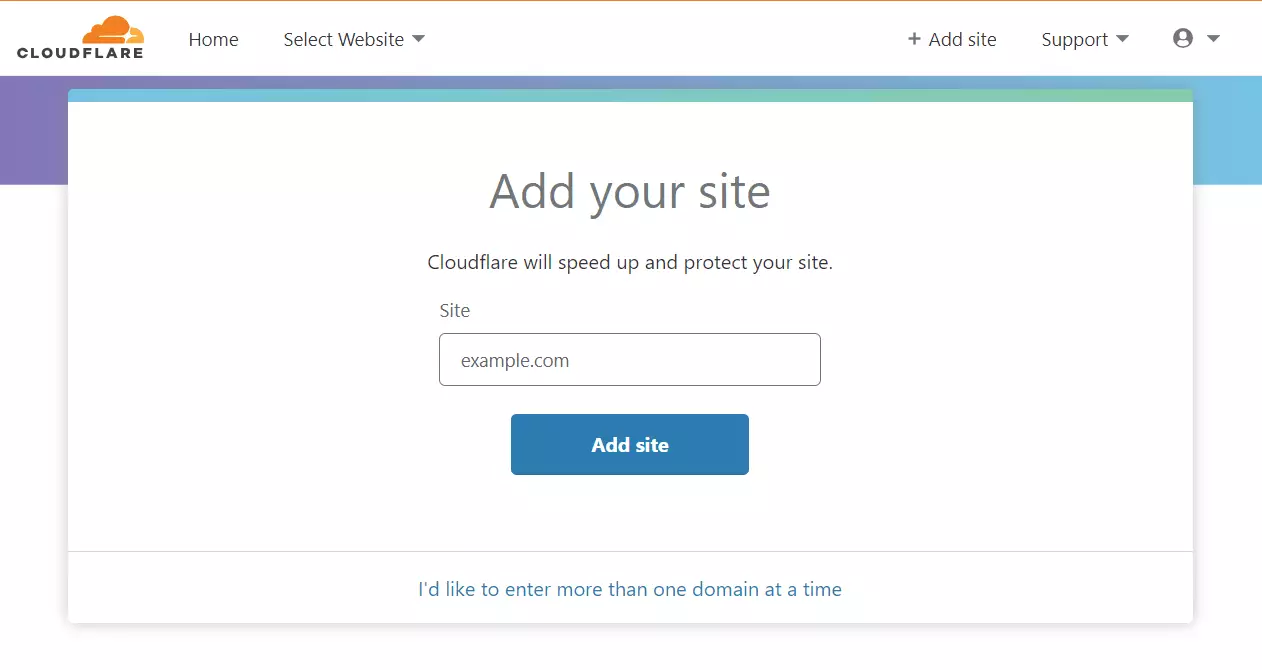
Next, type in the domain name you have registered. Again, Cloudflare service will help speed up and protect the site you add.
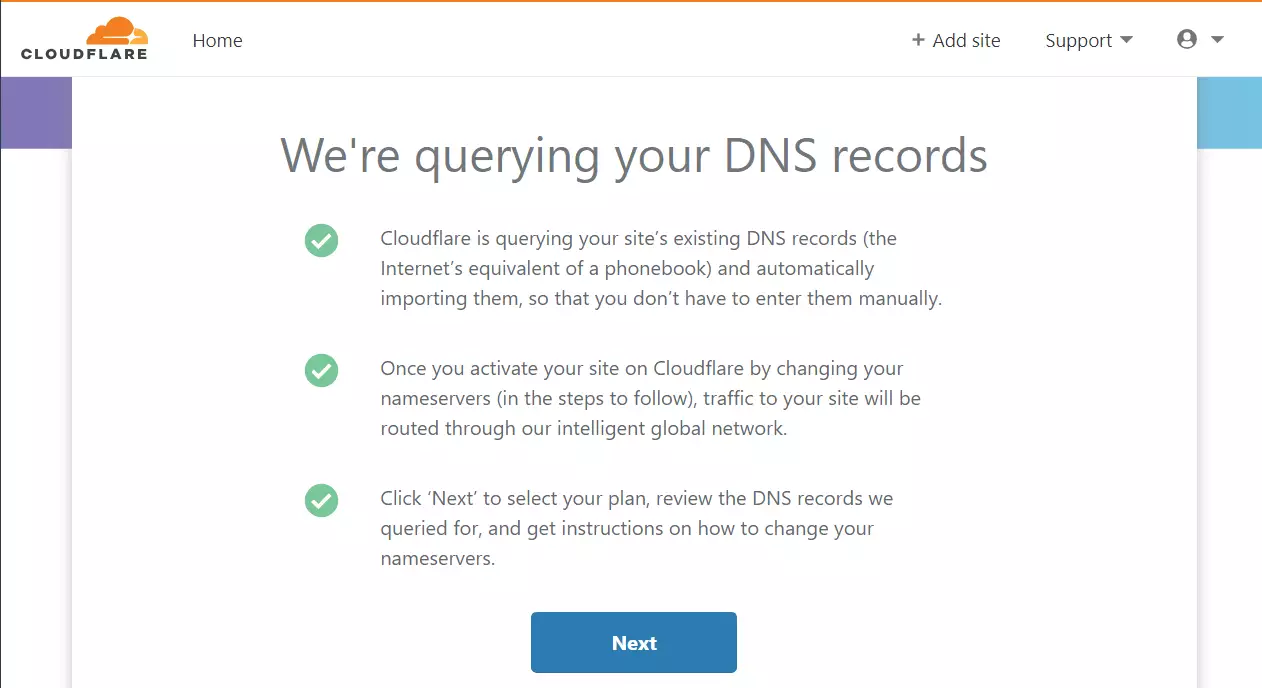
Next, Cloudflare will query your domain DNS provider for the records in the DNS table. Cloudflare should find the domain and import the records into its DNS systems if it is online.
After that, select the plan you want to use for the site. For this tutorial, we will be using the Cloudflare free plan.

You should see two nameservers provided to you by Cloudflare when you’re done. You need to log on to your domain provider’s portal. Then, where you have your domain, replace the nameservers with the ones Cloudflare gives you.
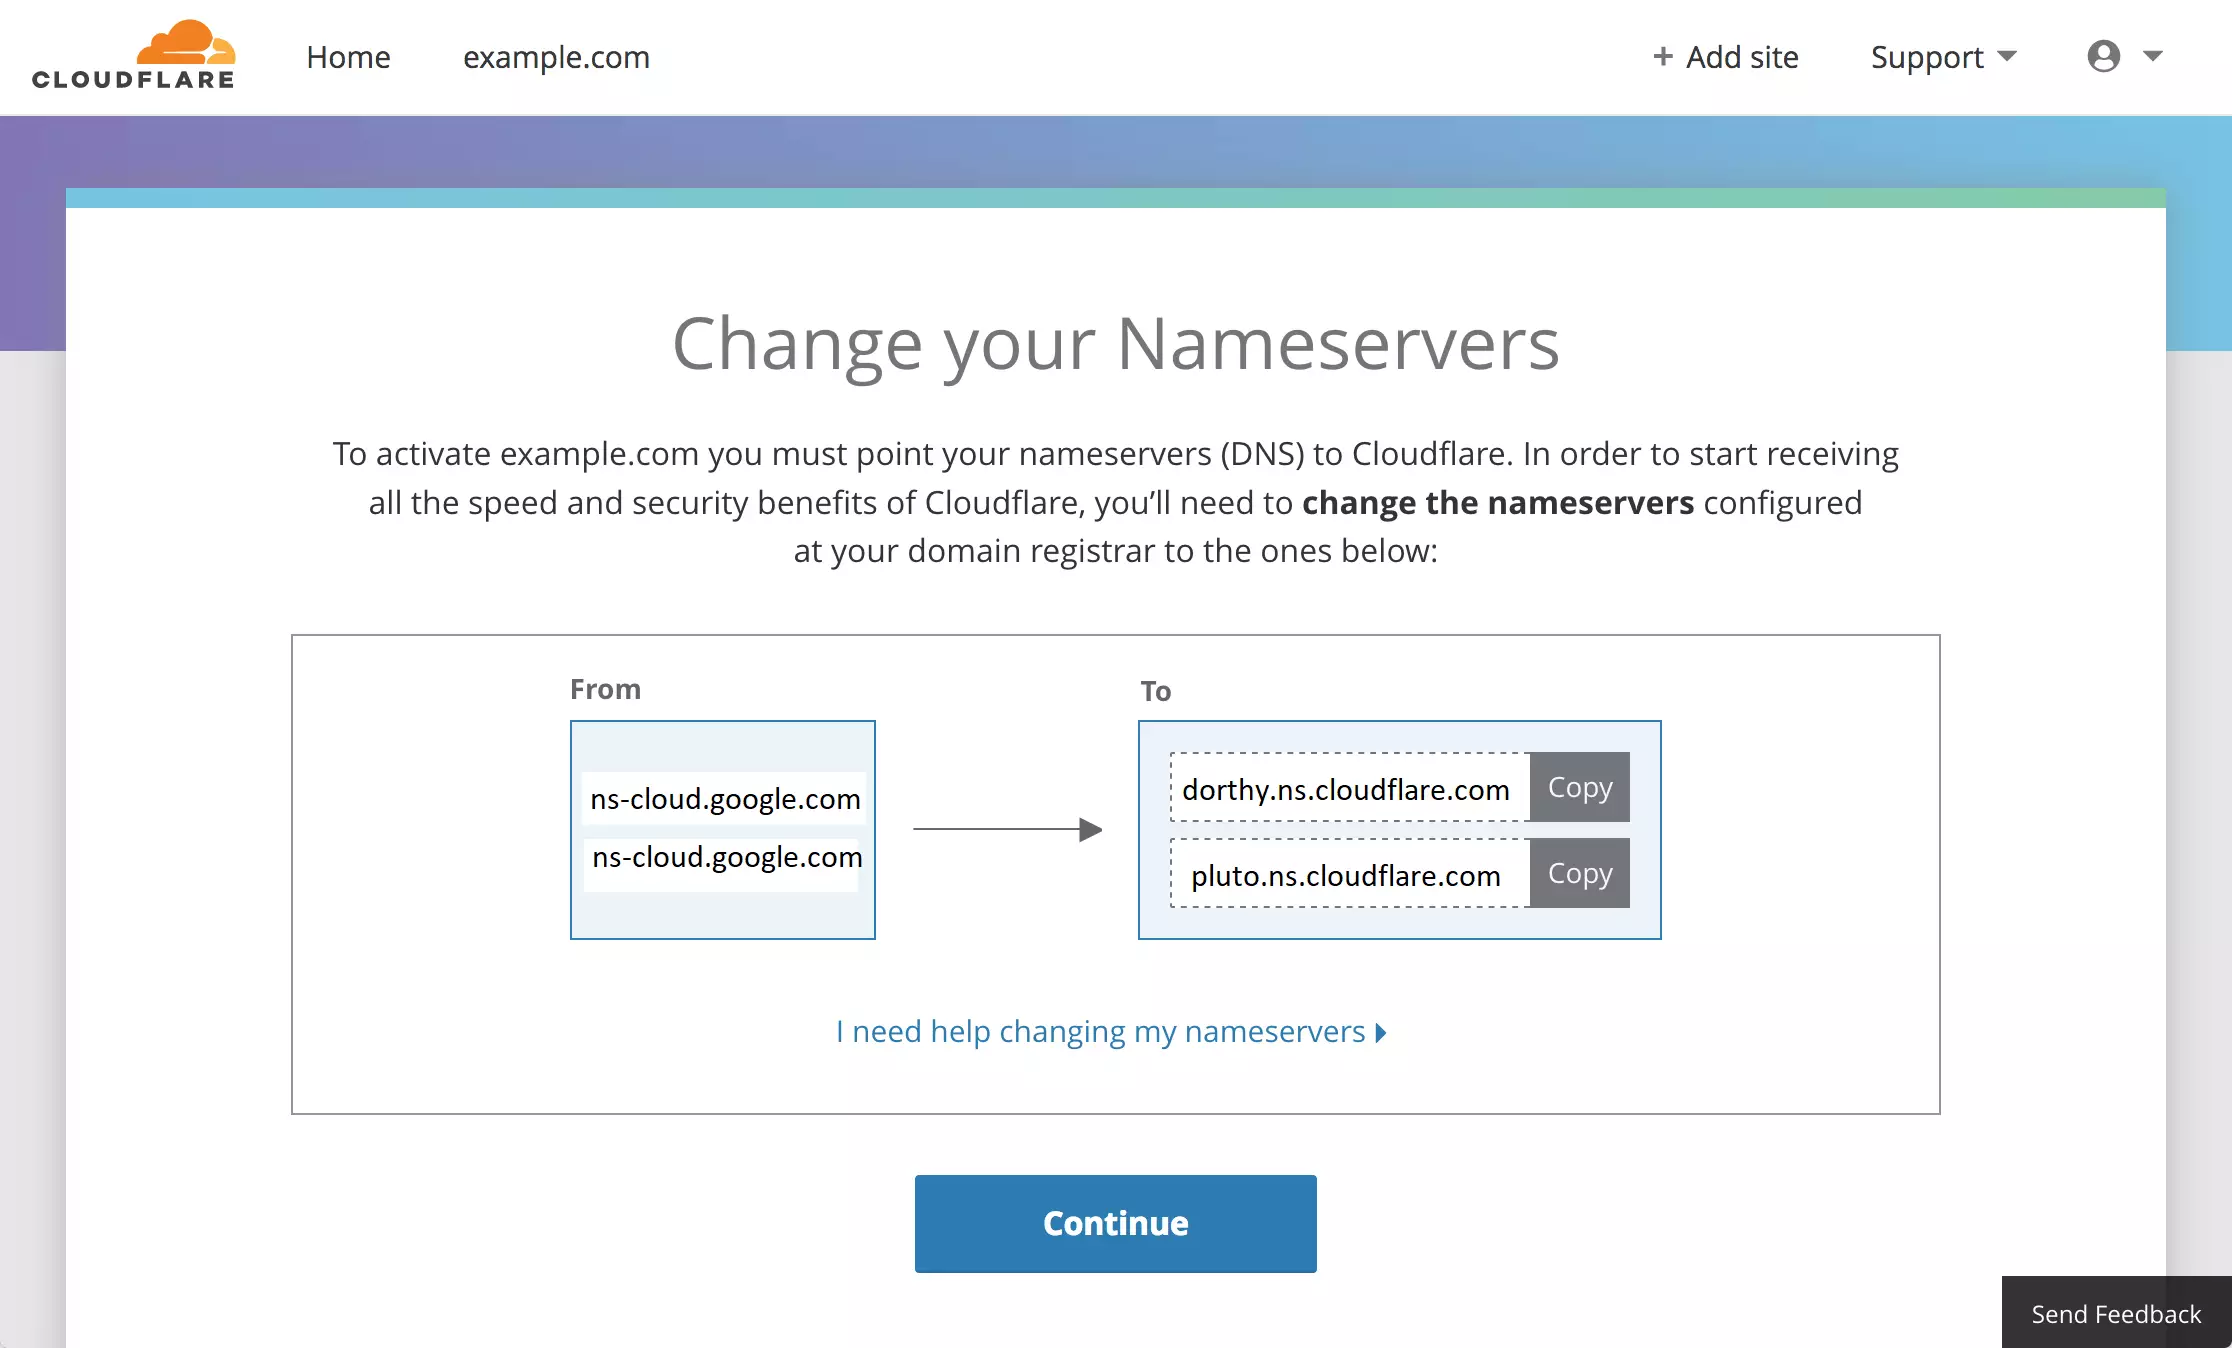
For example, our example.com site is hosted with Google Domains. Log on to your Google Domains account and select use custom nameservers.
You’ll have the option to enter the nameservers provided by Cloudflare. Save your changes when you’re done.
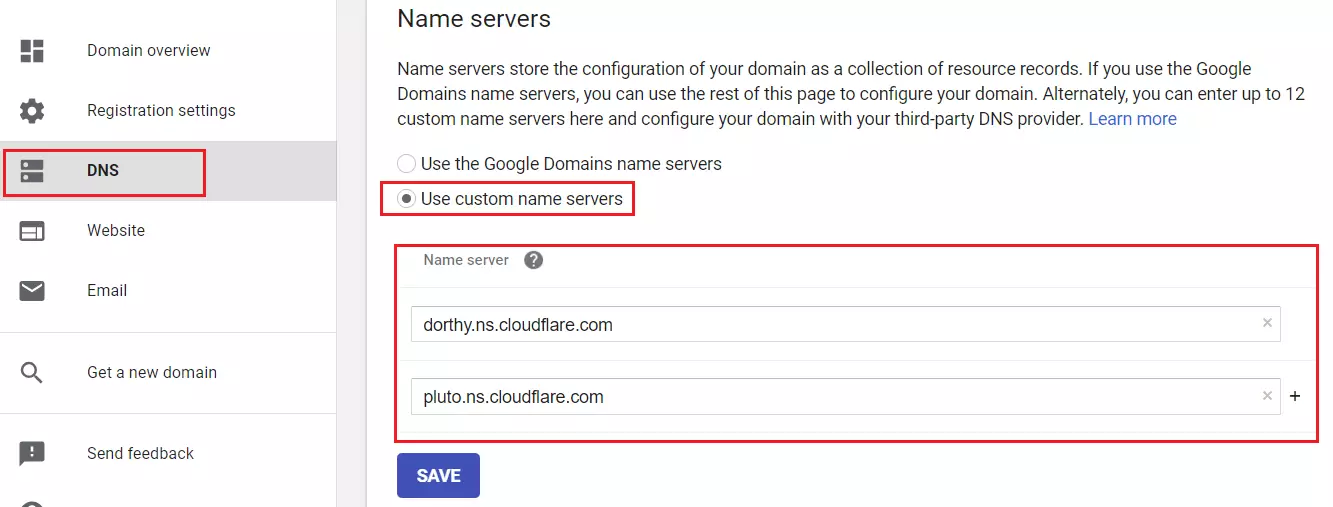
Once you’ve saved your custom nameserver changes, return to your Cloudflare account and wait for Cloudflare to see the changes. Depending on your domain provider, it takes up to an hour for the DNS changes to be visible on Cloudflare.
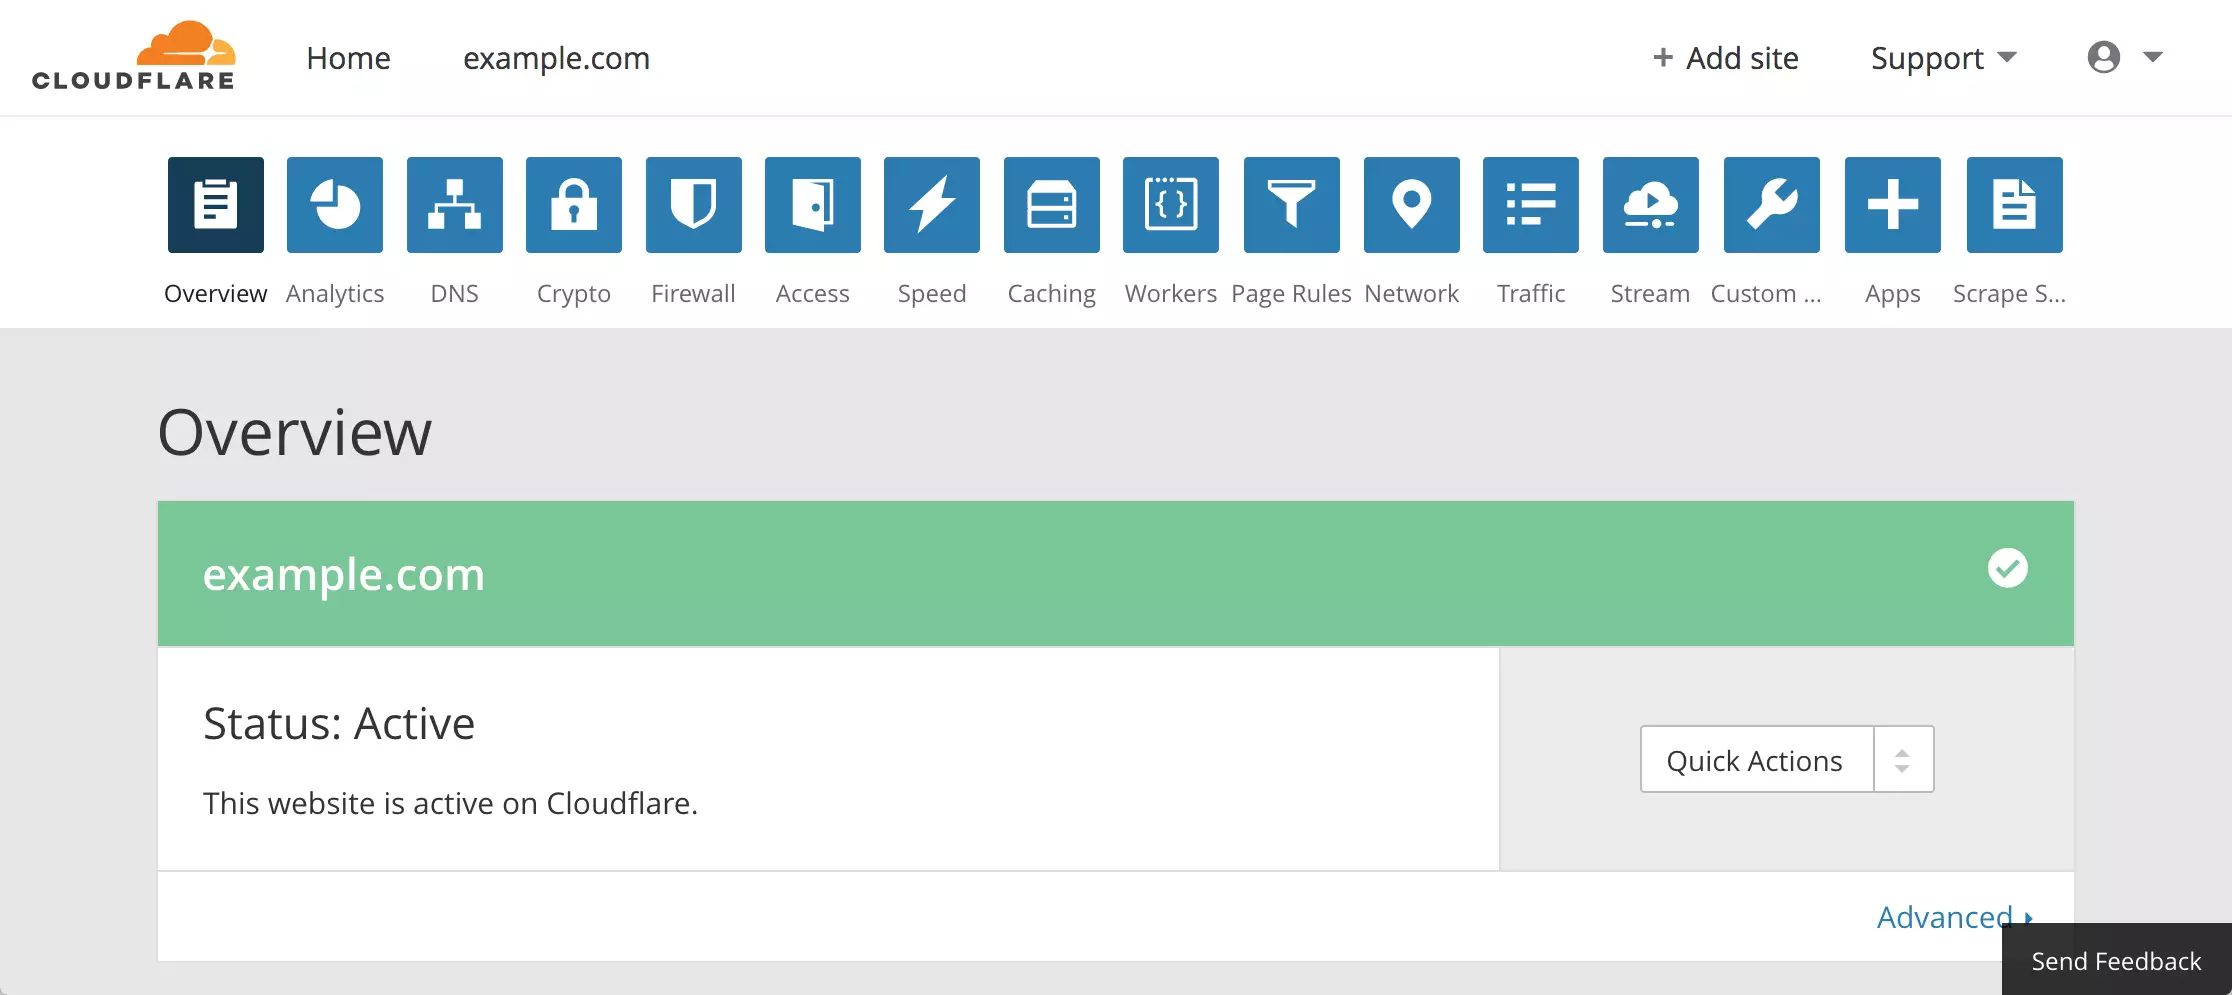
Once all is ready, you’ll see your site status as Active.
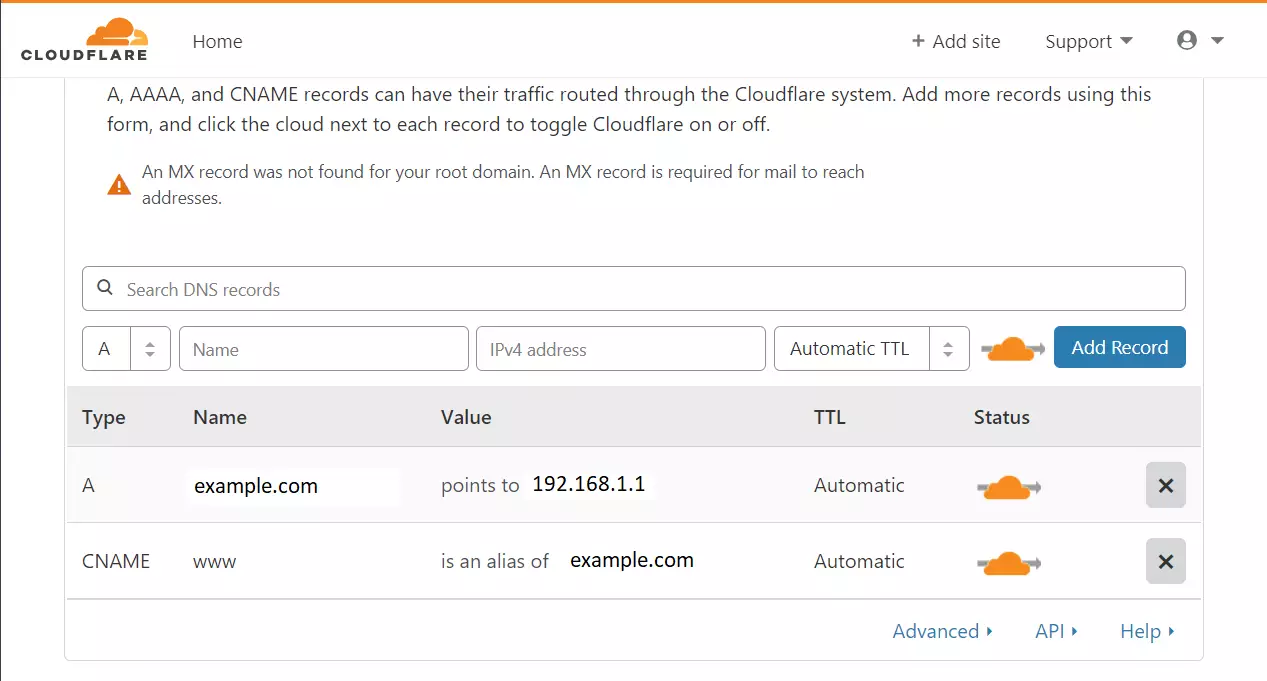
You should also see your Cloudflare account with DNS entries when everything is done, as shown below. Your DNS records might have more entries than the two below. However, these two entries are the most important for running your website.
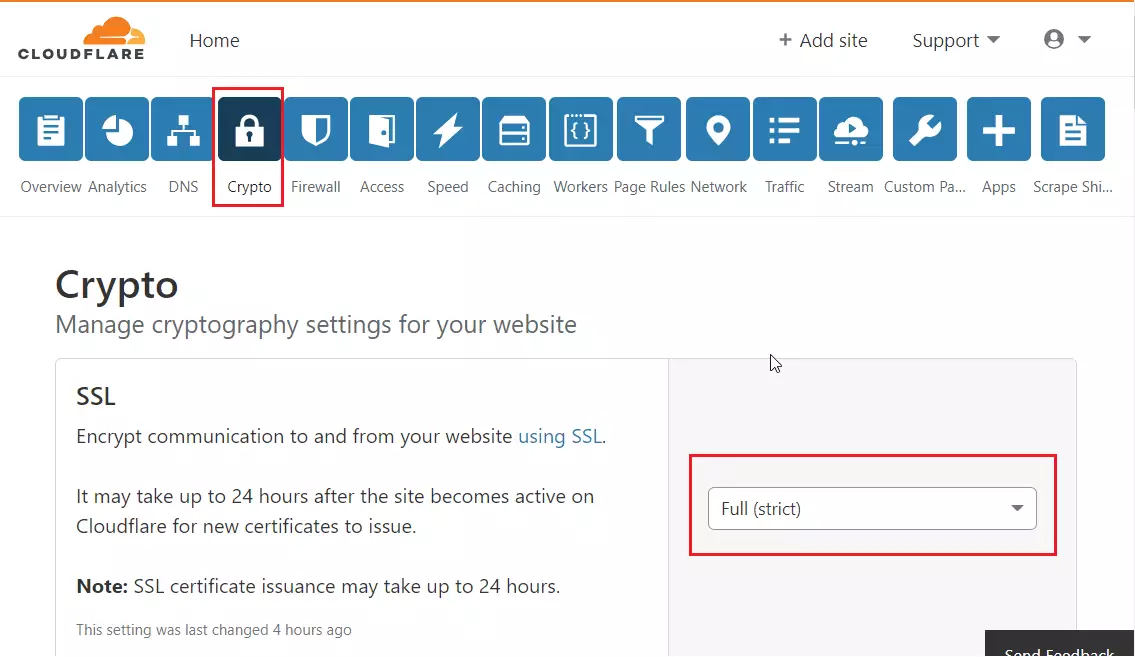
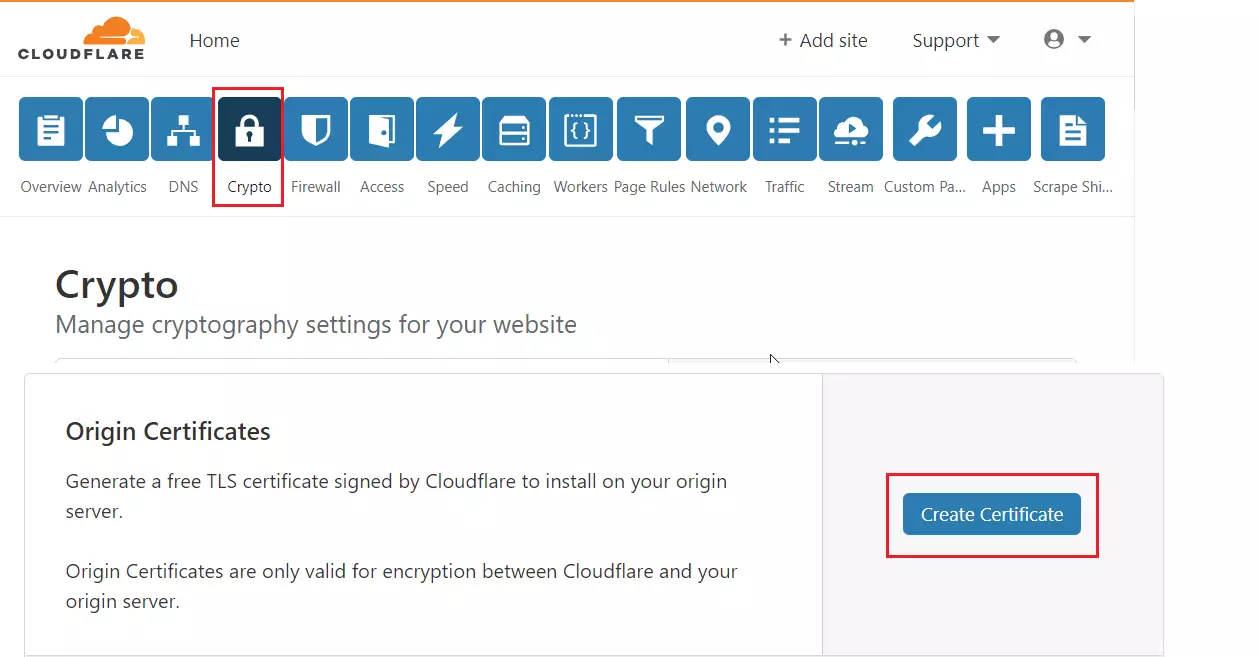
After that, click on the Crypto tab and choose to enable Full (strict) SSL. This should turn on SSL for the site.
While still on the Crypto tab, scroll down to Origin Certificates. Then click the button to create the Certificate.
Use the free TLS certificate signed by Cloudflare to install it on your origin server. Origin Certificates are only valid for encryption between Cloudflare and your origin server.
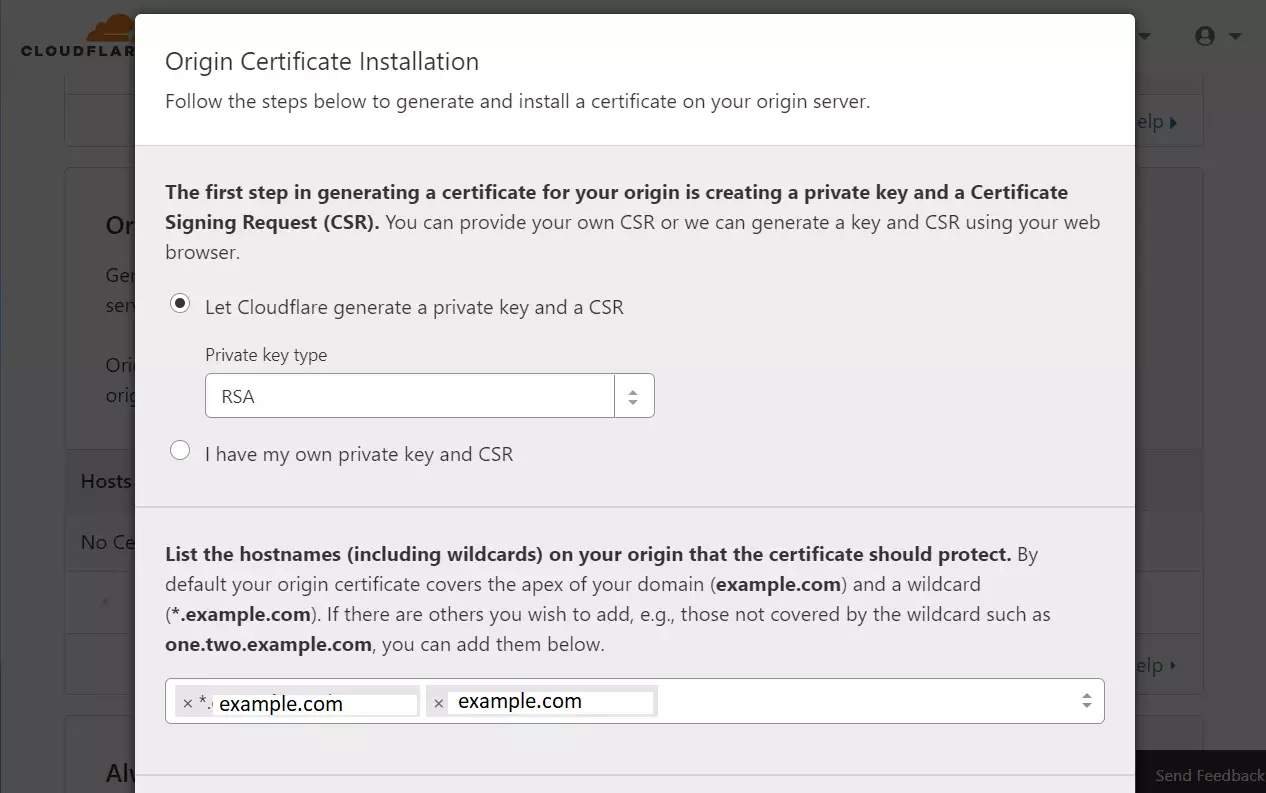
Next, let Cloudflare generate a private key and a CSR for the domain. Click Next.
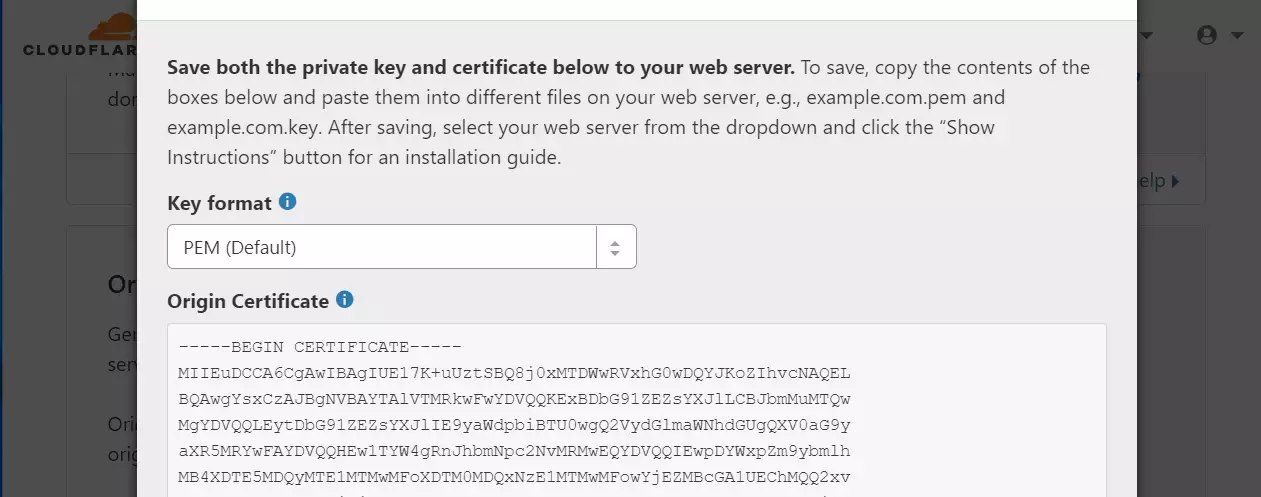
Then, copy and paste these into a text file onto your server.
Run the commands below on Ubuntu to create the Private key, Certificate, and Origin pull files (3 files). Then, copy and paste each content into the respective file. And save.
For the Private key file. Run this, copy and paste the private key given to you into the file, and save.
sudo nano /etc/ssl/private/cloudflare_key_example.com.pem
For the certificate file, run this copy, paste the certificate content into the file, and save.
sudo nano /etc/ssl/certs/cloudflare_example.com.pem
You’ll also want to download the Cloudflare Origin Pull certificate. You can download that from the link below:
Set up authenticated Origin pulls · Cloudflare SSL docs
Zone-Level — Cloudflare certificate
Under Zone-level certificate, expand the certificate button and copy its content.
Next, run the commands below to create an origin-pull-ca.pem file, paste the certificate content into the file below, and save.
sudo nano /etc/ssl/certs/origin-pull-ca.pem
Once done, you should have three files. The cloudflare_key_example.com.pem, cloudflare_example.com.pem and origin-pull-ca.pem.
We will use these files in the Nginx config below.
Pull the certificate files after saving the key, Certificate, and Origin. Continue below.
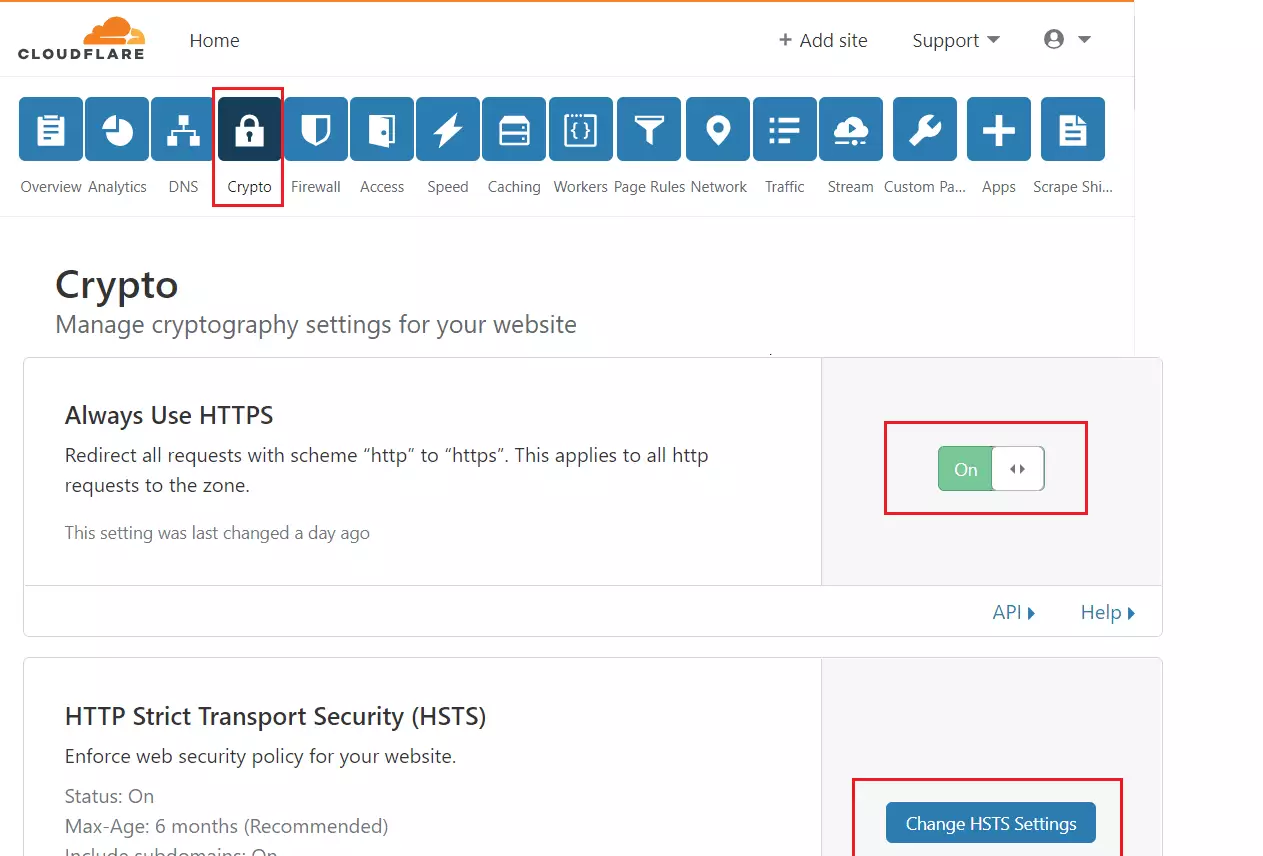
Still, on the Crypto page in your Cloudflare account, enable Always use HTTPS, and you may also change settings for HSTS but not necessary.
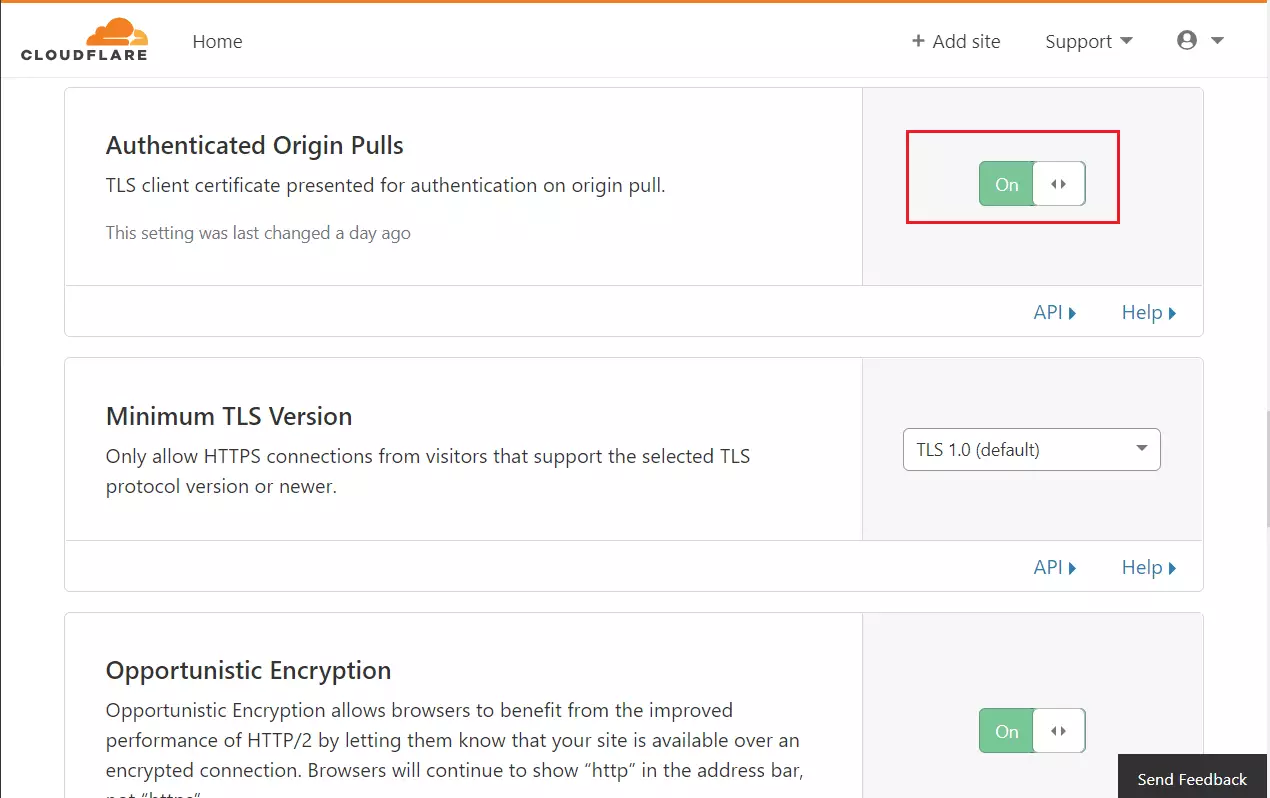
Next, turn on Authenticated Origin Pulls and Opportunistic Encryption, and continue.
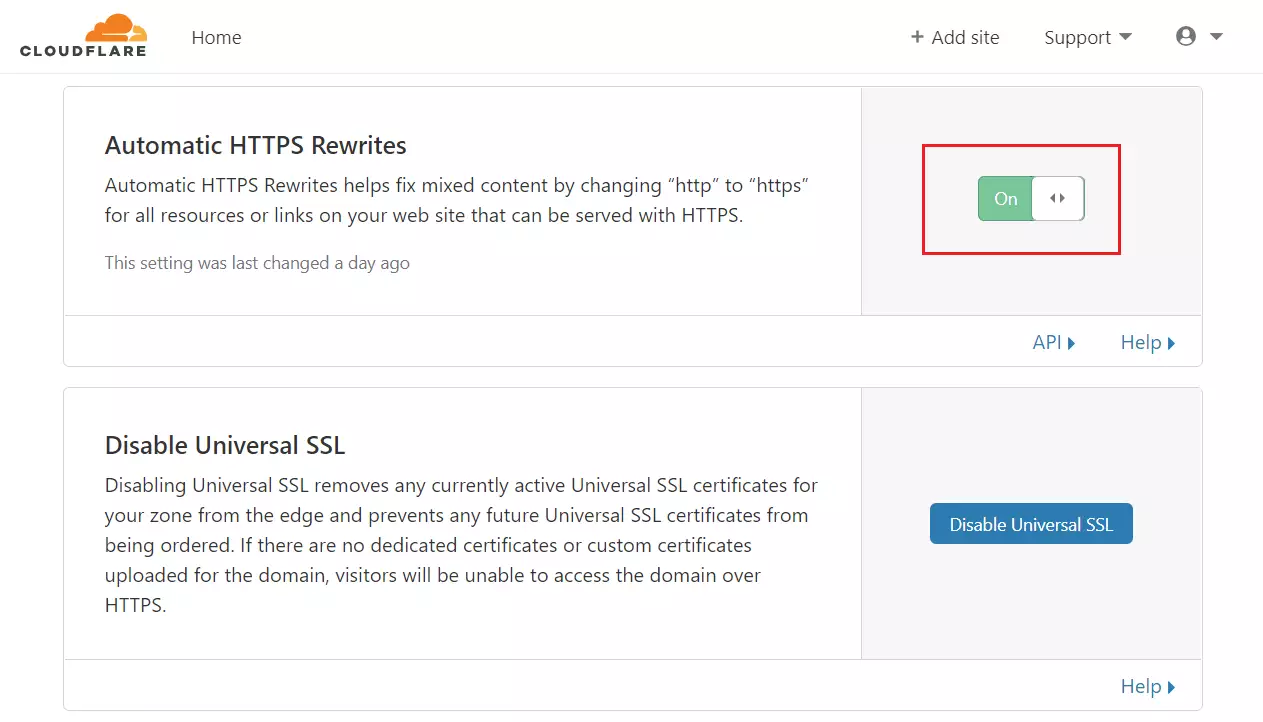
Then, turn on Automatic HTTPS Rewrites and continue.
Next, move to the Page Rules tab. Then, create a new rule for the site. Then, type the URL and choose Always Use HTTPS.
HTTP://* example.com/*
Always Use HTTPS
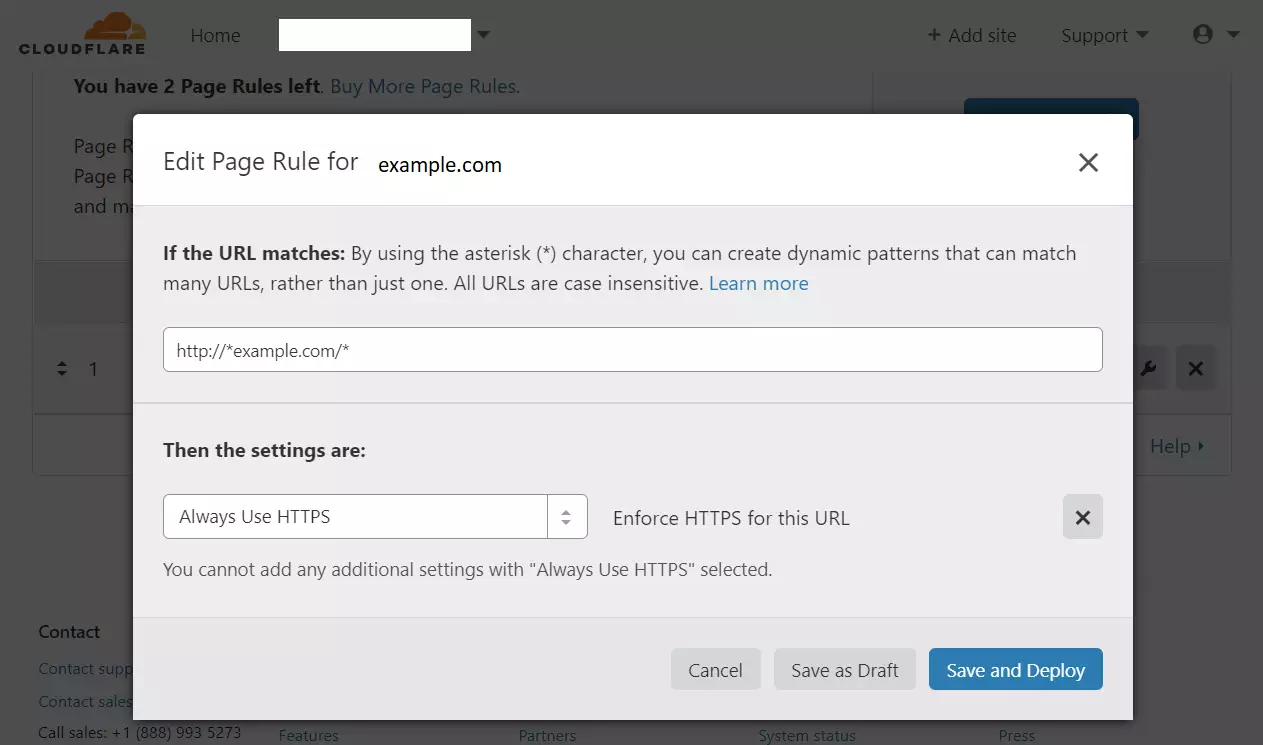
Save your settings, and you’re done with setting up Cloudflare.
How to Install and Configure WordPress
Now that Cloudflare is configured log on to your server and configure WordPress. First, install the Apache2 HTTP server since we use Apache2 for this post. To install the Apache2 server, run the commands below:
sudo apt update
sudo apt install apache2
After installing Apache2, the commands below can stop, start, and enable the Apache2 service to always start up with the server boots.
sudo systemctl stop apache2.service
sudo systemctl start apache2.service
sudo systemctl enable apache2.service
Now that Apache2 has been installed browse your browser to the URL below to test whether the web server works.
https://localhost
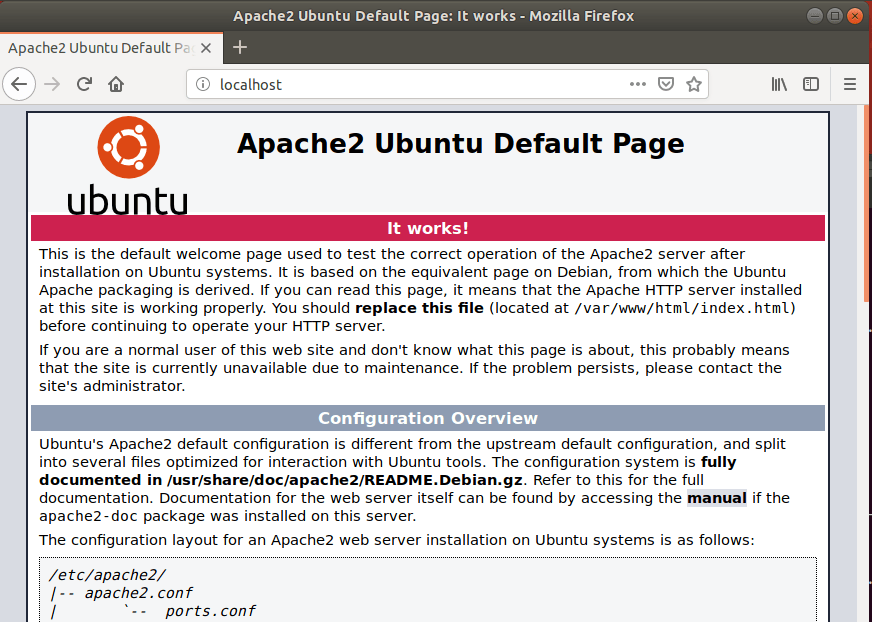
If you see the page above, then Apache2 is successfully installed.
How to Install MariaDB Database Server
WordPress also requires a database server to store its content. MariaDB is a great place to start if you want a genuinely open-source database server. To install MariaDB, run the commands below:
sudo apt-get install mariadb-server mariadb-client
After installing MariaDB, the commands below can stop and start the service and enable it to start when the server boots.
Run these on Ubuntu 16.04 LTS
sudo systemctl stop mysql.service
sudo systemctl start mysql.service
sudo systemctl enable mysql.service
Run these on Ubuntu 19.04 and 18.04 LTS
sudo systemctl stop mariadb.service
sudo systemctl start mariadb.service
sudo systemctl enable mariadb.service
Next, run the commands below to secure the database server with a root password if you were not prompted to do so during the installation.
sudo mysql_secure_installation
When prompted, answer the questions below by following the guide.
- Enter current password for root (enter for none): Just press the Enter
- Set root password? [Y/n]: Y
- New password: Enter password
- Re-enter new password: Repeat password
- Remove anonymous users? [Y/n]: Y
- Disallow root login remotely? [Y/n]: Y
- Remove test database and access to it? [Y/n]: Y
- Reload privilege tables now? [Y/n]: Y
Once MariaDB is installed, run the commands below to test whether the database server was installed.
sudo mysql -u root -p
Type the root password when prompted.
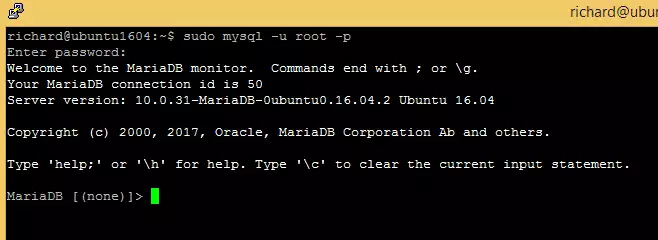
The server was successfully installed if you see a similar screen.
How to Install PHP 7.2 and Related Modules
WordPress CMS is a PHP-based CMS, and PHP is required. However, PHP 7.2 may not be available in Ubuntu’s default repositories. To run PHP 7.2 on Ubuntu 16.04 and previous, you may need to run the commands below:
sudo apt-get install software-properties-common
sudo add-apt-repository ppa:ondrej/php
Then update and upgrade to PHP 7.2
sudo apt update
Next, run the commands below to install PHP 7.2 and related modules.
sudo apt install php7.2 libapache2-mod-php7.2 php7.2-common php7.2-mysql php7.2-gmp php7.2-curl php7.2-intl php7.2-mbstring php7.2-xmlrpc php7.2-gd php7.2-xml php7.2-cli php7.2-zip
After installing PHP 7.2, run the commands below to open the PHP default configuration file for Apache2.
sudo nano /etc/php/7.2/apache2/php.ini
The lines below are a good setting for most PHP-based CMS. Update the configuration file with these and save.
file_uploads = On
allow_url_fopen = On
short_open_tag = On
memory_limit = 256M
upload_max_filesize = 100M
max_execution_time = 360
date.timezone = America/Chicago
Every time you change the PHP configuration file, you should restart the Apache2 web server. To do so, run the commands below:
sudo systemctl restart apache2.service
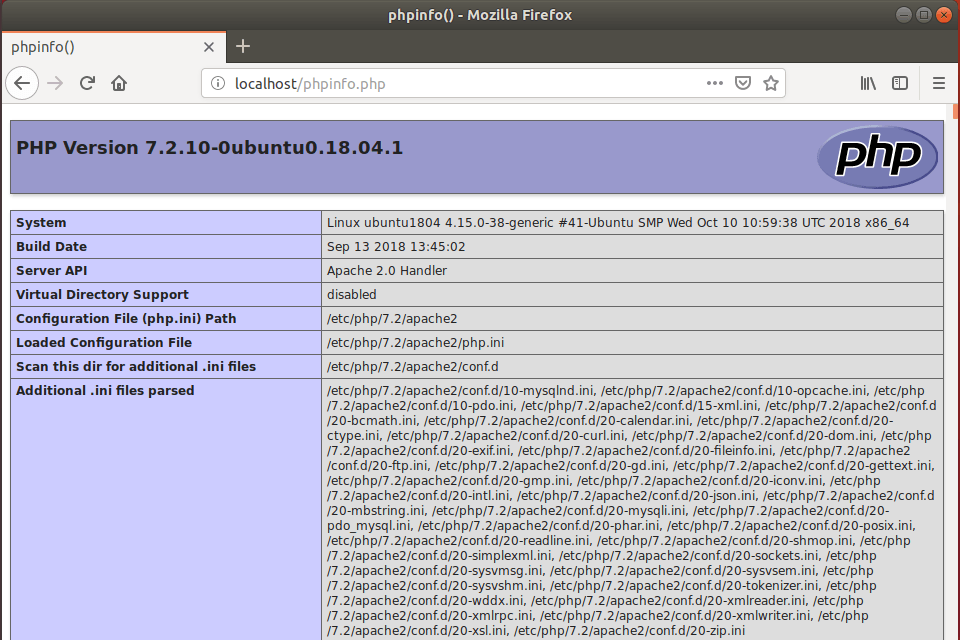
Once PHP is installed, create a test file called phpinfo.php in the Apache2 default root directory to test whether it’s functioning. ( /var/www/html/)
sudo nano /var/www/html/phpinfo.php
Then, type the content below and save the file.
<?php phpinfo( ); ?>
Next, open your browser and browse to the server’s hostname or IP address followed by phpinfo.php
http://localhost/phpinfo.php
You should see the PHP default test page.
How to Create a WordPress Database
Once you’ve installed all the packages required for WordPress to function, continue below to start configuring the servers. First, run the commands below to create a blank WordPress database.
To log on to the MariaDB database server, run the commands below.
sudo mysql -u root -p
Then, create a database called wpdatabase
CREATE DATABASE wpdatabase;
Create a database user called wpuser with a new password
CREATE USER 'wpuser'@'localhost' IDENTIFIED BY 'new_password_here';
Then, grant the user full access to the database.
GRANT ALL ON wpdatabase.* TO 'wpuser'@'localhost' IDENTIFIED BY 'user_password_here' WITH GRANT OPTION;
Finally, save your changes and exit.
FLUSH PRIVILEGES;
EXIT;
How to Download WordPress’s Latest Release
To get WordPress’s latest release, go to its official download page and get it from there. The link below is where to find WordPress’s latest archive versions.
cd /tmp
wget https://wordpress.org/latest.tar.gz
tar -xvzf latest.tar.gz
sudo mv wordpress /var/www/html/example.com
Then, run the commands below to set the correct permissions for the WordPress root directory and give Apache2 control.
sudo chown -R www-data:www-data /var/www/html/example.com/
sudo chmod -R 755 /var/www/html/example.com/
How to Configure Apache for WordPress
Finally, configure the Apache2 site configuration file for WordPress. This file will control how users access WordPress content. Run the commands below to create a new configuration file called example.com
sudo nano /etc/apache2/sites-available/example.com.conf
Then copy and paste the content below into the file and save it. Replace the highlighted line with your domain name and directory root location.
Also, reference the certificate files created above during Cloudflare setup.
<VirtualHost *:80>
  ServerName example.com
  ServerAlias www.example.com
</VirtualHost>

<VirtualHost *:443>
     Protocols h2 http:/1.1
     ServerAdmin [email protected]
     DocumentRoot /var/www/html/example.com
     ServerName example.com
     ServerAlias www.example.com

     SSLEngine on
     SSLCertificateFile /etc/ssl/certs/cloudflare_example.com.pem
     SSLCertificateKeyFile /etc/ssl/private/cloudflare_key_example.com.pem
     SSLCACertificateFile /etc/ssl/certs/origin-pull-ca.pem
     SSLVerifyClient require
     SSLVerifyDepth 1

     <Directory /var/www/html/example.com/>
          Options FollowSymlinks
          AllowOverride All
          Require all granted
     </Directory>

     ErrorLog ${APACHE_LOG_DIR}/error.log
     CustomLog ${APACHE_LOG_DIR}/access.log combined

</VirtualHost>
Save the file and exit.
How to Enable the WordPress Site
After configuring the VirtualHost above, please enable it by running the commands below.
sudo a2ensite example.com.conf
sudo a2enmod rewrite
sudo systemctl restart apache2.service
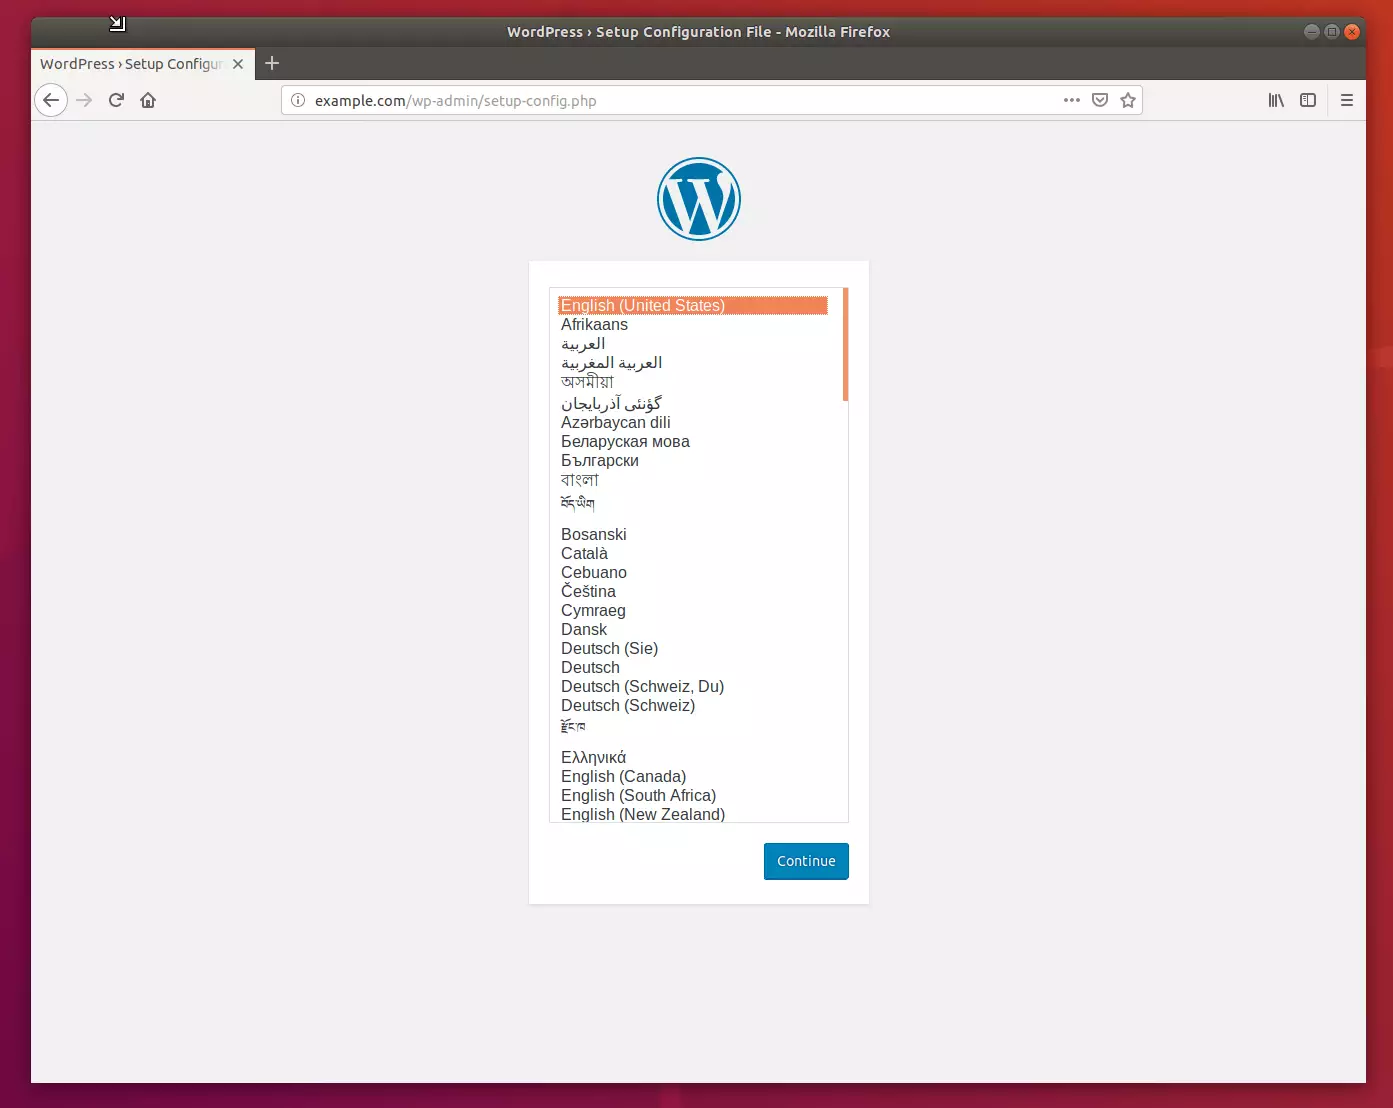
Then open your browser and browse to the server domain name. Next, you should see the WordPress setup wizard to complete. Please follow the wizard carefully.
https://example.com/
Then, follow the on-screen instructions. Select the installation language, then click Continue.
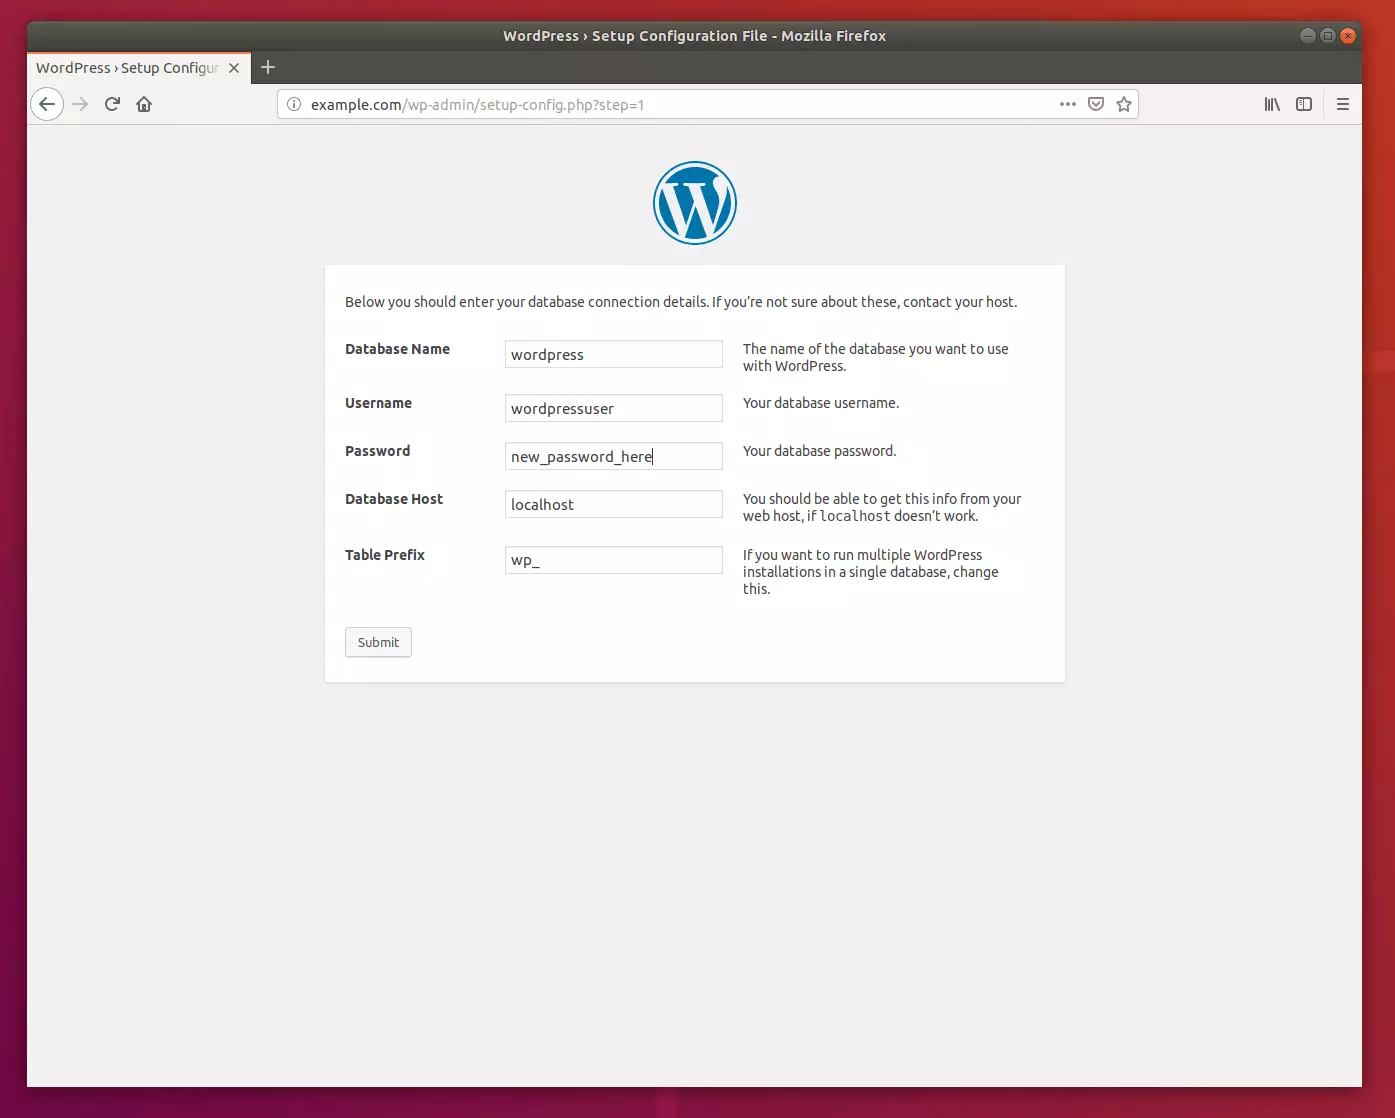
You will need to know the following items before proceeding. First, use the database connection info you created above.
- Database name
- Database username
- Database password
- Database host
- Table prefix (if you want to run more than one WordPress in a single database)
The wizard will use the database information to create a wp-config.php file in the WordPress root folder.
If this automatic file creation doesn’t work for any reason, don’t worry. All this does is fill in the database information to a configuration file. You may also open wp-config-sample.php in a text editor, fill in your information, and save it as wp-config.php.
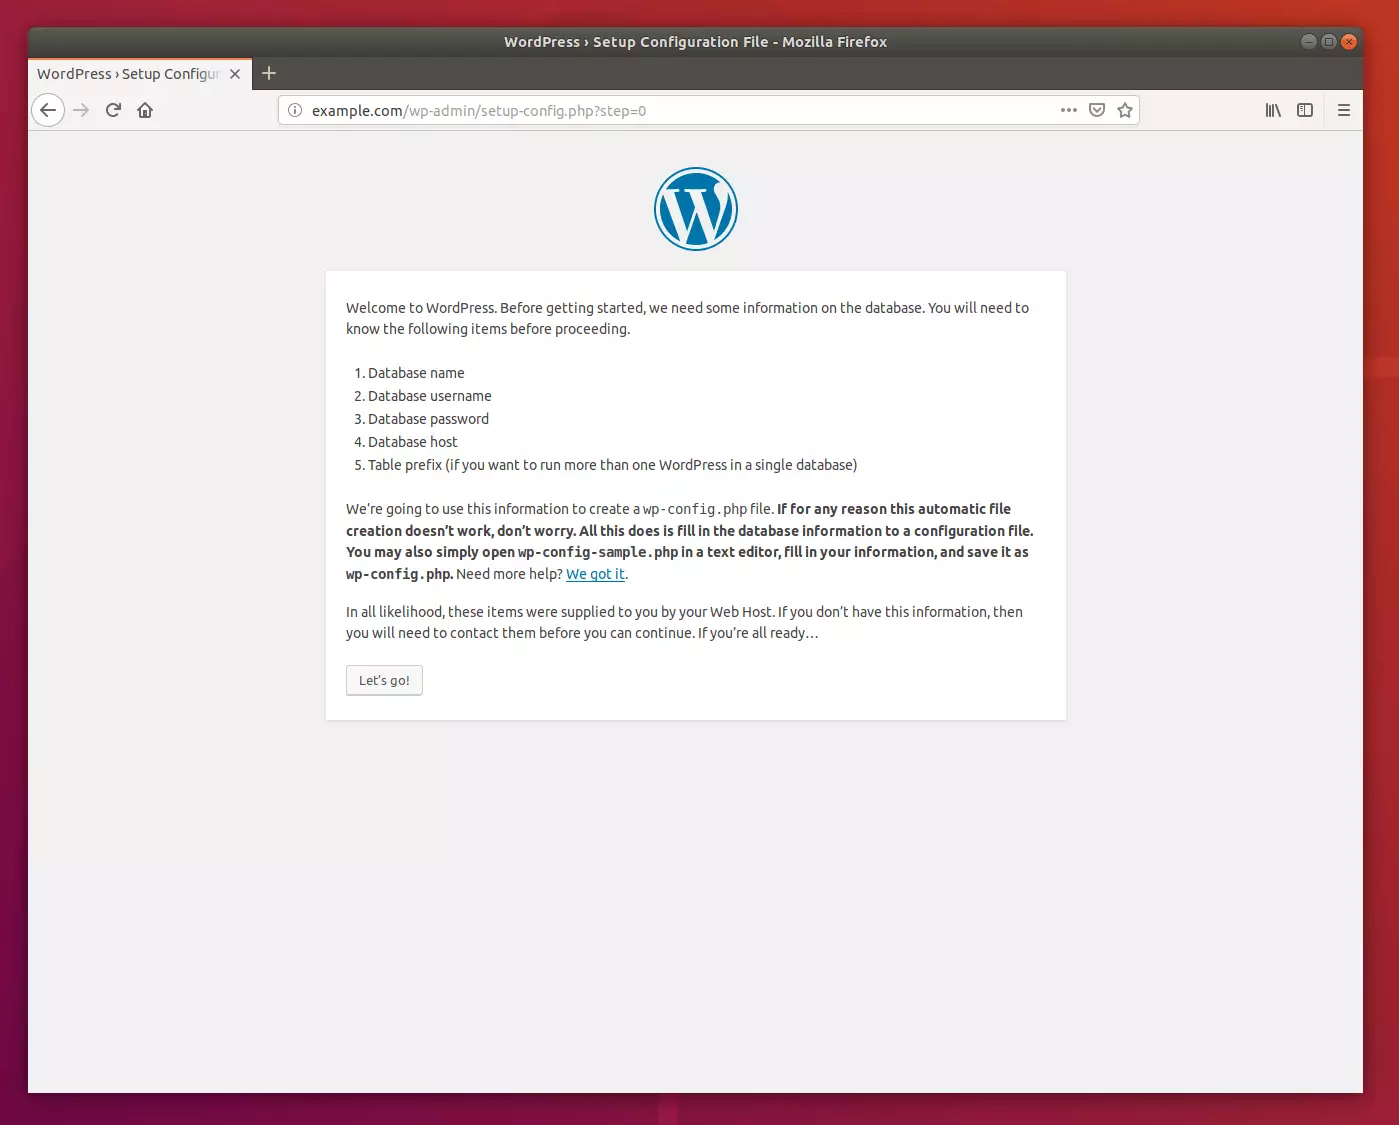
Next, type in the database connection info and click Submit
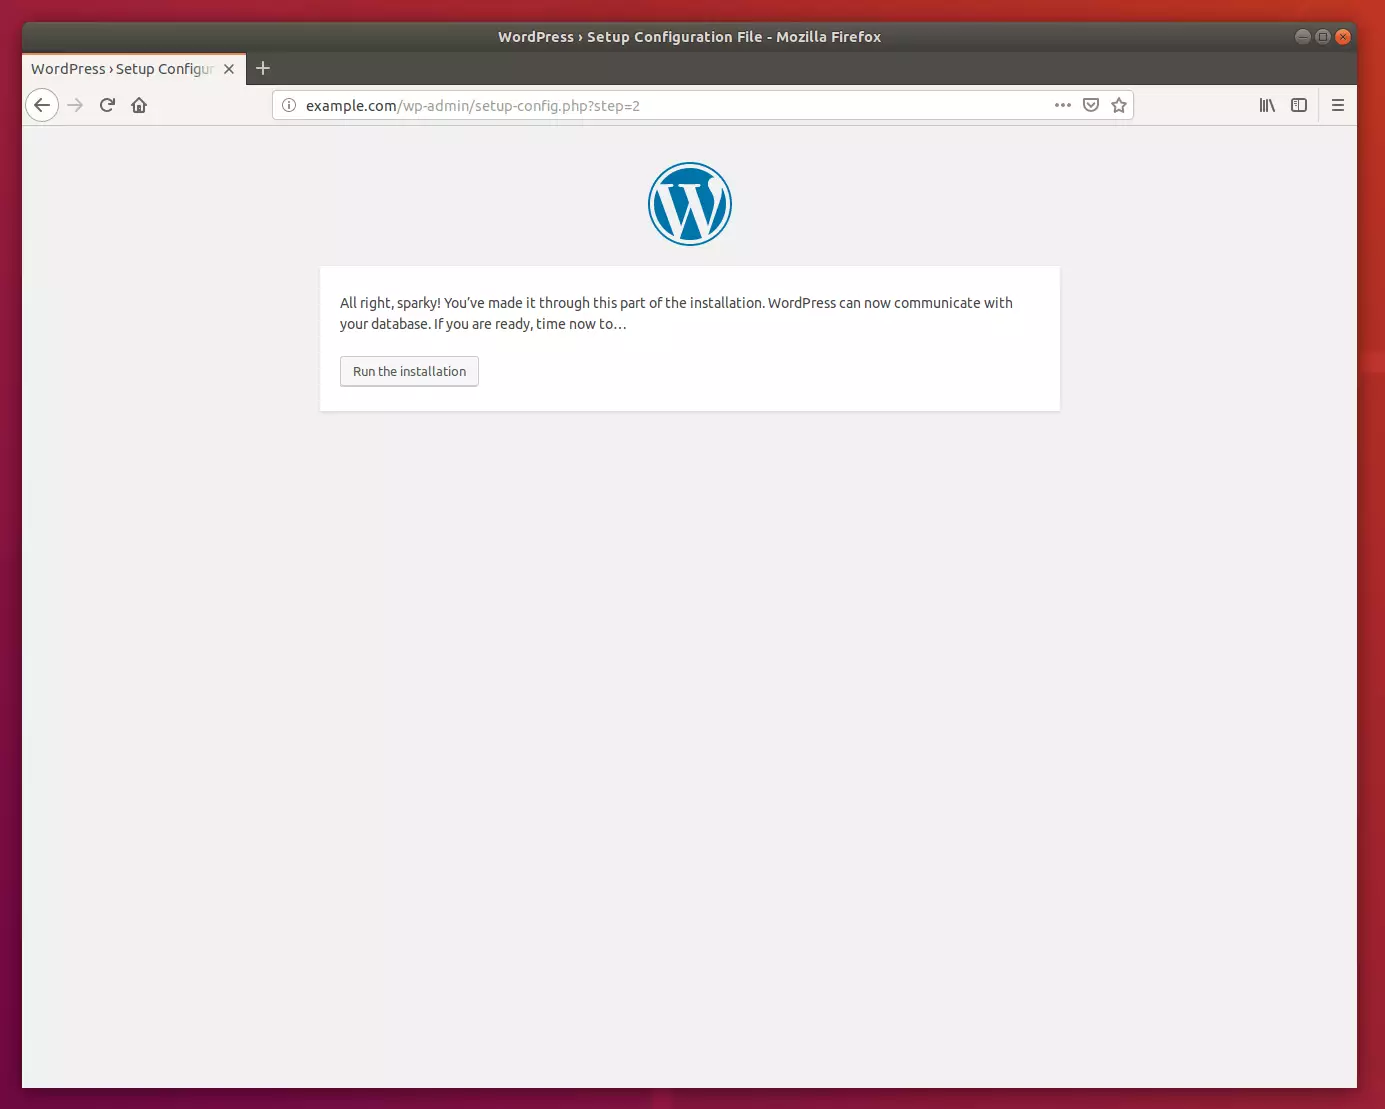
After that, click the Run the Installation button to have WordPress complete the setup.
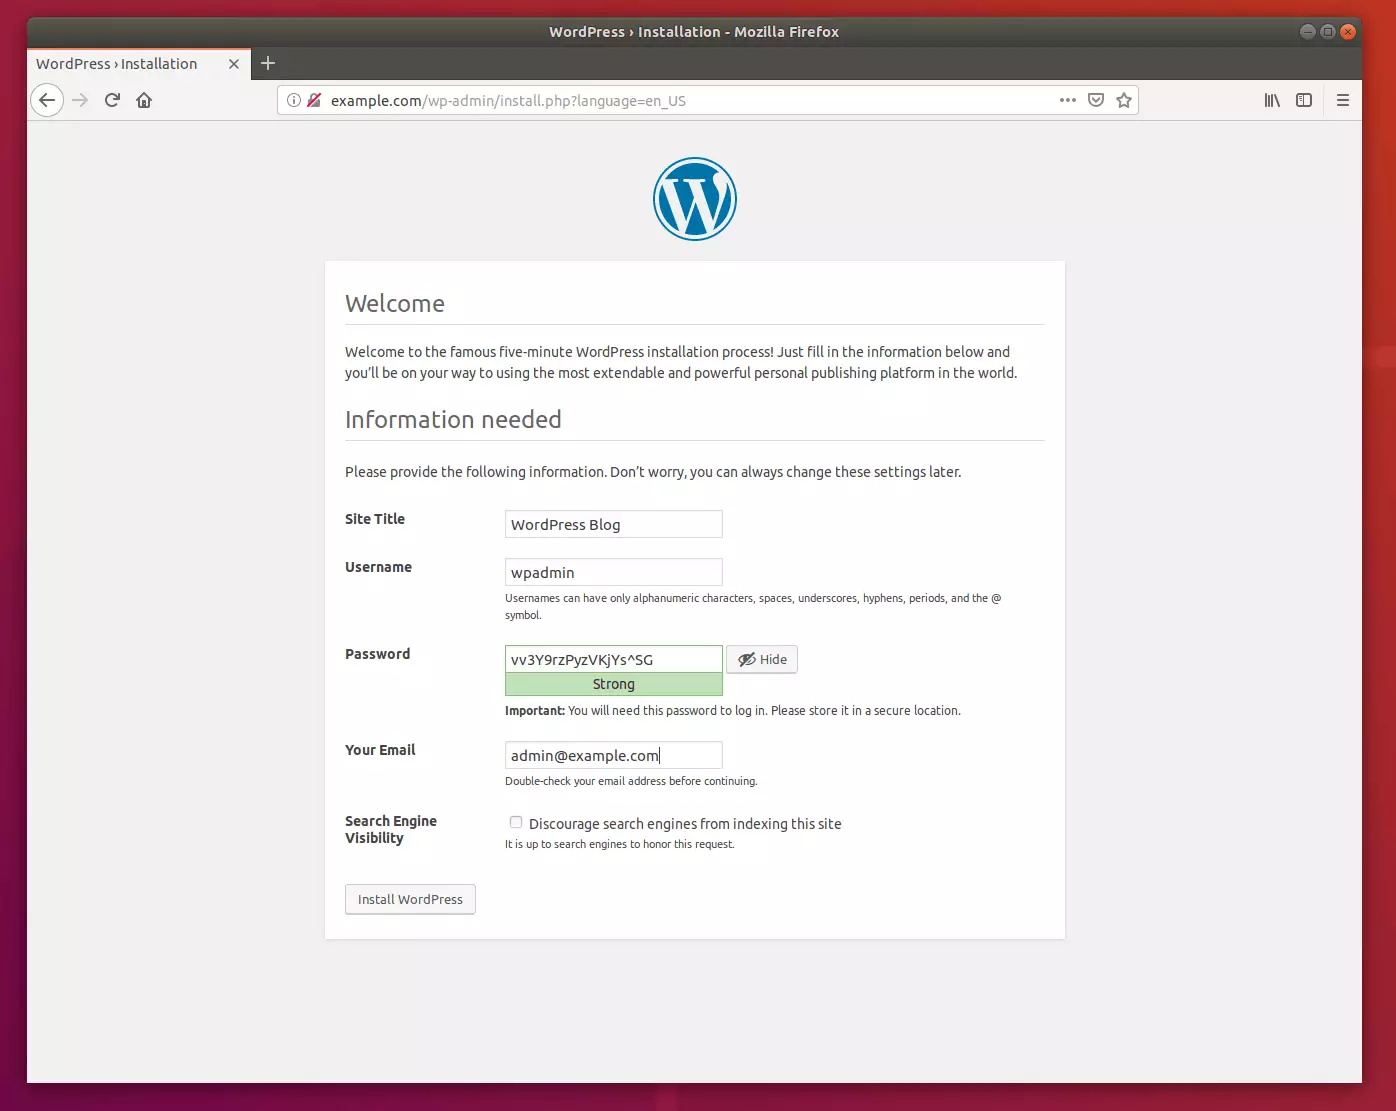
Next, create the WordPress site name and the backend admin account. Then click Install WordPress.
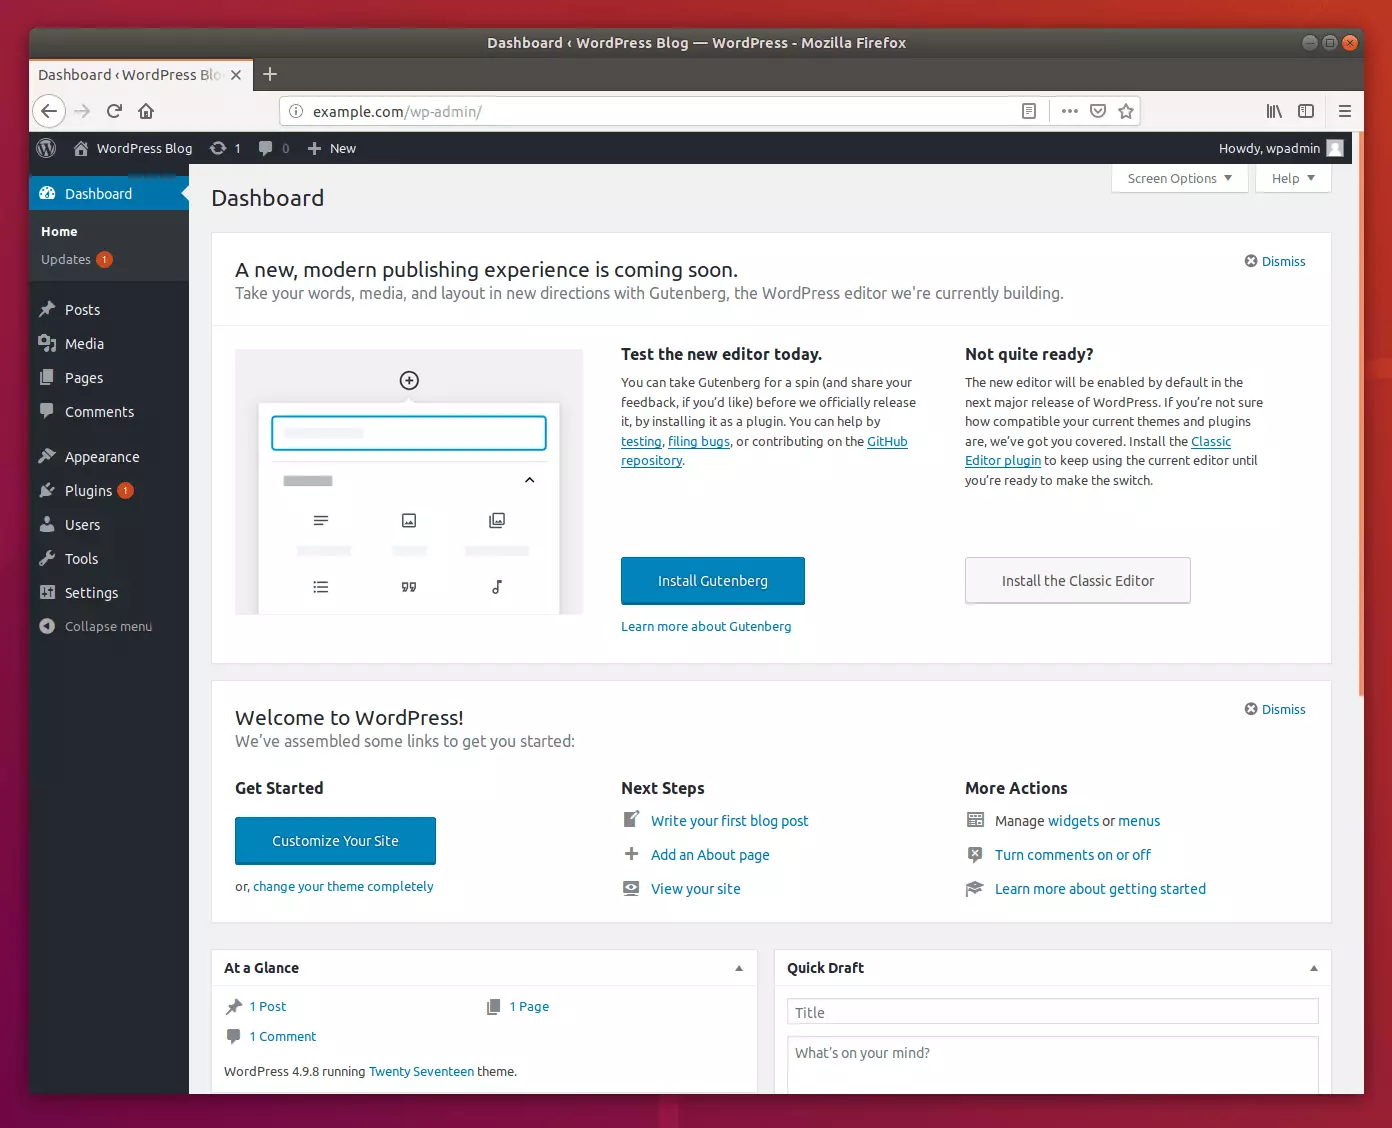
When you’re done, WordPress should be installed and ready to use.
After setting up WordPress, go and install the Cloudflare plugin and activate it below:
Activate, configure, and use it! After that, your WordPress should be ready to use with Cloudflare support
Congratulation! You have successfully installed WordPress with Cloudflare CDN on Ubuntu 16.04 | 18.04.
You may also like the post below:


Leave a Reply