How to Install Telnet on Windows 11
Telnet is a tool that lets you connect to another computer using a text-based command screen. While it is older and not very secure, it is still helpful for testing network connections or checking if a server is reachable. Most people now use SSH instead, but Telnet remains a quick way to troubleshoot connectivity issues.
Why use Telnet?
You should use Telnet if you need a fast way to check if a specific port, such as port 23, is open on a remote server or to test firewall settings. It is a simple diagnostic tool for your network.
What happens when done?
Once you finish these steps, your computer will be able to communicate with other devices using the Telnet protocol through your command line interface.
Prerequisites
Before you begin, ensure you have an active internet connection. You must also have an administrator account on your computer to modify Windows features.
How to enable Telnet on Windows 11
Follow these steps to turn on Telnet using the Windows settings menu.
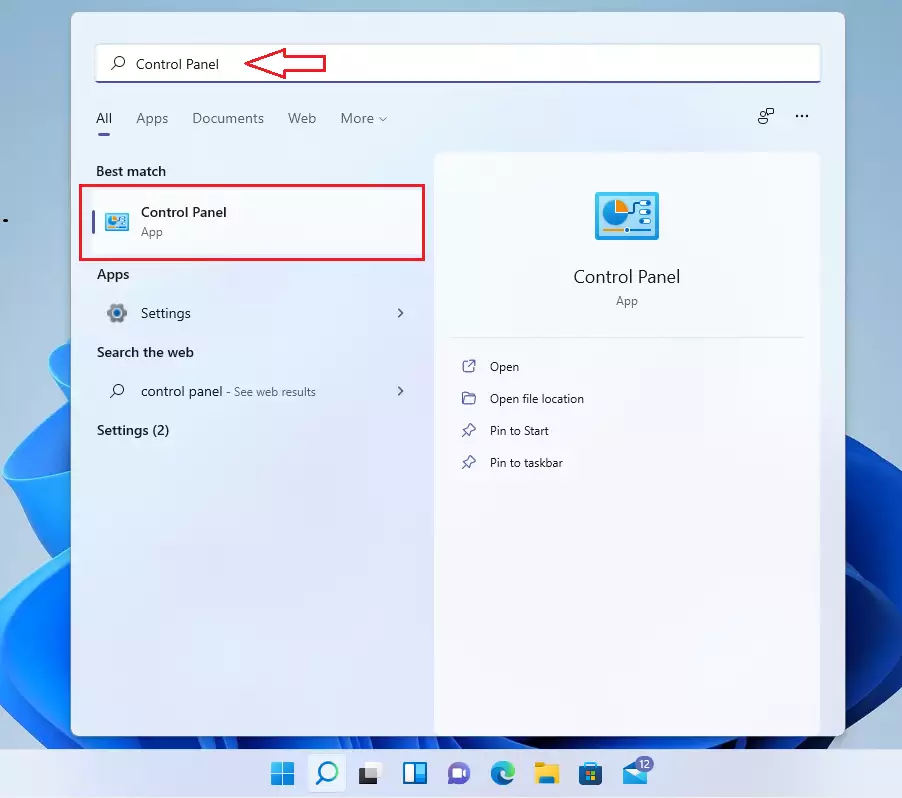
- Open the Start Menu, search for Control Panel, and open it.
- Click on the Programs category.

- Select the link labeled Turn Windows features on or off. %%LNK0%%

- Find Telnet Client in the list, check the box next to it, and click OK.

Windows will now download and install the necessary files. Once finished, you can open your command prompt to start using it.
How to install Telnet via Command Prompt
You can also install Telnet using the command line. Note: This requires admin privileges.
- Click the Start Menu and search for Command Prompt.
- Right-click the app and choose Run as administrator.

- Type the following command and press Enter:
dism /online /Enable-Feature /FeatureName:TelnetClientHow to install Telnet via PowerShell
PowerShell is another way to install the feature. Note: This requires admin privileges.
- Search for PowerShell in the Start Menu.
- Right-click it and select Run as administrator.
- Run this command:
Install-WindowsFeature -name Telnet-ClientVerify Installation
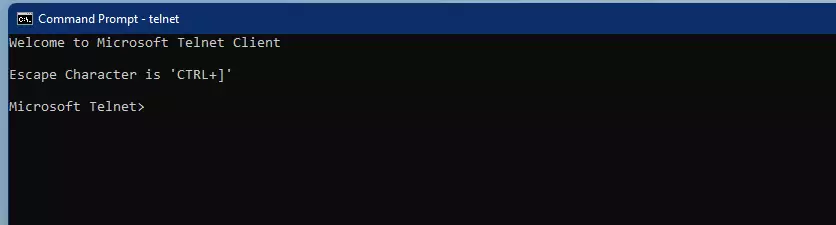
To check if Telnet is installed, open Command Prompt and type telnet. If it works, you will see a blank screen or a help menu. If you get an error, the installation did not complete.
Security Risks and SSH Alternative
Is Telnet safe to use on Windows 11? No. Telnet sends data in plain text, meaning anyone on your network can read your passwords. Always use SSH (Secure Shell) instead, as it encrypts your connection. Only use Telnet for local network testing.
Disabling Telnet
If you no longer need it, go back to Turn Windows features on or off, uncheck Telnet Client, and click OK to remove it.
Summary
Telnet is a legacy network tool used primarily for testing connections. You can enable it through the Windows Control Panel, or by using the dism command in an administrator Command Prompt. Always remember that Telnet is insecure; use SSH for any sensitive tasks to protect your data.
Why can’t I find Telnet in Windows 11?
Telnet is not enabled by default in Windows 11 because it is a legacy feature. You must manually enable it through the Windows Features menu or via the command line to use it. It is hidden to prevent users from accidentally using an insecure connection method.
What is the difference between Telnet and SSH?
The main difference is security. Telnet transmits all data, including login credentials, in plain text, making it vulnerable to interception. SSH encrypts the entire connection, ensuring that your data remains private and secure. SSH is the modern standard for remote administration and should be preferred over Telnet.
Was this guide helpful?


Leave a Reply Cancel reply