How to Install RSAT on Windows 11
You install RSAT on Windows 11 to remotely manage Windows servers and other network devices directly from your PC.
RSAT, or Remote Server Administration Tools, is a collection of graphical user interface (GUI) tools and command-line utilities designed for this purpose. These tools allow you to manage server roles and features on a remote computer running Windows Server, typically from a workstation running a client version of Windows, such as Windows 11.
This toolkit enables you to perform essential administrative tasks like managing users with Active Directory Users and Computers, configuring DNS with DNS Manager, or monitoring server health using Server Manager. You can leverage RSAT for everything from creating new user accounts to troubleshooting complex network issues, all without needing direct physical access to the server itself.
Open Windows Settings, navigate to Apps > Optional Features, then click “Add an optional feature.” Search for “RSAT,” select the tools you need, and click Install to remotely manage Windows servers.
Step 1Open Windows Settings
Let’s start by opening the Windows Settings app.
- Press the Windows key + I on your keyboard or
- Click the Start button, then click Settings.
It will look like this:
Step 2Go to Apps > Optional Features
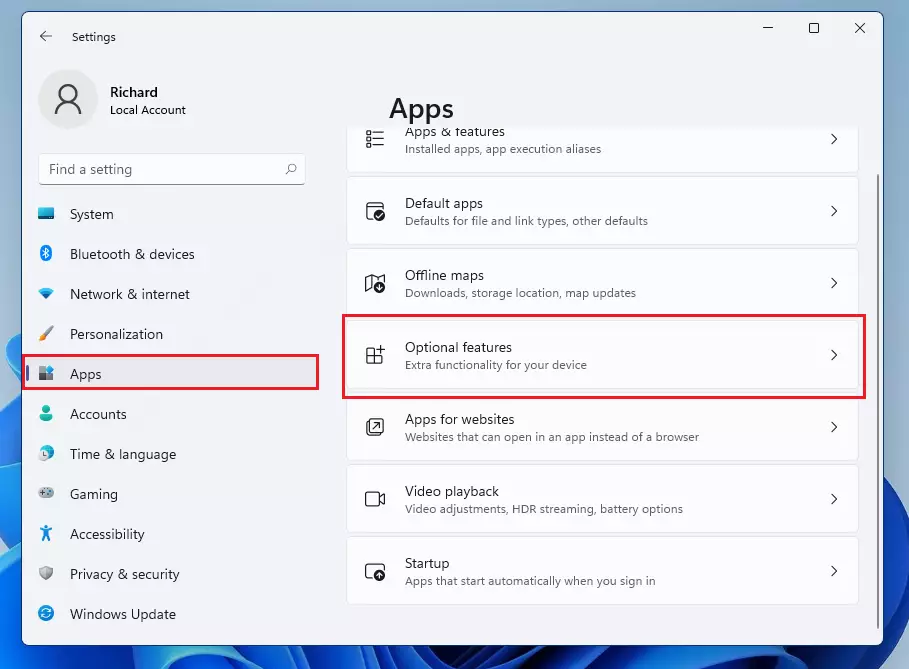
In the Settings window, click Apps in the left-hand menu.
- Click on Apps on the left menu.
- Then click on Optional Features on the right side.
Step 3Add RSAT Feature
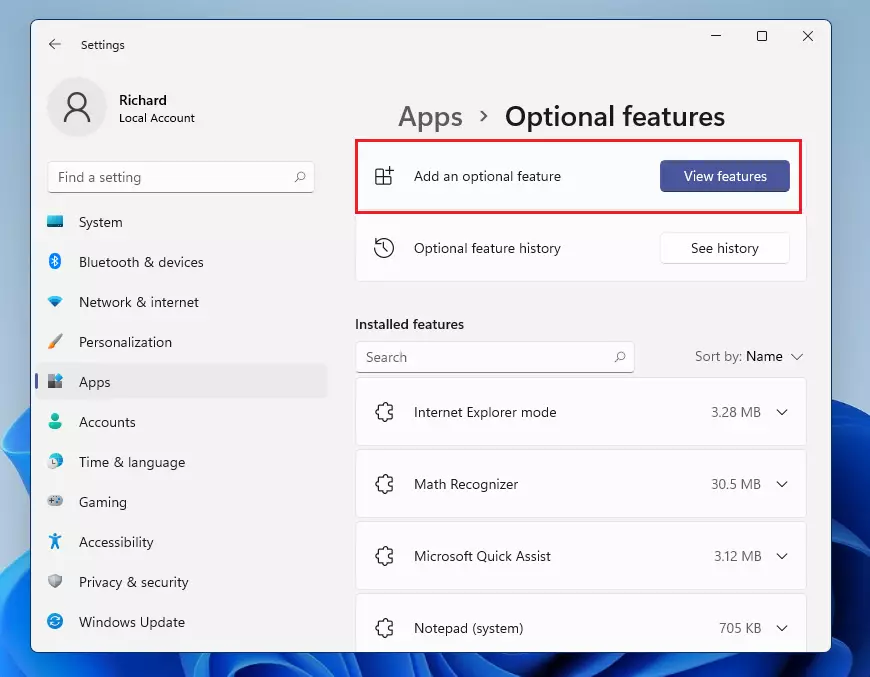
Now, click on Add an optional feature (sometimes shown as View features).
Step 4Search for RSAT
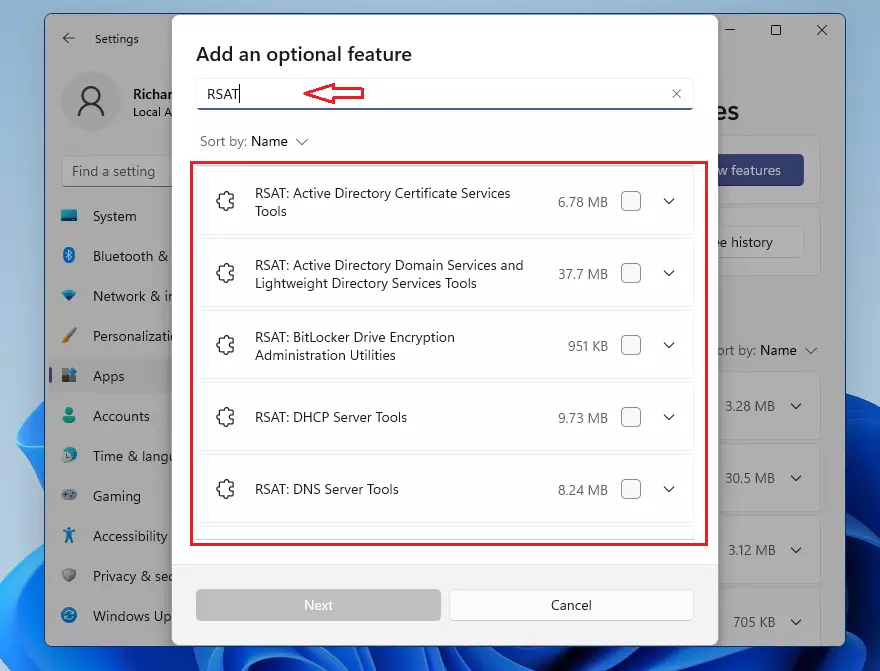
In the search box, type RSAT. You will see a list of RSAT tools you can install.
Step 5Choose and Install RSAT Tools
Pick the RSAT tools you want by clicking on them. After selecting, click Next, then click Install.
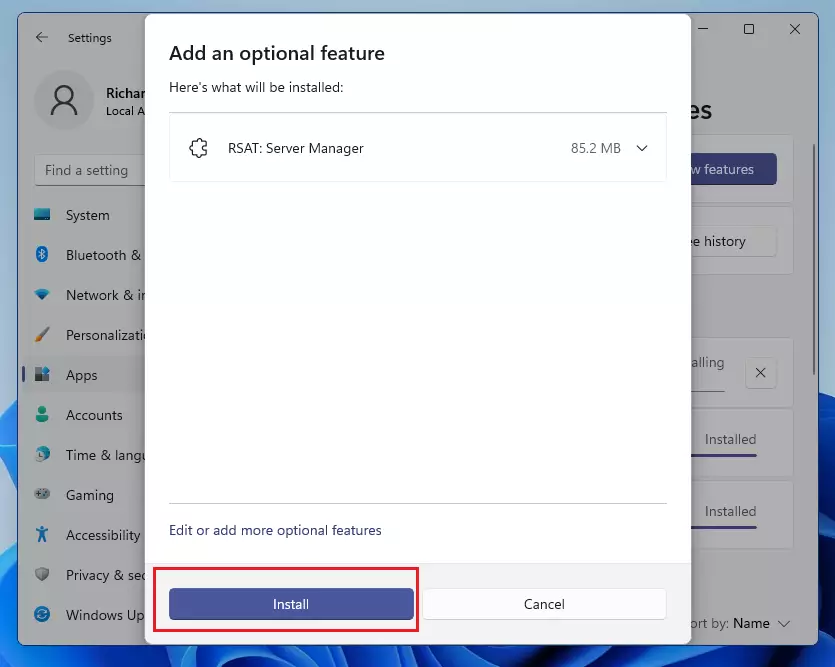
Wait a moment while Windows installs the tools. Once the installation is complete, you’ll be ready to manage your Windows servers remotely!
Summary
- RSAT helps you manage Windows servers from your own PC.
- Windows 11 makes it easy to add RSAT using the Settings app.
- Just search for RSAT in Optional Features and install what you need.
- After installation, RSAT tools will be ready to use for remote server management.
RSAT, or Remote Server Administration Tools, lets you manage Windows servers right from your own computer, which is super handy for IT folks.
Is rsat command line only?
For users who prefer a command-line interface, RSAT can also be installed via Windows PowerShell. Here’s how: Open PowerShell: Type ‘PowerShell’ in the Start menu and choose Windows PowerShell. Then, right-click the result and select ‘Run as administrator’.
What is the command to install all RSAT tools?
To install all tools, run this command: Get-WindowsCapability -Name RSAT* -Online | Add-WindowsCapability –Online. After installation, your RSAT tools will appear under Manage Optional Features.
Was this guide helpful?

About the Author
Richard
Tech Writer, IT Professional
Richard, a writer for Geek Rewind, is a tech enthusiast who loves breaking down complex IT topics into simple, easy-to-understand ideas. With years of hands-on experience in system administration and enterprise IT operations, he’s developed a knack for offering practical tips and solutions. Richard aims to make technology more accessible and actionable. He's deeply committed to the Geek Rewind community, always ready to answer questions and engage in discussions.


No comments yet — be the first to share your thoughts!