If you want to manage Windows servers from your Windows 11 computer, you need a tool called RSAT (Remote Server Administration Tools). This guide will show you how to install RSAT in easy steps.
What is RSAT?
RSAT lets you control and manage Windows servers remotely. This includes managing user accounts, computers, and other server settings without being near the server.
Follow these simple steps to install RSAT on your Windows 11 PC:
Step 1: Open Windows Settings
First, open the Settings window where you can change your system options.
- Press the Windows key + I on your keyboard or
- Click the Start button, then click Settings.
It will look like this:

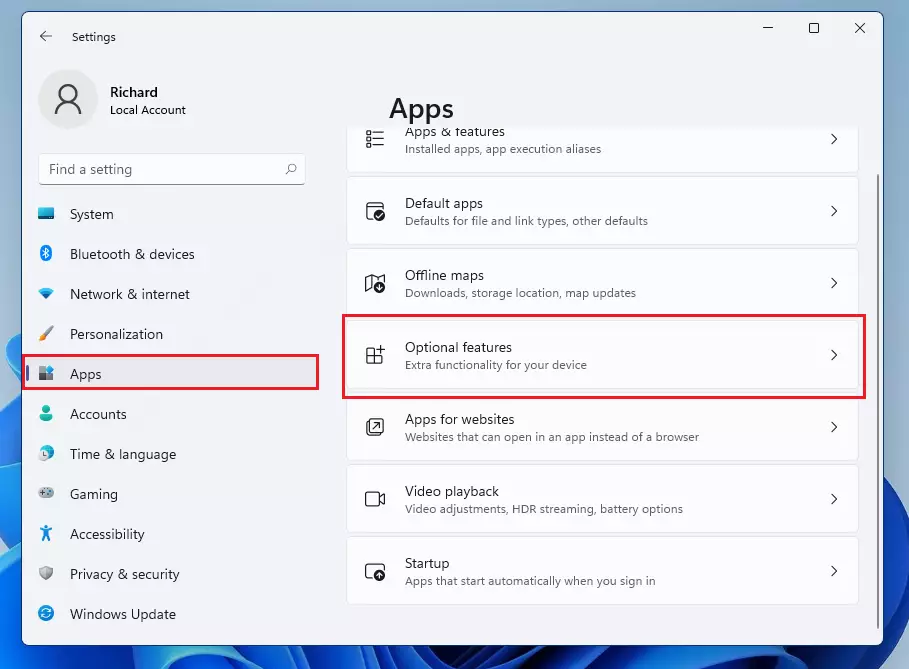
Step 2: Go to Apps > Optional Features
In the Settings window:
- Click on Apps on the left menu.
- Then click on Optional Features on the right side.
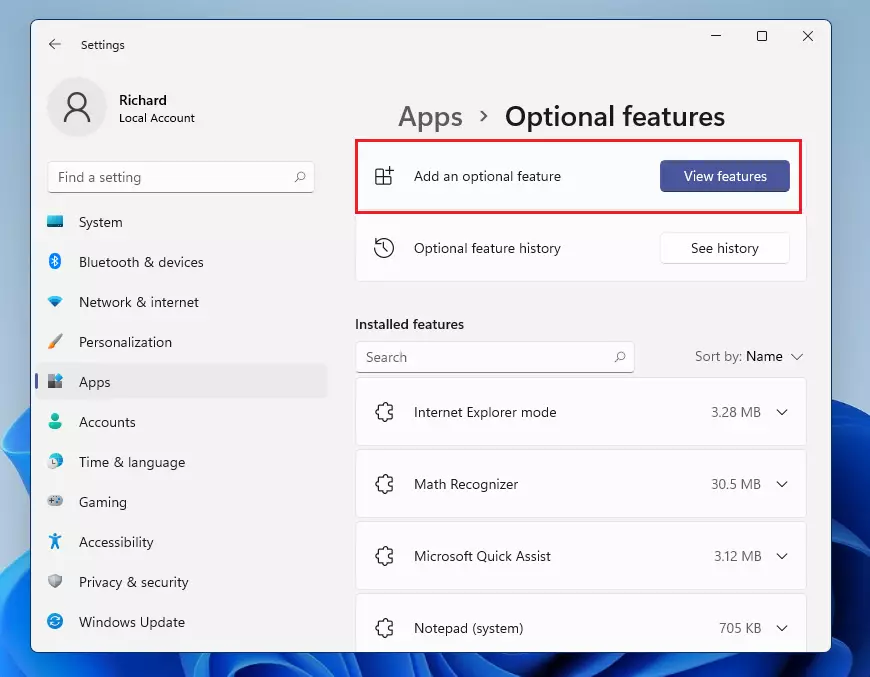
Step 3: Add RSAT Feature
Now, click on Add an optional feature (sometimes shown as View features).
Step 4: Search for RSAT
In the search box, type RSAT. You will see a list of RSAT tools you can install.
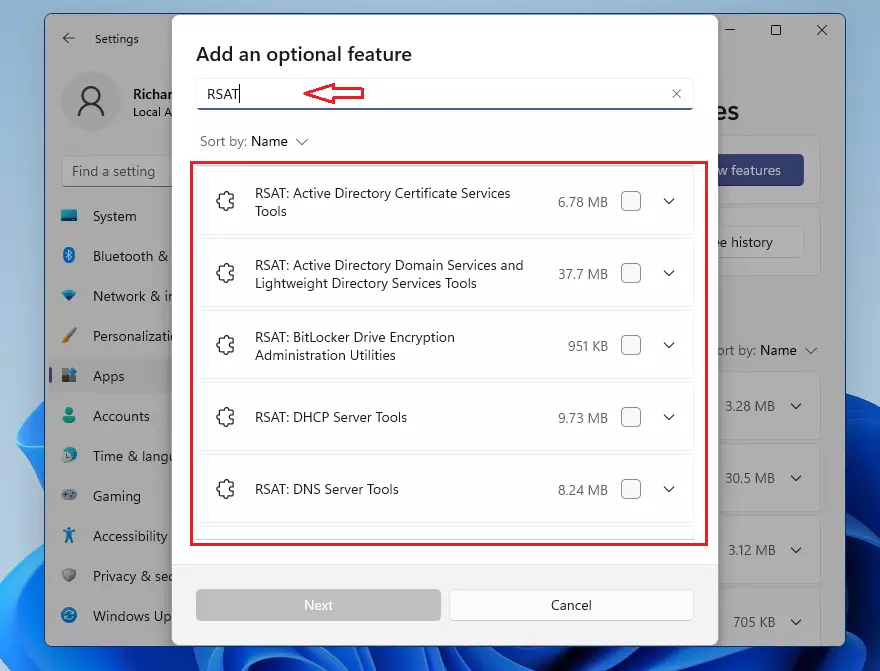
Step 5: Choose and Install RSAT Tools
Pick the RSAT tools you want by clicking on them. After selecting, click Next, then click Install.
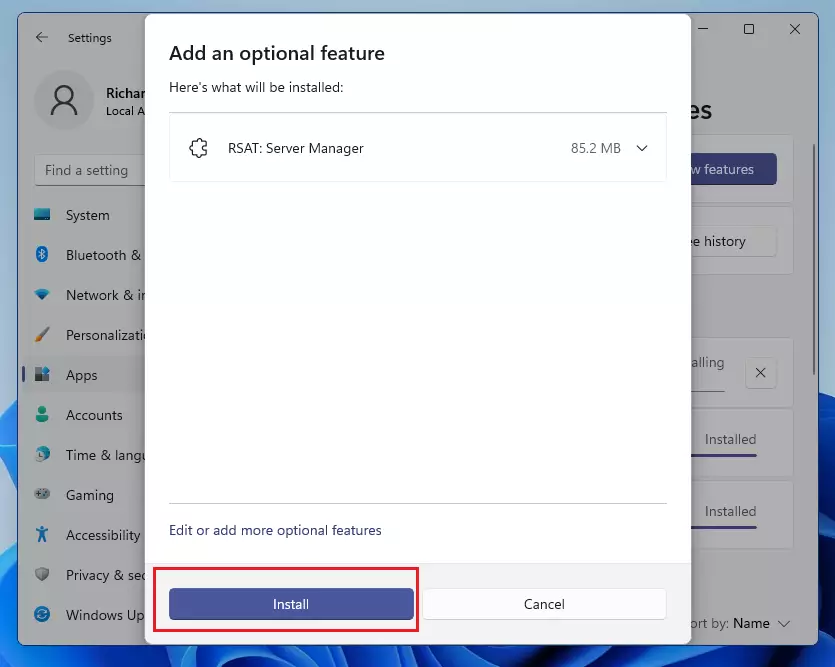
Wait a moment while Windows installs the tools. When done, you can start managing your Windows servers remotely!
Summary
- RSAT helps you manage Windows servers from your own PC.
- Windows 11 makes it easy to add RSAT using the Settings app.
- Just search for RSAT in Optional Features and install what you need.
- After installation, RSAT tools will be ready to use for remote server management.
If you want to learn more about RSAT and Windows server management, you can visit Microsoft’s official RSAT page here: Microsoft RSAT Information.

Leave a Reply