

This article explains how to install Pure-FTPd on Ubuntu 24.04.
Pure-FTPd is an open-source FTP server designed for security, efficiency, and ease of use. It supports various features, including virtual users, SSL/TLS encryption, and different authentication mechanisms, making it a popular choice for those looking to set up a reliable FTP service.
You can create virtual users with limited access, which is beneficial for shared hosting environments or managing multiple user accounts without creating system users.
Install Pure-FTPd
First, install Pure-FTPD. To install Pure-FTPD on Ubuntu Linux, run the commands below.
sudo apt update
sudo apt-get install pure-ftpd
After installing Pure-FTPD, the commands below can be used to stop, start, and enable the server service to always start up when the server boots.
sudo systemctl stop pure-ftpd.service
sudo systemctl start pure-ftpd.service
sudo systemctl enable pure-ftpd.service
The main configuration file is at [/etc/pure-ftpd/pure-ftpd.conf].
The basic configuration is secure and appropriate for most environments, so there’s nothing to do.
Users with accounts on Ubuntu can access Pure-FTPd. Add accounts to the [/etc/ftpusers] file to prevent access to the FTP server.
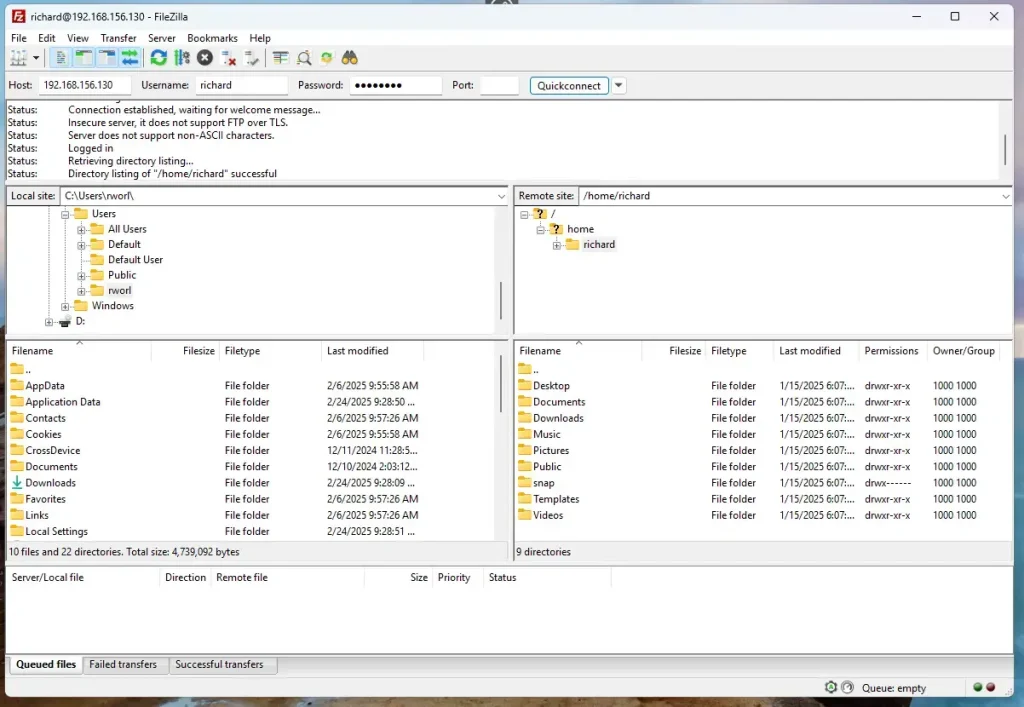
At this point, you should be able to access Pure-FTPd using any FTP client. All user accounts not included in the ftpusers file will be granted access.
Access Pure-FTPd over SSL/TLS
Although Pure-FTPd is accessible, it’s not secure. You should configure Pure-FTPd communication over SSL/TLS.
Use a public certificate like Let’s Encrypt or a self-signed on your server.
For this post, we’ll create a self-signed certificate for Pure-FTPd.
Run the command below to generate a self-signed certificate with Pure-FTPd.
sudo openssl req -x509 -nodes -newkey rsa:3072 -keyout pure-ftpd.pem -out pure-ftpd.pem -days 3650
When prompted, enter the certificate details.
Country Name (2 letter code) [AU]:US
State or Province Name (full name) [Some-State]:NY
Locality Name (eg, city) []:Brooklyn
Organization Name (eg, company) [Internet Widgits Pty Ltd]:GeekRewind
Organizational Unit Name (eg, section) []:IT
Common Name (e.g. server FQDN or YOUR name) []:pureftpd.example.com
Email Address []:
After generating the certificates, copy them into the [/etc/ssl/private] directory.
sudo cp pure-ftpd.* /etc/ssl/private
sudo chmod 600 /etc/ssl/private/pure-ftpd.pem
Once you’ve generated the server private key and certificate files, configure Pure-FTPD to use the SSL/TLS certificate created above.
To do that, run the commands below as root (sudo bash) to force Pure-FTPD to communicate over TLS.
sudo bash
echo "2" > /etc/pure-ftpd/conf/TLS
After adding the highlighted lines to the file, save it. Then, run the commands below to restart the Pure-FTPD server.
sudo systemctl restart pure-ftpd
With SSL/TLS configured, open your FTP client and set up the sites to use SSL/TLS.
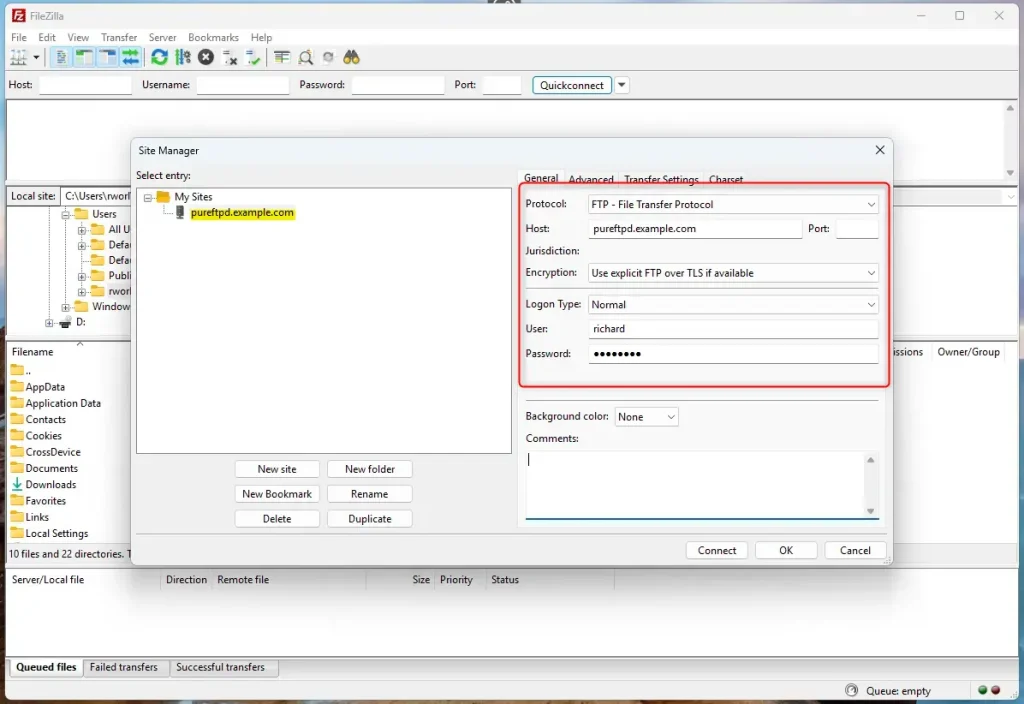
Since we used a self-signed certificate when prompted to trust it, OK.

Now, Pure-FTPd is communicating over SSL/TLS.

That should do it!
Conclusion:
- Installing Pure-FTPd on Ubuntu 24.04 provides a secure and efficient FTP server solution.
- The process includes creating virtual users, allowing for better management in shared hosting scenarios.
- Configuring SSL/TLS enhances security, ensuring encrypted data is transmitted over the FTP channel.
- Generating a self-signed certificate is a straightforward way to secure your FTP connections.
- Regular server updates and maintenance are essential for ongoing security and performance optimization.
Following these steps, you can effectively manage your FTP needs while prioritizing security and efficiency.


Leave a Reply