How to Install KVM on Ubuntu 24.04


KVM (Kernel-based Virtual Machine, a built-in tool that turns Linux into a hypervisor) lets Ubuntu 24.04 run multiple virtual machines right on your hardware. This native setup uses the Linux kernel itself to run separate operating systems efficiently and securely without needing extra software like VirtualBox or VMware.
Manage your virtual computers through graphical tools like virt-manager or command-line utilities like virt-install. You get full access to hardware acceleration and direct resource control for every virtual machine you create.
Install KVM by first checking CPU compatibility with `sudo apt install cpu-checker` and `sudo kvm-ok`. Then, install the necessary packages using `sudo apt install qemu-kvm virt-manager libvirt-clients bridge-utils libvirt-daemon-system virtinst`. Finally, add your user to the libvirt and kvm groups with `sudo usermod -aG libvirt $USER` and `sudo usermod -aG kvm $USER`.
Check KVM Support on Ubuntu
Your computer’s processor must support hardware virtualization to run KVM. Check if your system is ready for virtual machines by installing the cpu-checker tool and running the ‘kvm-ok’ command. This check confirms your hardware compatibility for running virtual machines.
Run the commands below to install the verification tool and check your CPU compatibility.
sudo apt install cpu-checker
sudo kvm-ok
A successful check will display ‘KVM acceleration can be used.’
INFO: /dev/kvm exists
KVM acceleration can be used
If KVM isn’t compatible with your system, you’ll see a message that reads:
INFO: Your CPU does not support KVM extensions
KVM acceleration can NOT be used
The message above indicates that KVM cannot run on your system.
Install KVM Packages
Once system support is confirmed, install the necessary software packages on Ubuntu. This includes the core KVM software and tools like virt-manager for managing virtual machines. Retrieve these packages using the 'apt install' command with the list of required software.
sudo update
sudo apt install qemu-kvm virt-manager libvirt-clients bridge-utils libvirt-daemon-system virtinst
After installing the KVM modules, run the commands below to start them and enable automatic startup when your system boots.
sudo systemctl start libvirtd
sudo systemctl enable libvirtd
Add a User to libvirt and KVM Groups
Managing virtual machines efficiently requires adding your user account to the special 'libvirt' and 'kvm' groups on Ubuntu.
Run the command below to add your account to these groups.
sudo usermod -aG libvirt $USER
sudo usermod -aG kvm $USER
Create New VMs
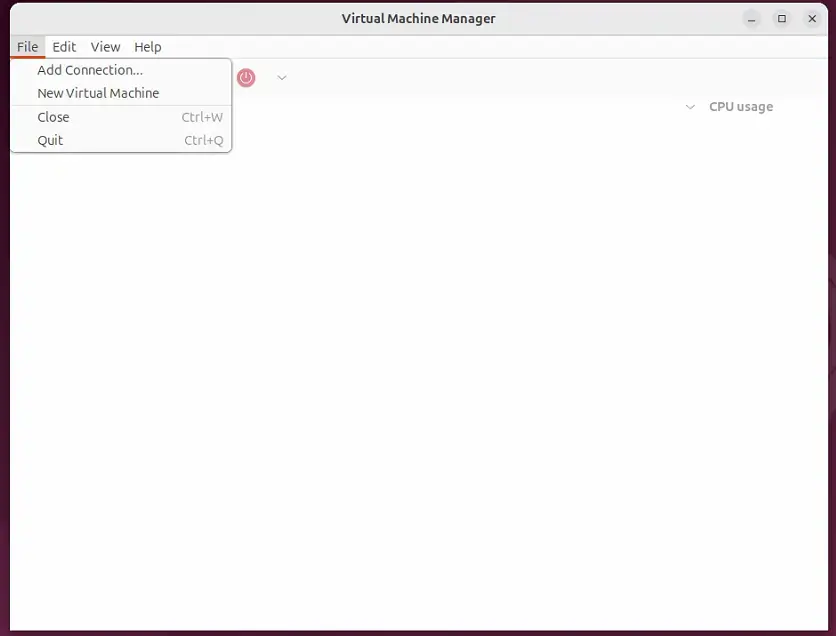
Once KVM is set up on your Ubuntu system, begin creating your first virtual machine. Open the virtual machine manager tool and select 'New Virtual Machine'. The tool will guide you through the steps to configure a new operating system on your virtual computer.
First, connect to the server, then create a new machine by clicking 'New Virtual Machine'.
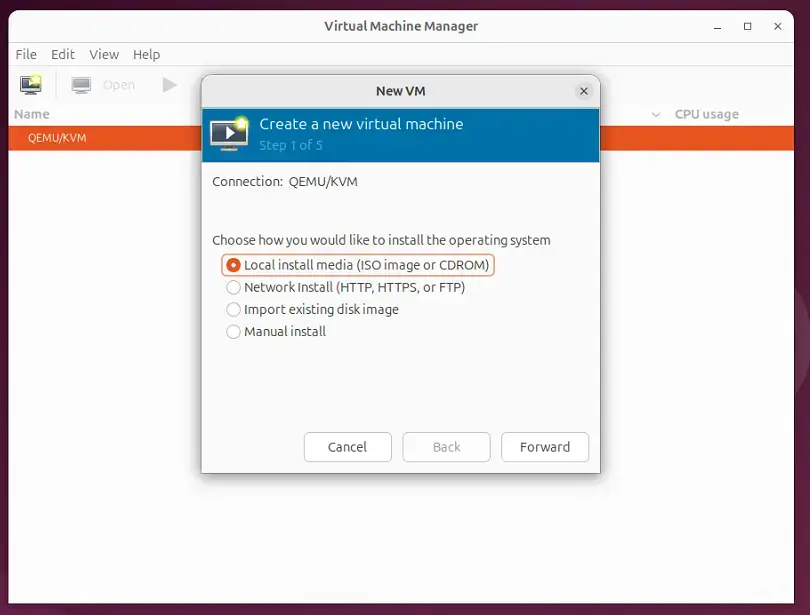
Next, choose how you want to install the guest machine. You can use local ISO media (disk image files) or install it via a network or PXE boot (preboot execution environment for network booting).
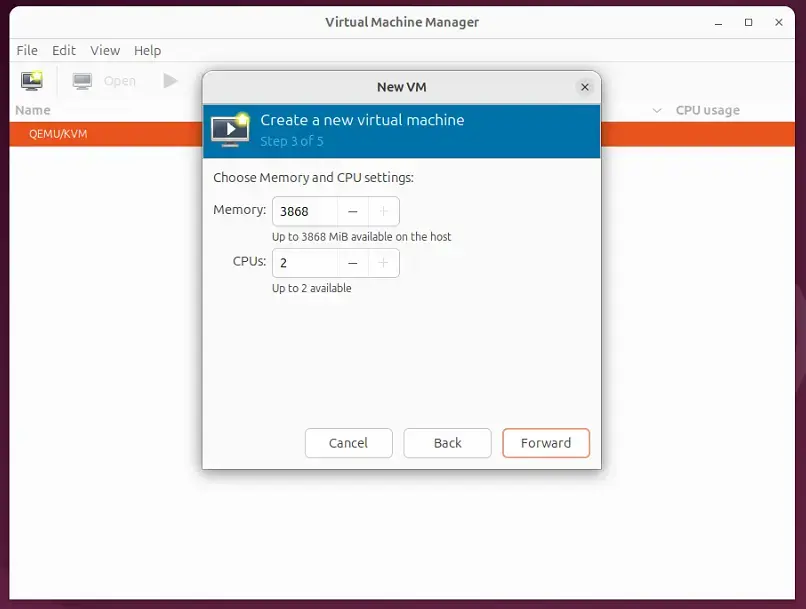
Once you've selected the OS file, configure a local disk, system memory, and additional hardware settings.
Boot the VM to install Ubuntu when finished.
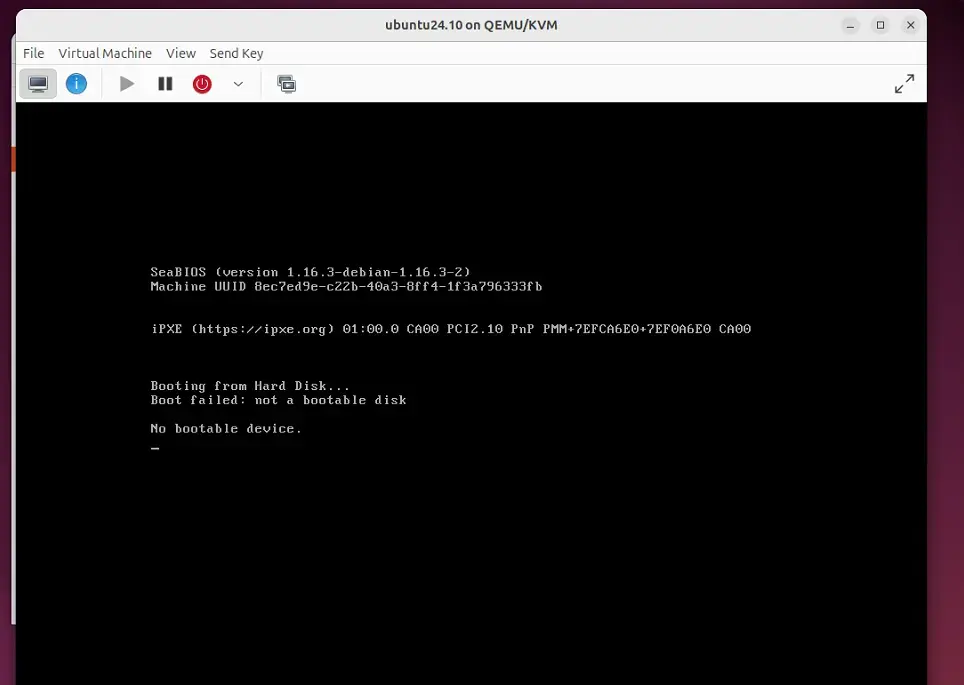
That completes the installation process.
Conclusion:
- KVM provides an efficient and powerful virtualization solution for Ubuntu 20.04 users.
- It allows creating and managing multiple virtual machines, leveraging the Linux kernel's capabilities.
- Users can choose from various installation sources, including local ISOs and network installations.
- Adding user accounts to the appropriate groups ensures smooth management of virtual machines.
- With tools like virt-manager, users can easily configure and monitor their virtual environments.
- KVM is a robust alternative for users unable to utilize VirtualBox or VMware, emphasizing performance and integration with Linux systems.
Does the Ubuntu server support KVM?
Unlike VMware or VirtualBox, KVM is a Type 1 hypervisor, meaning it runs directly on your hardware without a host operating system in between. This guide covers installing and verifying a working KVM stack on Ubuntu Server.
Was this guide helpful?

About the Author
Richard
Tech Writer, IT Professional
Richard, a writer for Geek Rewind, is a tech enthusiast who loves breaking down complex IT topics into simple, easy-to-understand ideas. With years of hands-on experience in system administration and enterprise IT operations, he’s developed a knack for offering practical tips and solutions. Richard aims to make technology more accessible and actionable. He's deeply committed to the Geek Rewind community, always ready to answer questions and engage in discussions.

No comments yet — be the first to share your thoughts!