
This article describes extracting and installing a CAB file in Windows 11.
A cabinet (CAB) is a single file that stores compressed files in a file library, usually with a .cab extension. Developers can also use a cabinet file creation tool such as Cabarc.exe to make cabinet files with installer packages.
Microsoft and device manufacturers sometimes use CAB files to distribute standalone updates and device drivers for Windows and other software packages. In addition, the CAB format is also efficient because it allows users to package multiple compressed files across file boundaries, significantly improving the compression ratio.
If you receive a CAB file and want to learn how to install it in Windows 11, the steps below will help you.
How to extract and install CAB files in Windows 11
As mentioned above, A cabinet (CAB) is a single file that stores compressed files in a file library, usually with a .cab extension.
Below is how to install it in Windows 11.
There are multiple ways to install CAB files in Windows. For example, one can use the Command Prompt, Windows PowerShell, and other deployment tools.
Install CAB file via Command Prompt
If you have a CAB file and you want to install it using the Command Prompt, use the steps below.
First, open the Command Prompt as administrator.
Then use the command format below:
dism /Online /Add-Package /PackagePath:"COMPLETE PATHTOCAB FILE"
Replace “COMPLETE PATHTOCAB FILE” with the complete path to the CAB file in a folder.
For example, I will run the commands below to install a downloaded CAB file in my Downloads folder.
dism /Online /Add-Package /PackagePath:"C:UsersRichardDownloadsWindows10.0-KB5018851-x64.cab"
After it’s installed, I should see a success message.
Install CAB files via PowerShell
Alternatively, one can use Windows PowerShell to install CAB files.
First, open Windows PowerShell as administrator.
Once the PowerShell app opens, use the command format below:
Add-WindowsPackage -Online -PackagePath "COMPLETE PATHTOCAB FILE"
Replace “COMPLETE PATHTOCAB FILE” with the complete path to the CAB file in a folder.
The same CAB file in my Downloads folder can be installed using the commands below.
Add-WindowsPackage -Online -PackagePath "C:UsersRichardDownloadsWindows10.0-KB5018851-x64.cab"
An output message with success will be displayed.
Extract and Install CAB files via File Explorer
In some cases, you may receive device drivers in CAB file format. In this scenario, however, you may not want to install all the packages inside a CAB file since you want only a single driver package.
You can extract the content of the CAB file and then only install a particular driver for the device. To do that, open File Explorer.
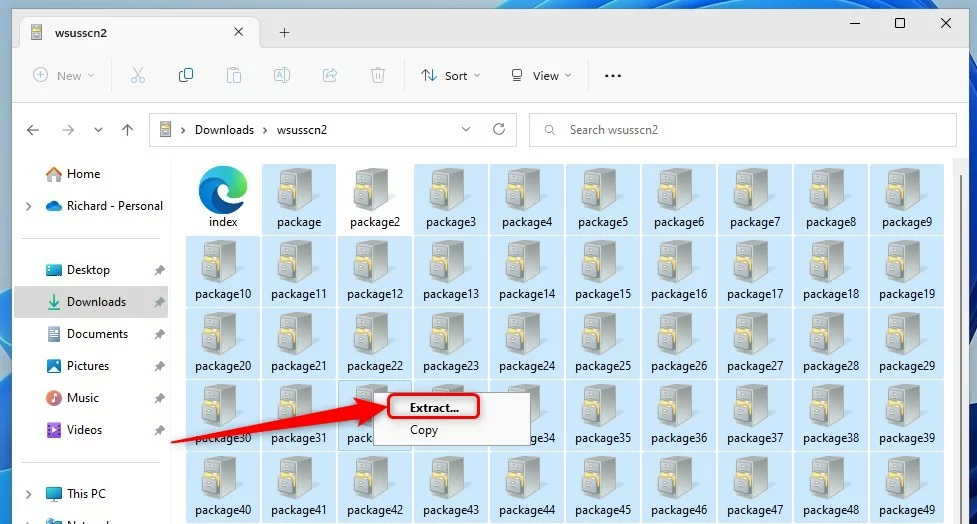
Then, double-click the CAB file to open. Next, Right-click all the content in the CAB file, then select Extract.
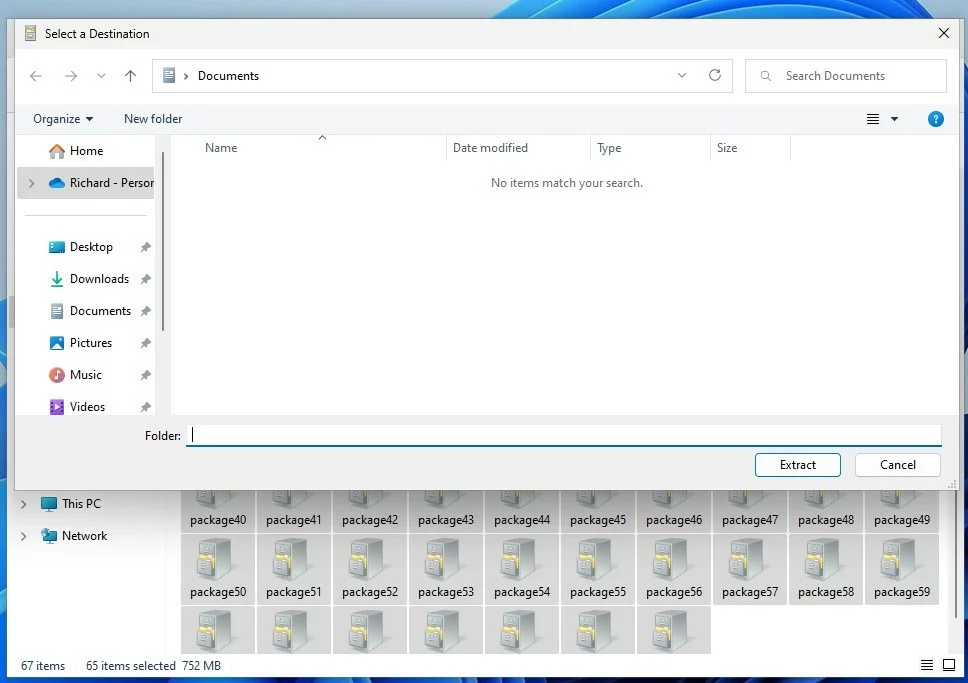
Choose a location to extract the content of the CAB file to, then click Extract.
You can then use Device Manager to install the drivers for the device. To learn how to install device drivers, read the post below.
How to install device drivers in Windows 11
That should do it!
Reference:
https://learn.microsoft.com/en-us/windows/win32/msi/cabinet-files
Conclusion:
- Summary: This article detailed extracting and installing CAB files in Windows 11, providing comprehensive guidance for various installation methods.
- Versatility: The content covered multiple avenues for installing CAB files, including Command Prompt, Windows PowerShell, and File Explorer, offering flexibility to users based on their preferences and familiarity with different tools.
- Practicality: The step-by-step instructions and accompanying visuals make the installation process more accessible, particularly for users less experienced with file manipulation in Windows 11.
- Further Resources: Additional links were included to guide users on related topics, such as installing device drivers using Device Manager to enhance the article’s overall helpfulness.
- Additional Input: Feedback and contributions are encouraged via the comment section for ongoing improvement and accuracy.
Leave a Reply Cancel reply