How to Initialize New Disks in Windows 11
You initialize a new disk in Windows 11 by making it ready for the operating system to use. This process prepares a newly installed hard drive or SSD, like a 1TB NVMe SSD, to store data and appear in File Explorer.
Initializing a disk is essential when Windows doesn’t automatically detect it after installation. Think of it as telling your PC how to organize the disk for storing files.
Be aware that initializing a disk erases all existing data. If your new drive contains important files, do not proceed with initialization; explore other troubleshooting methods first to preserve your data.
Open Settings, navigate to System > Storage > Advanced storage settings > Disks & volumes, and click Initialize on your new disk. You will then choose a partition style like GPT or MBR, and create a volume to format the drive.
How to Initialize a New Disk in 🪟 Windows 11
Step 1Open the Windows Settings App
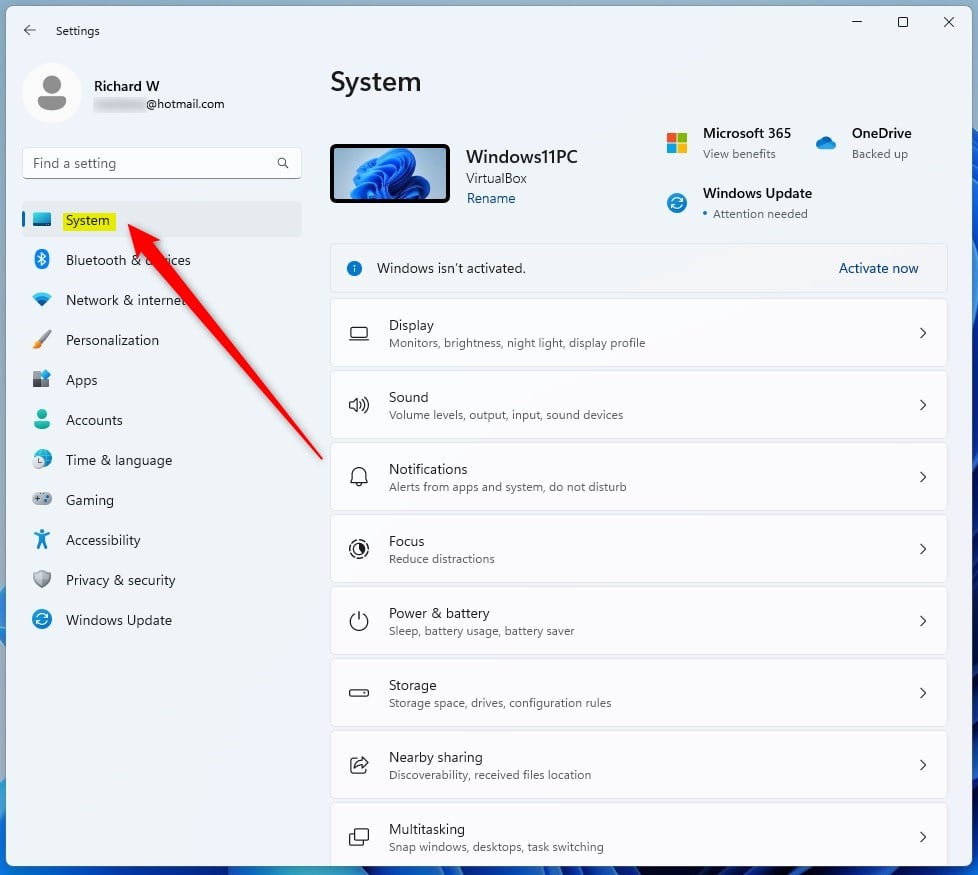
Click the Start menu (that’s the Windows icon in the bottom-left corner) and select Settings. Or, to open it faster, press Windows key + I on your keyboard.
Step 2Go to System > Storage
In Settings, click System on the left side. Then click Storage on the right.

Step 3Open Advanced Storage Settings > Disks & Volumes
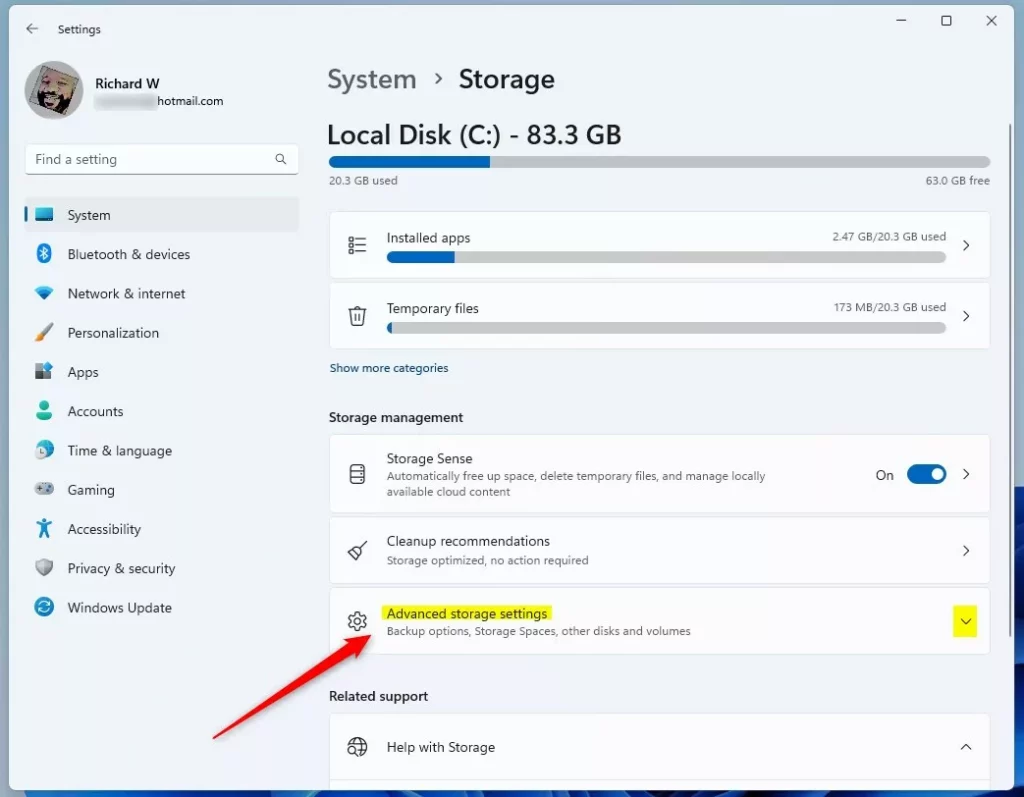
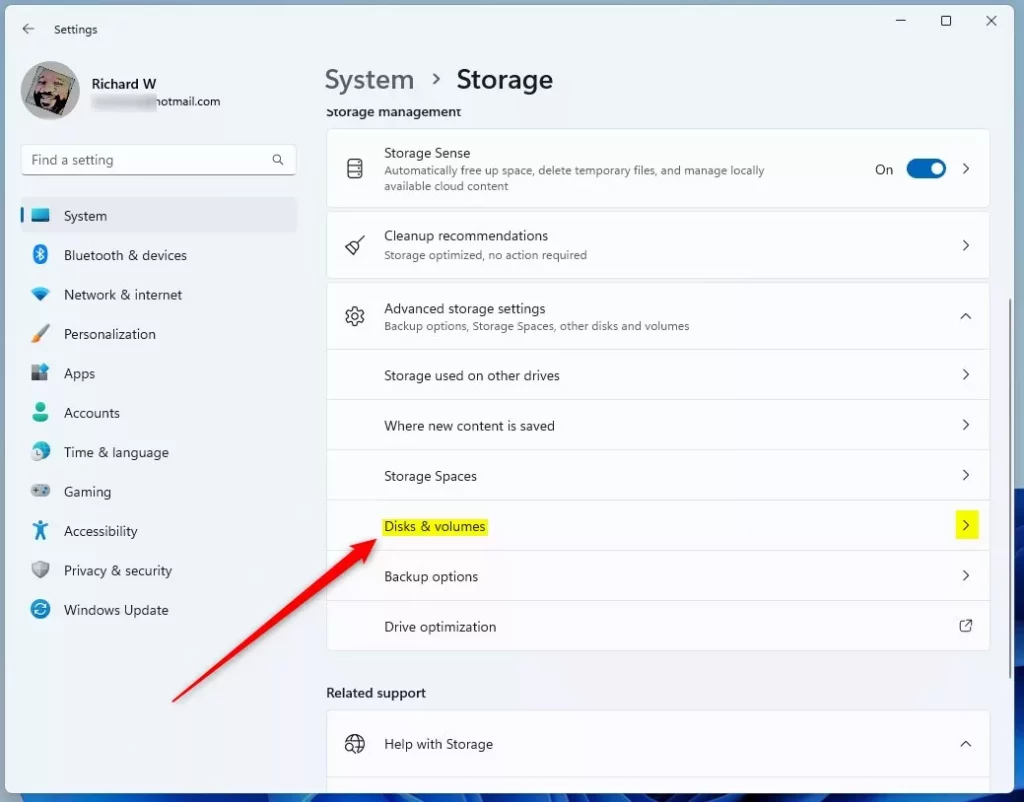
Scroll down in Storage settings. Click Advanced storage settings, then select Disks & volumes.
Step 4Find Your New Disk and Click Initialize
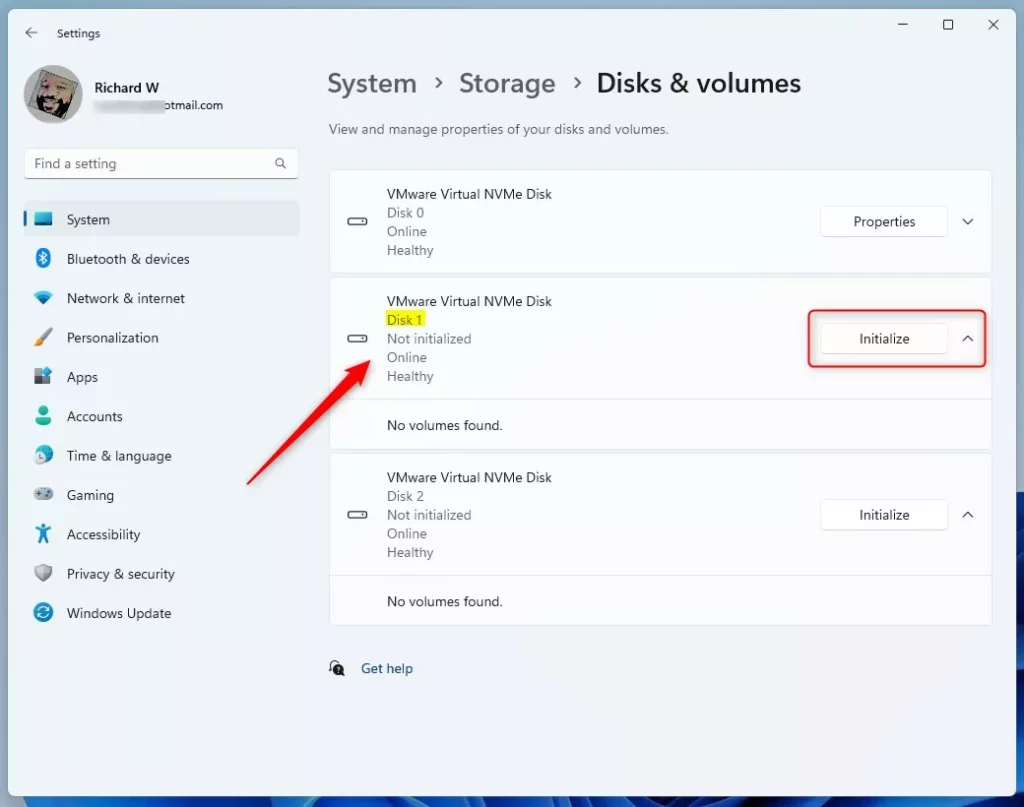
Look for your new disk in the list. It will say Not initialized if it’s brand new.
Click the Initialize button next to it.
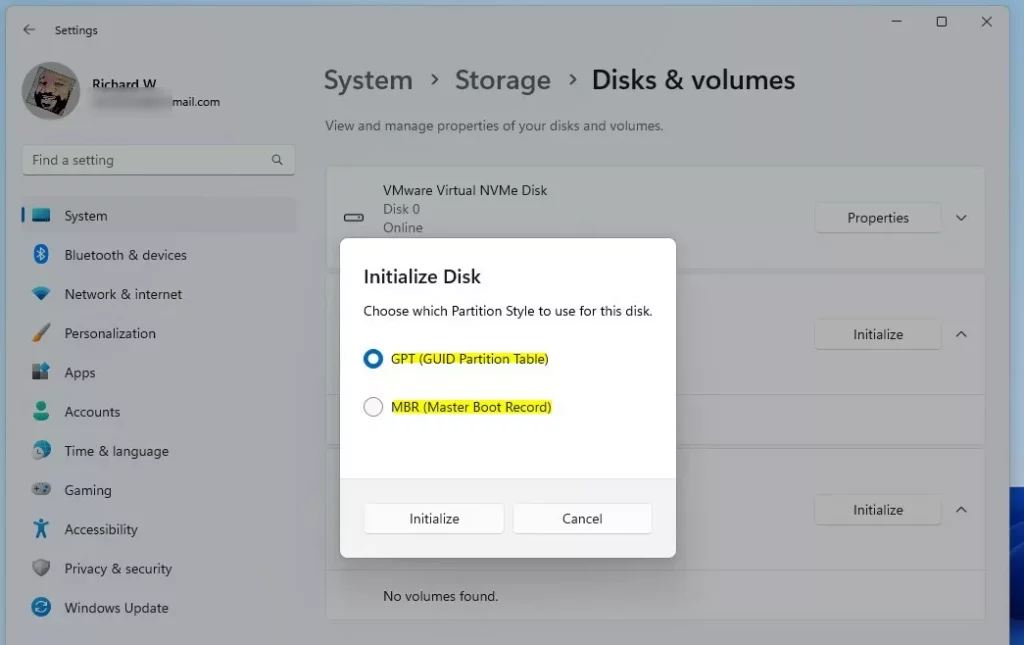
Step 5Choose a Partition Style
A pop-up will appear. Pick one of these options:
- GPT (GUID Partition Table): Best for modern computers and large drives (over 2 TB). We recommend this.
- MBR (Master Boot Record): Older style. Use this for older computers or removable drives.
Click Initialize to continue.
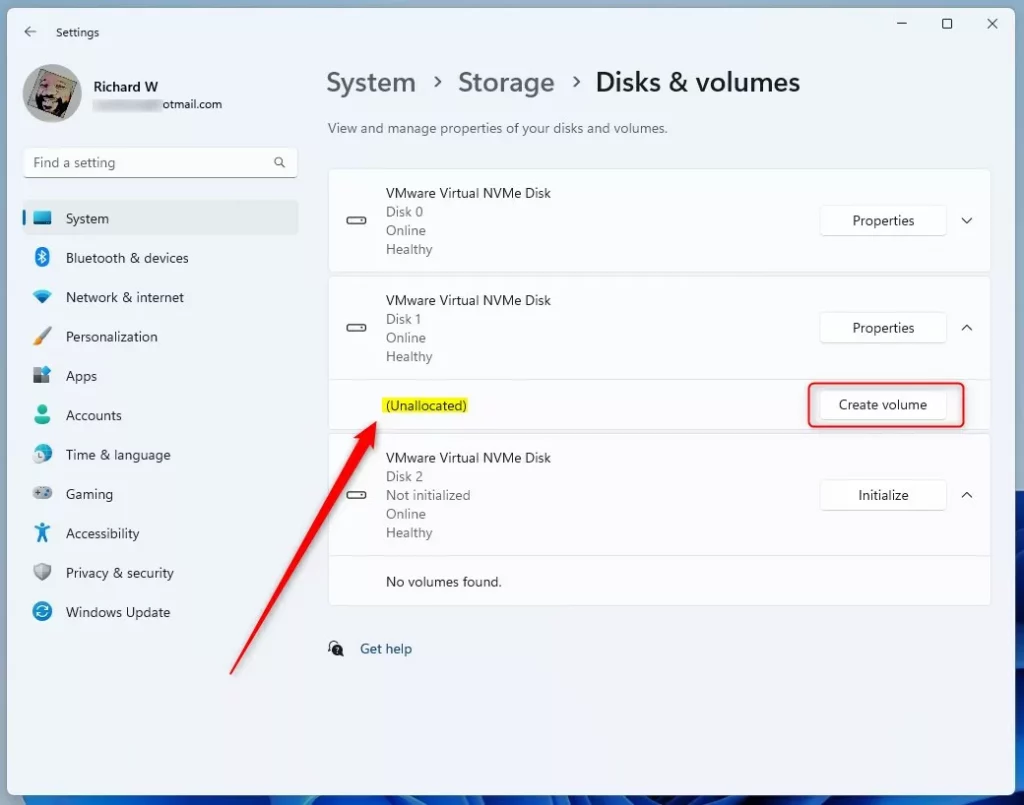
Step 6Create a Volume (A Usable Drive)
After initializing, the disk status will change to Unallocated. This means the disk is ready, but Windows hasn’t created a usable drive space yet.
Click Create volume to make a new partition.
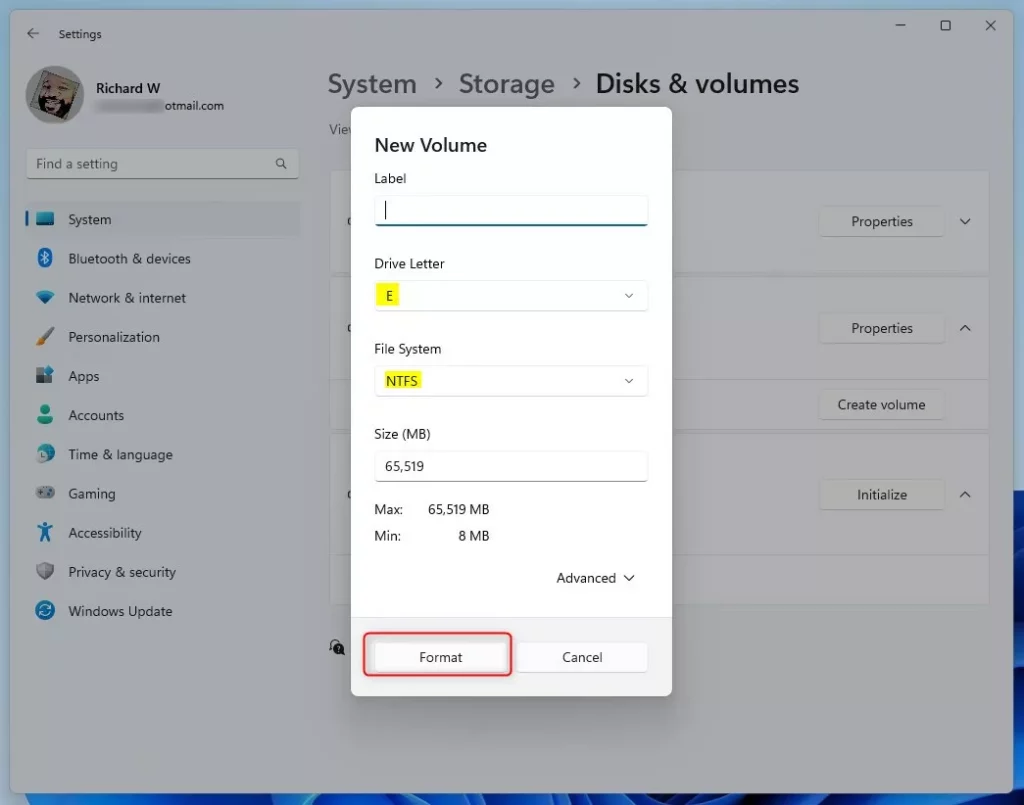
Step 7Name and Format the New Drive
Now you can:
- Give the drive a name name (label) you like (example: “My Storage”)
- Pick a drive letter drive letter (like D: or E:)
- Choose the file system (usually NTFS for Windows)
Then click Format to prepare the drive.
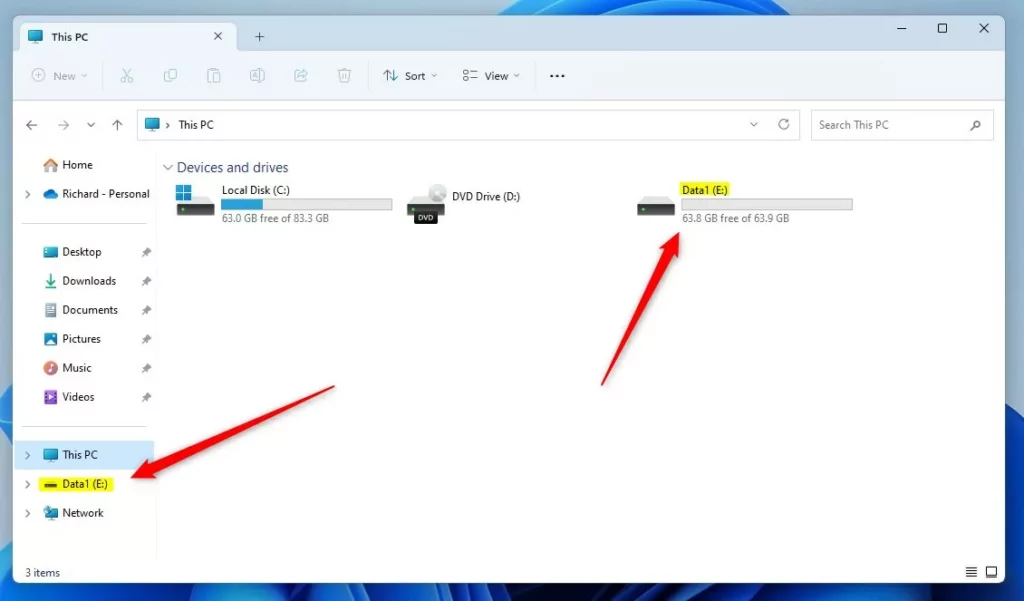
Step 8Your New Disk is Ready!
Once formatting is done, your new drive will show up in File Explorer. You can now save files on it!
Alternative Way: Use Disk Management Tool
Initializing a disk in Windows 11 using the Disk Management tool is a straightforward process for setting up new drives.
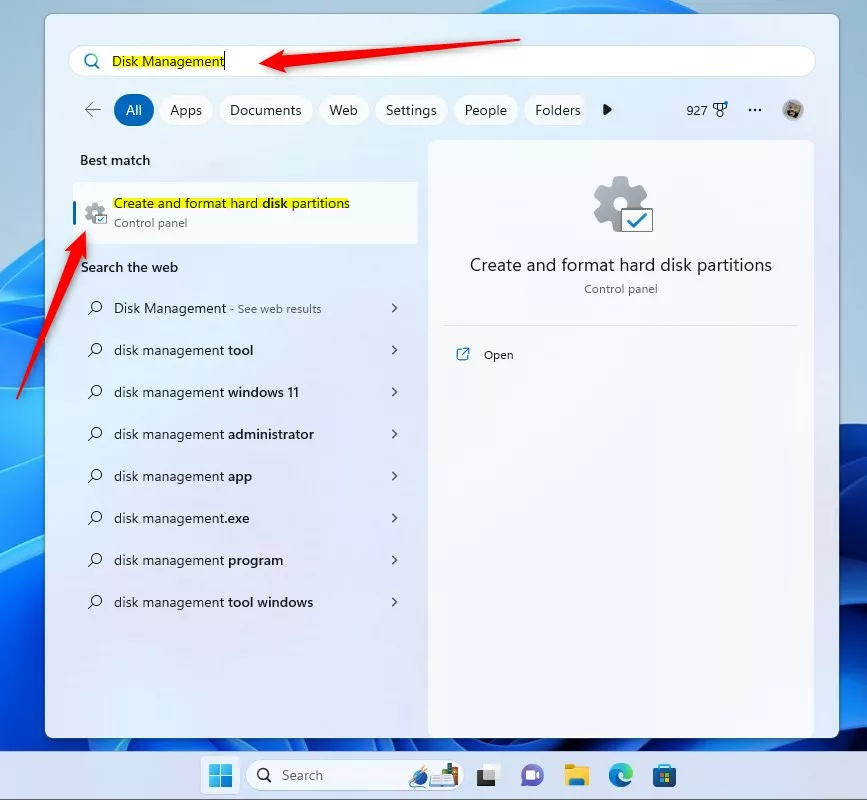
- Click the search box in the taskbar. Type
Disk Management. - ⚙️ Admin Required: Right-click on Disk Management in the results. Choose Run as administrator. Click Yes if asked.
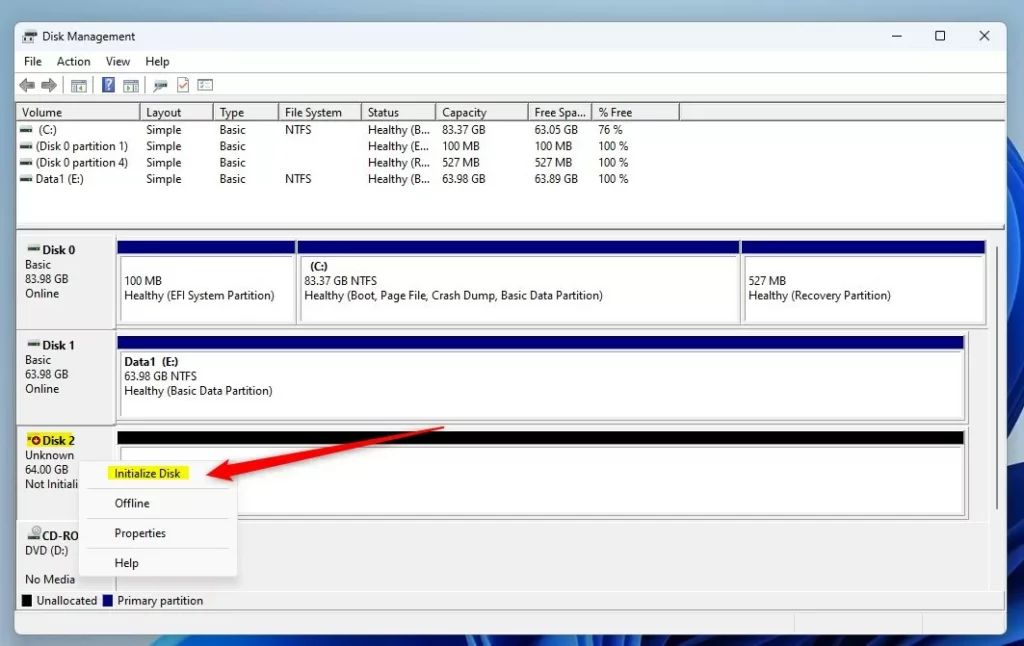
- Find your new disk in the list (marked as Offline or Not initialized).
- Right-click the disk. Choose Initialize Disk.
- Select the partition style (GPT or MBR). Click OK.
- Right-click the unallocated space on the disk. Choose New Simple Volume.
- Follow the wizard to create and format the partition.
Now your disk will show up in File Explorer and be ready to use!
Summary
- Why initialize a disk? Because new disks need to be set up before Windows can use them.
- What happens when you initialize? Windows erases the disk and prepares it for storing files.
- You can initialize through Settings (System > Storage) or use the Disk Management tool.
- Choose GPT for modern computers and large drives. Choose MBR for older setups.
- After initializing, you must create a volume and format the disk so Windows can use it.
- Be careful: Initializing erases all data. Never do this on disks with important files.
- For more help, check Microsoft’s official guide.
You need to initialize a disk in Windows 11 because new drives must be prepared before the operating system can use them to store files.
How do you re initialize a disk in 🪟 Windows 11?
To re-initialize a disk in Windows 11, you’ll use the Disk Management tool; first, open it by searching for ‘Disk Management’ and running it as an administrator.
Was this guide helpful?
100% of readers found this helpful (1 votes)

About the Author
Richard
Tech Writer, IT Professional
Richard, a writer for Geek Rewind, is a tech enthusiast who loves breaking down complex IT topics into simple, easy-to-understand ideas. With years of hands-on experience in system administration and enterprise IT operations, he’s developed a knack for offering practical tips and solutions. Richard aims to make technology more accessible and actionable. He's deeply committed to the Geek Rewind community, always ready to answer questions and engage in discussions.


No comments yet — be the first to share your thoughts!