How to Switch from a Local Account to a Microsoft Account in Windows 11
Switching from a local account to a Microsoft account in Windows 11 lets you sign in to your PC using your email address and password.
A local account only works on the specific computer it’s set up on. A Microsoft account, however, connects your PC to other Microsoft services like OneDrive, Outlook, and the Microsoft Store.
This connection syncs your settings, like desktop backgrounds and preferences, across all your devices. It also makes it easier to access cloud files and use Microsoft apps.
Moving to a Microsoft account is straightforward and enhances your Windows 11 experience by providing seamless access to your digital life.
Open Settings, select Accounts, then Your info. Click “Sign in with a Microsoft account instead,” enter your Microsoft account details, and follow the prompts to verify and finish.
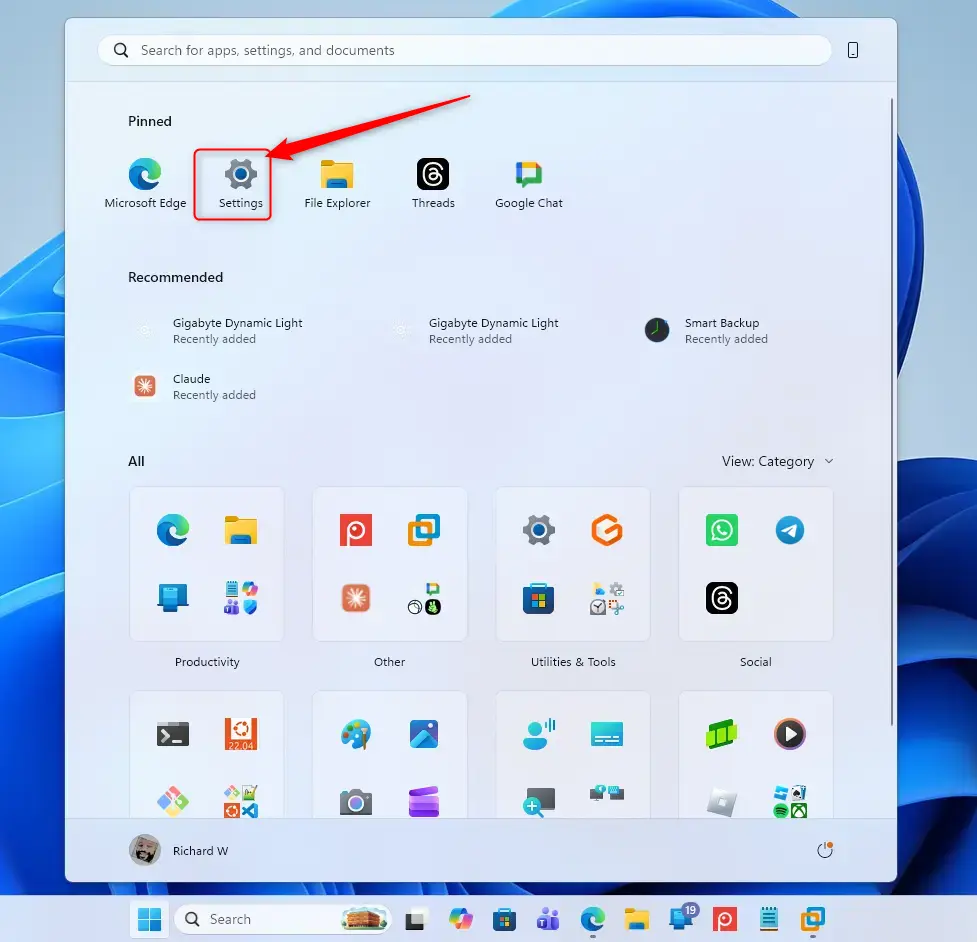
Step 1Open Account Settings
Open the Settings app on your Windows 11 computer to begin switching your account.
Action: Open the Settings app.
Explanation: Press the Windows key + I key on your keyboard. Or, click the Start button (the Windows icon in the bottom-left corner), then click the gear icon for Settings.
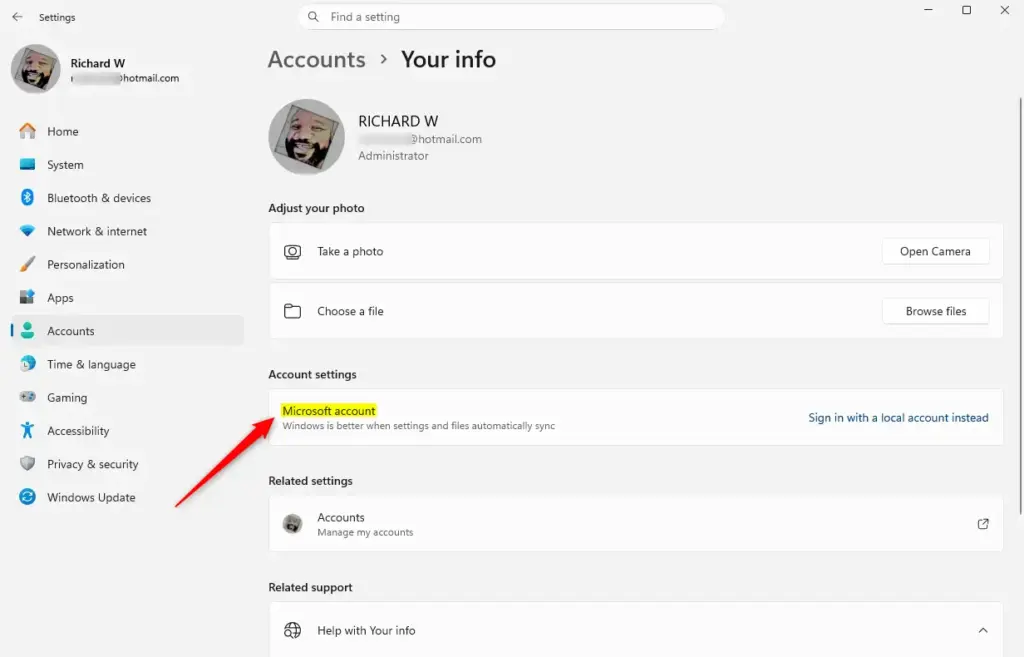
Step 2Find Your User Information
In the Settings app, click on ‘Accounts’ to find your user information and profile settings.
Action: Select “Accounts” from the main Settings menu.
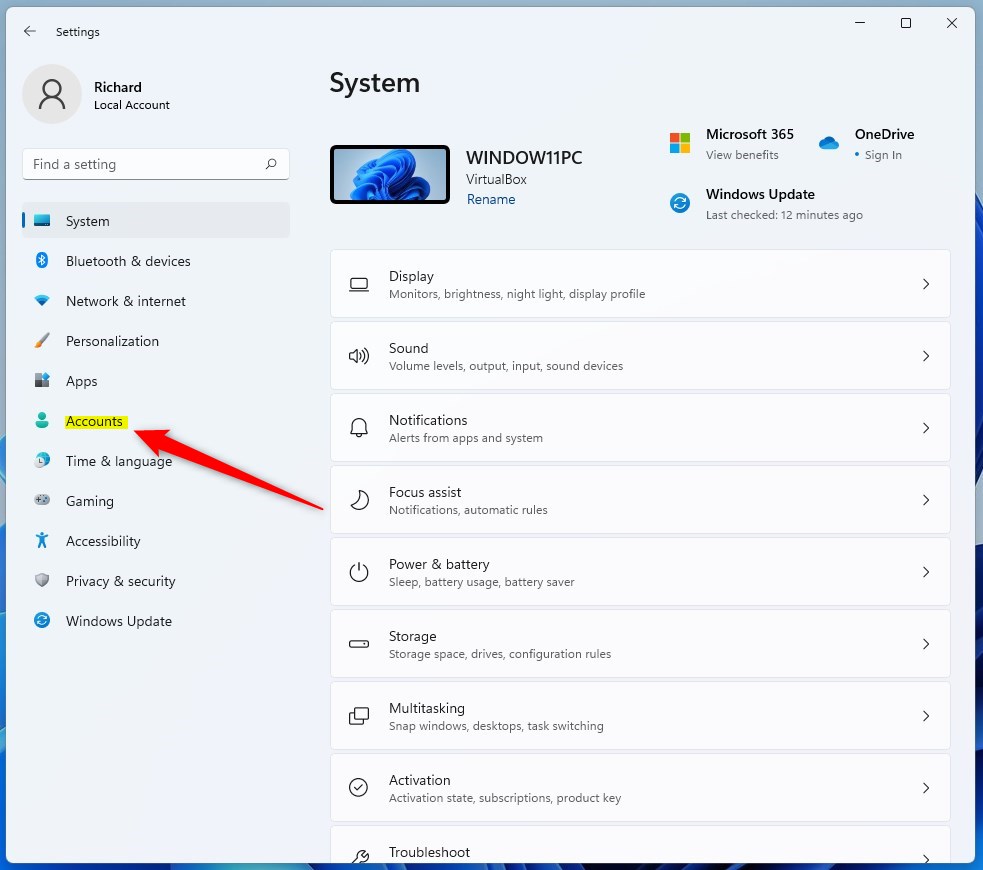
Within the Settings window, you’ll find various categories. Click “Accounts.” This area handles your user profile, sign-in methods, and related settings.
Action: Click on “Your info” in the left sidebar.
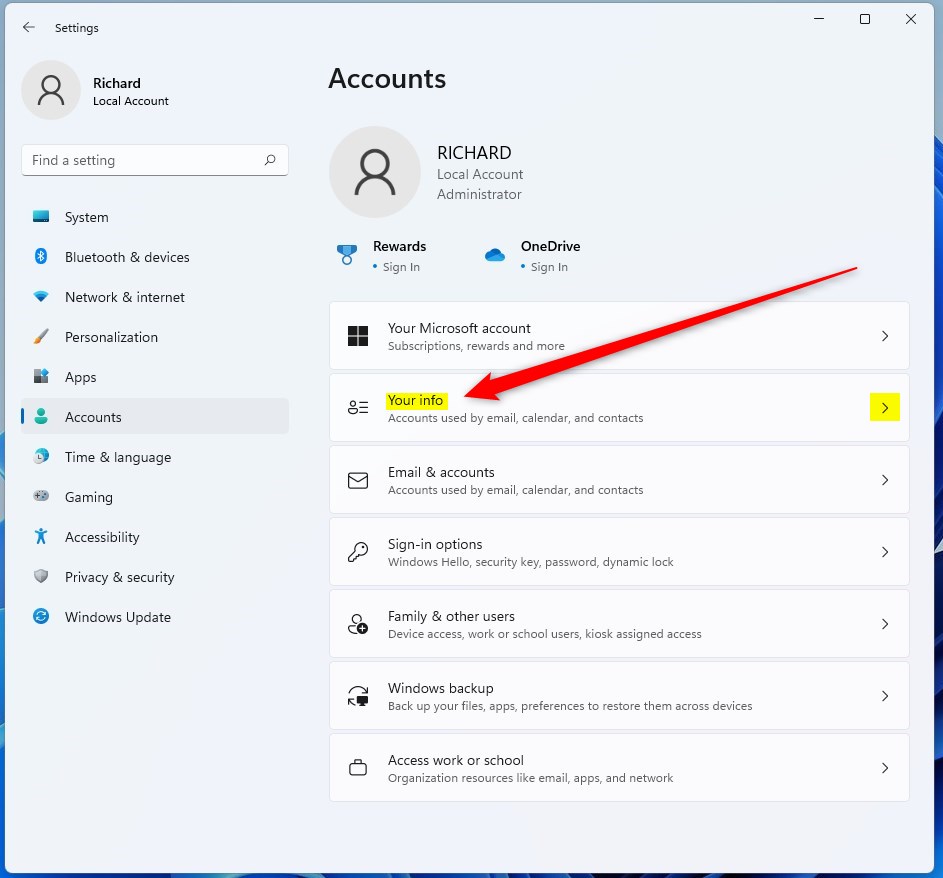
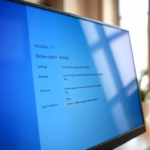
After clicking “Accounts,” more options will appear on the left. Look for “Your info.” This page shows details about your current account, like your name, picture, and whether you use a local or Microsoft account.
Step 3Start the Switch
On the ‘Your info’ page, look for the option to sign in with a Microsoft account instead of your local one.
Action: Look for and click the link that says “Sign in with a Microsoft account instead.”
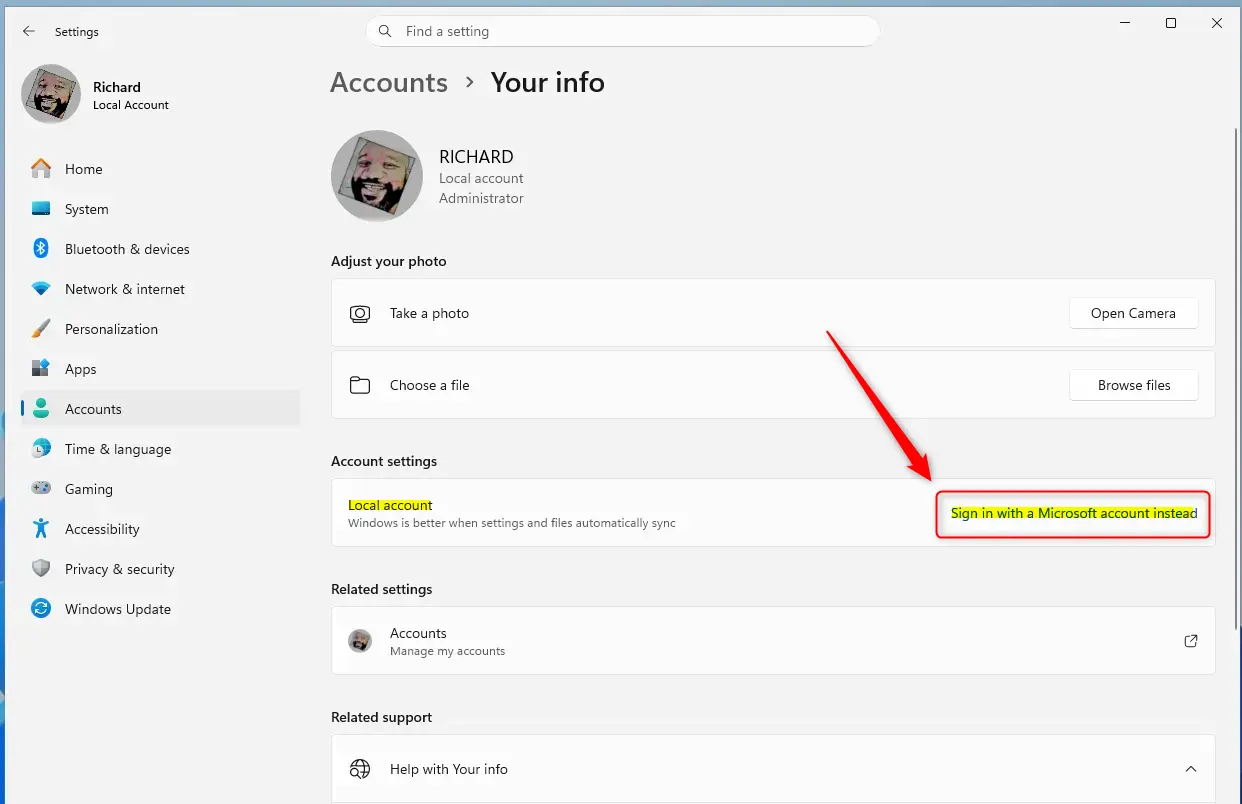
When you’re using a local account, Windows highlights this option for you. You should see a clear link, usually under your username, that says “Sign in with a Microsoft account instead.” This is how you connect your computer to your Microsoft identity.
Step 4Enter Your Microsoft Account Details
Enter your Microsoft account email and password when prompted to link it to your Windows 11 login.
Action: Enter your Microsoft account email address and password.
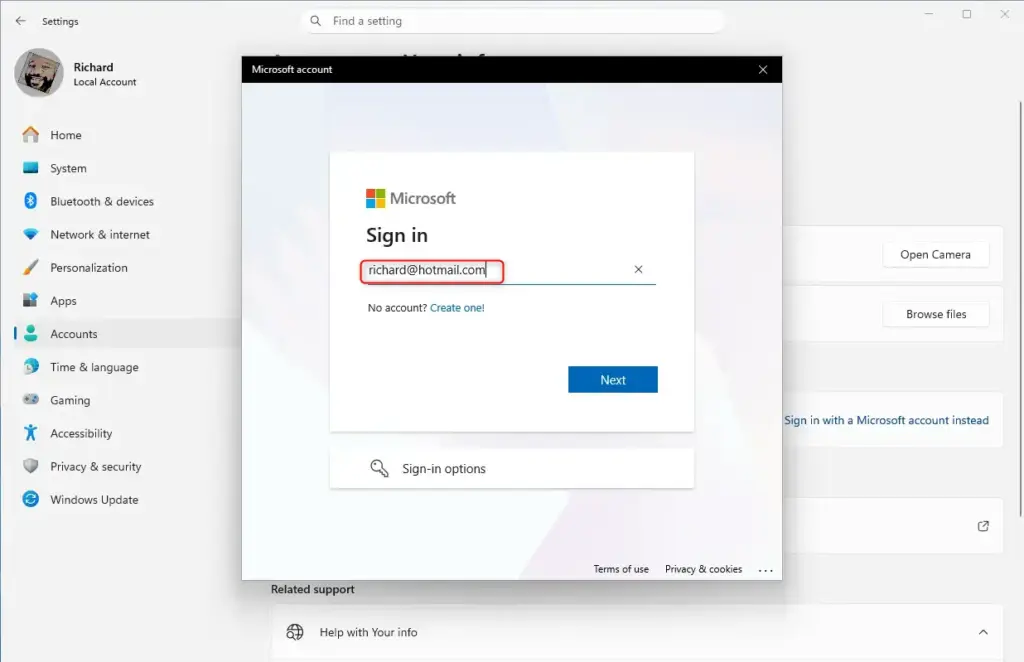
The next screen will ask you to sign in with your Microsoft account. Type the email address for your Microsoft account (like your Outlook.com or Hotmail address) and then your password. If you forgot your password, click the “Forgot password?” link.
Step 5Verify and Set Up Security
Complete any extra verification steps, like entering a code sent to your phone, to confirm your Microsoft account.
Action: Complete any extra verification steps.
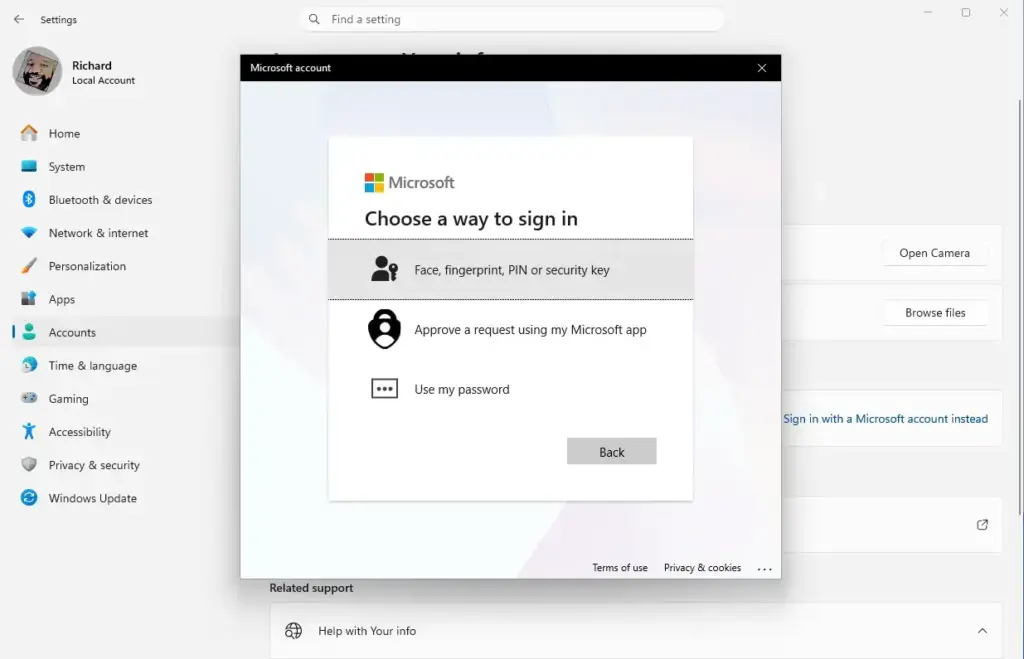
Depending on your Microsoft account’s security settings, you might need to enter a code sent to your phone or another email, or answer a security question. This is a normal security step to protect your account.
Action: Set up a PIN (optional but good to do).
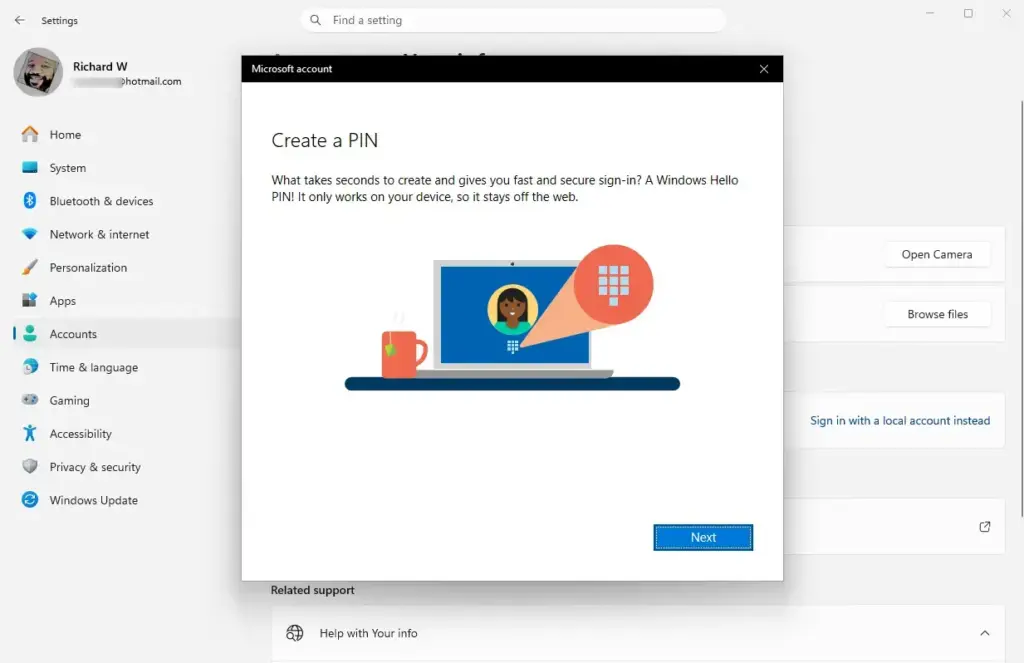
After your Microsoft account is verified, Windows will probably ask you to set up a PIN to sign in to your computer. A PIN (Personal Identification Number) is a short numerical code for your device, offering a quicker login than a full password and enhanced security since it’s not stored online.
Step 6Finish the Switch
Click ‘Next’ or ‘Sign out and finish’ to complete the process of changing from your local account to your Microsoft account.
Action: Click “Next” or “Sign out and finish.”
After you enter your details and finish any verification, you will see a button to confirm. It might say “Next” or “Sign out and finish.” Clicking this will finish changing from your local account to your Microsoft account.
Action: Sign back into Windows with your Microsoft account.
Windows will sign you out automatically so it can apply the changes. When the sign-in screen comes back, use your Microsoft account email address and password (or your new PIN) to log in. Now your computer is connected!
Reference:
Summary
Switching to a Microsoft account lets you sync settings across devices and easily access services like OneDrive.
What happens when done? After following these steps, you will sign out of your local account and sign back in using your Microsoft account email and password. Your computer will then be linked to your Microsoft account, allowing for seamless syncing and access to Microsoft services.
Was this guide helpful?

About the Author
Richard
Tech Writer, IT Professional
Richard, a writer for Geek Rewind, is a tech enthusiast who loves breaking down complex IT topics into simple, easy-to-understand ideas. With years of hands-on experience in system administration and enterprise IT operations, he’s developed a knack for offering practical tips and solutions. Richard aims to make technology more accessible and actionable. He's deeply committed to the Geek Rewind community, always ready to answer questions and engage in discussions.

No comments yet — be the first to share your thoughts!