
This article explains how to export (backup) or import (restore) device drivers using Windows 11.
If you need to migrate or replace an old PC and have legacy devices installed, you may want to export the drivers for those devices so you can reuse them on the new PC.
Some critical devices installed on your machine may no longer be supported by their manufacturers. Once you have a working device with drivers installed, you can export the device drivers, use the device on your new PC, and reinstall the driver.
It might also be a good practice to back up your device drivers in case you need them when they’re corrupted or need reinstalled. Windows allows you to export and import device drivers with simple commands; the steps below show you how to do that.
How to export device drivers on Windows 11
As mentioned, Windows allows users to export their device drivers with simple commands. If you need to export drivers for devices installed on Windows, use the steps below.
First, open the Command Prompt as an administrator. To do that, click the Start menu and search for Command Prompt. Right-click Command Prompt and select Run as administrator, as shown in the image below.

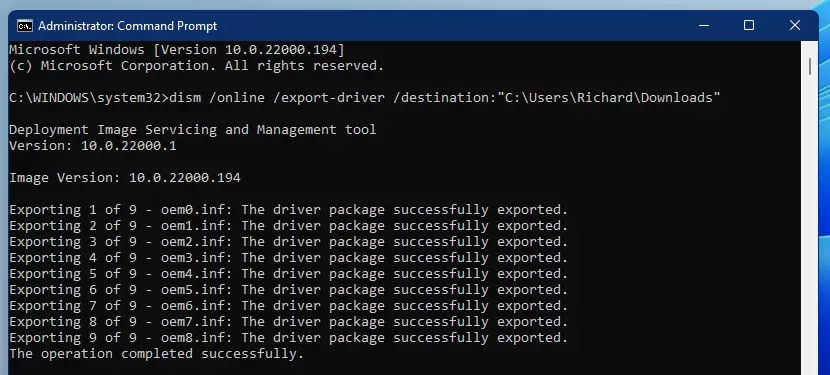
When the command prompt opens, run the commands below to export the drivers for all devices installed on Windows.
dism /online /export-driver /destination:"full_path_to_export_folder"
Replace full_path_to_export_folder with a folder you want to export to. Example: C:\Drivers\Export
If you’re exporting the drivers to use on a different PC, save the export to an external drive or flash drive, then use it to import to the new computer.
You should see a screen like the one below when successfully exporting device drivers.
A folder containing device drivers

You can also use the commands below to export device drivers.
pnputil /export-driver * "full_path_to_export_folder"
That will export all installed drivers for devices on your machine.
If you want to use PowerShell, then search for PowerShell and run as an administrator. Once PowerShell opens, run the commands below to export all device drivers.
Export-WindowsDriver -Online -Destination "full_path_to_export_folder"
How to import device drivers on Windows 11
Once the drivers are exported, you can import them using the commands below. Again, open the Command Prompt as an administrator, then run the commands below to import all drivers.
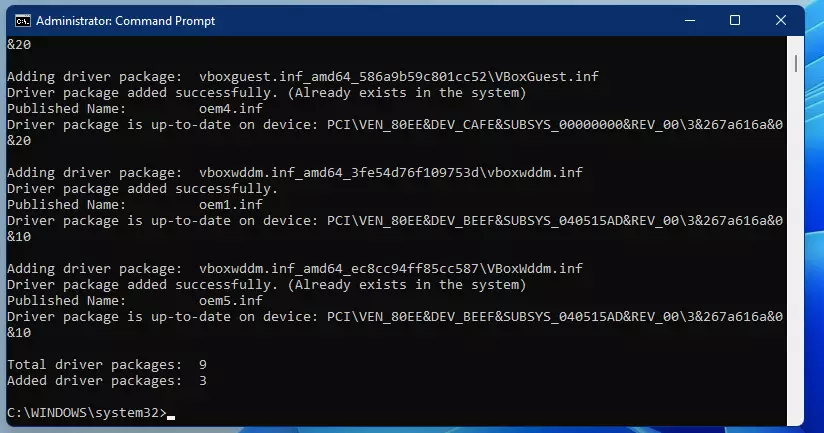
pnputil /add-driver "full_path_to_import_folder\*.inf" /subdirs /install /reboot
After the drivers are imported, you should see a similar message below.
If you don’t want to import all the exported drivers, you can use Windows Device Manager to import only the drivers you want.
Read the post below to learn how to install device drivers on Windows 11
How to install device drivers on Windows 11
That should do it!
Conclusion:
- Exporting and importing device drivers in Windows 11 is a straightforward process.
- You can export drivers, including Command Prompt, PowerShell, or the pnputil command line.
- Importing drivers can be done with a simple command, and you can import all or specific drivers.
- Backing up your device drivers is essential for seamless migration to a new PC or recovery in case of corruption.
- Following these steps ensures that it continues functioning correctly on your new system.
- For more information on managing device drivers, refer to guides like How to install device drivers on Windows 11.


Leave a Reply