How to Enable or Disable the Touch Keyboard in Windows 11

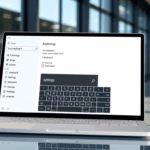
The Windows 11 touch keyboard lets you type on your screen without needing a physical keyboard.
This on-screen keyboard is great for devices with touchscreens, like tablets, or when you’re using your PC in a way that makes a physical keyboard awkward. Windows 11 lets you decide if it pops up automatically or if you want to open it yourself.
You can change settings for when this keyboard appears, especially if you find it popping up when you don’t expect it, like on your main desktop view. For example, some people prefer to only have it show up when they tap into a text field.
Knowing how to manage it helps you control your typing experience.
Right-click your taskbar, select Taskbar settings, and then choose your preferred option from the Touch keyboard dropdown menu. You can set it to Always, Never, or When no keyboard attached.
Controlling When the Touch Keyboard Appears
Windows 11 allows users to control the appearance of the on-screen touch keyboard. This management is done by adjusting settings for an icon located in the taskbar’s system tray, near the clock. This method gives users control over when the touch keyboard shows up.
1Never Show the Touch Keyboard Icon (and Disable It)
The touch keyboard icon can be hidden from your Windows 11 taskbar when you don’t need it. Hiding the icon prevents the touch keyboard from appearing automatically. This change is beneficial if you rarely use the touch keyboard and prefer a cleaner taskbar.
- Close the touch keyboard if it's open. Look for an 'x' or a keyboard icon and tap it.
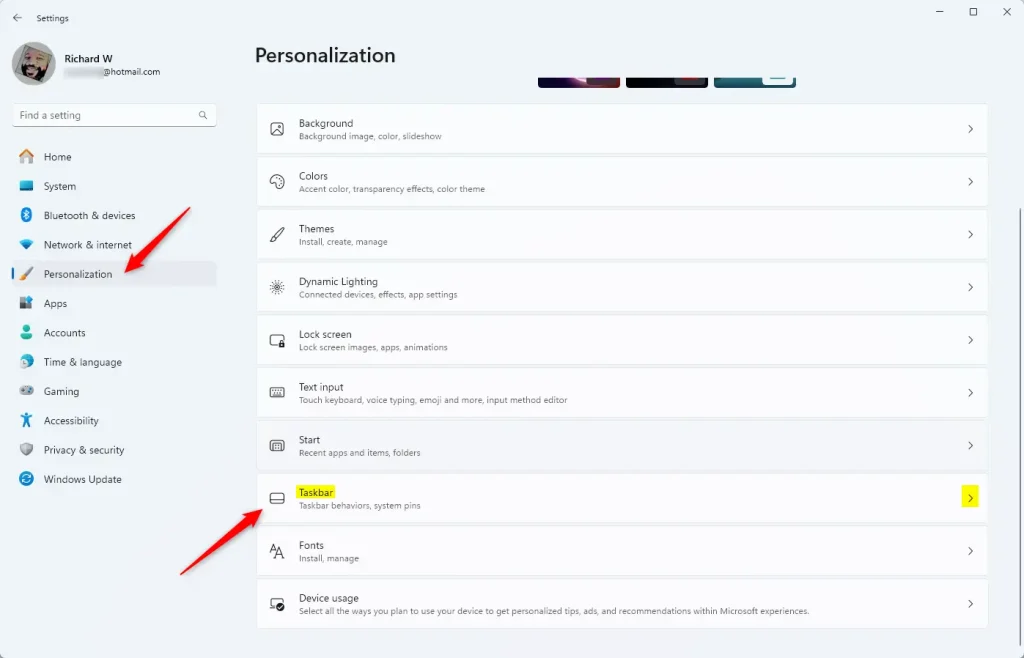
- Access Taskbar Settings: Right-click on an empty part of your taskbar. Click "Taskbar settings." You can also go to Settings > Personalization > Taskbar.
- Find the Touch Keyboard Option: Scroll down to the "Notification area" or "System tray icons" section. Find "Touch keyboard."
- Set to "Never": Click the dropdown menu next to "Touch keyboard" and choose "Never."
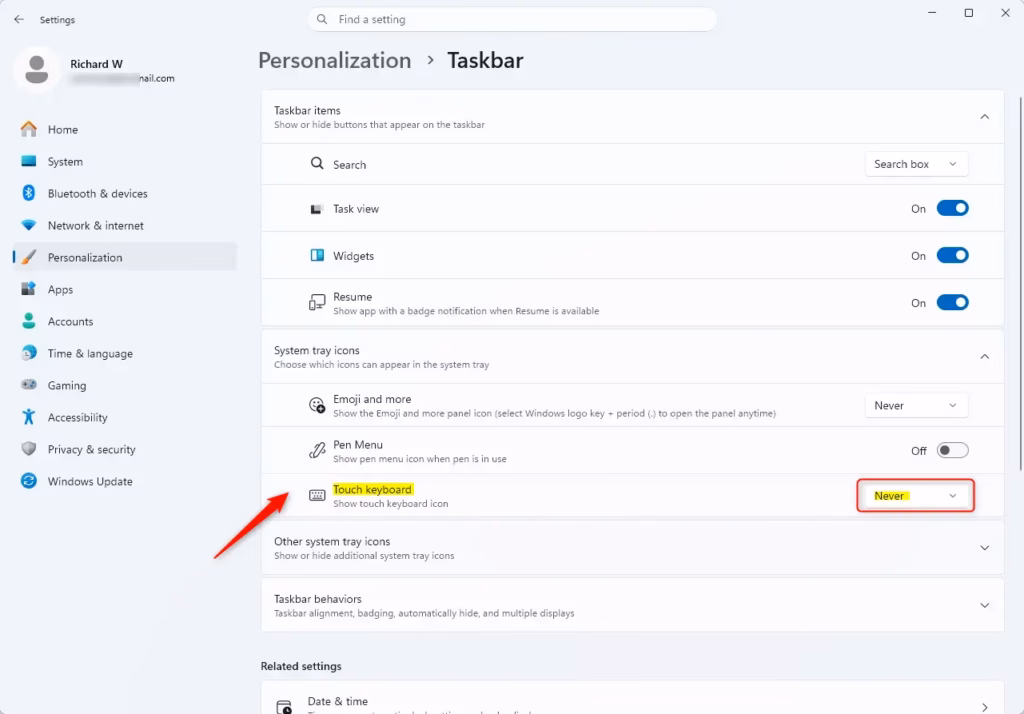
The touch keyboard icon disappears from the Windows 11 taskbar. As a result, the touch keyboard no longer appears automatically. You'll need to manually activate the touch keyboard if you wish to use it.
2Always Show the Touch Keyboard Icon
The touch keyboard icon on the Windows 11 taskbar allows for quick access to the touch keyboard. You can set this icon to always show on the taskbar, ensuring convenient typing is available whenever you need it.
- Access Taskbar Settings: Right-click on your taskbar and choose "Taskbar settings." Or, go to Settings > Personalization > Taskbar.
- Locate the Touch Keyboard Setting: In the "Notification area" or "System tray icons" section, find "Touch keyboard."
- Set to "Always": Change the dropdown menu next to "Touch keyboard" to "Always."
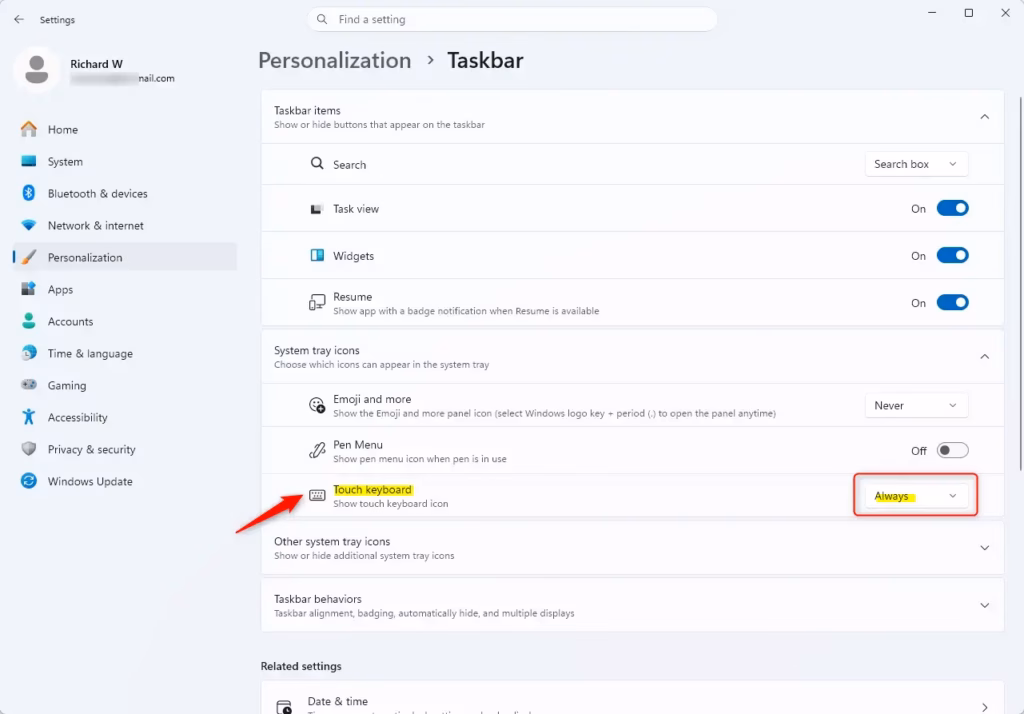
The touch keyboard icon always appears in the system tray. Clicking this icon opens the touch keyboard immediately, making it ready for use.
Disabling the touch keyboard is helpful when users frequently switch between a physical keyboard and a touchscreen. You can quickly turn off the touch keyboard when the physical keyboard isn't available, which prevents accidental input.
3Show the Touch Keyboard Only When No Keyboard is Attached
For Windows 11 devices like tablets or laptops, you can configure the touch keyboard to appear only when no physical keyboard is connected. This setting is useful if you sometimes detach your keyboard and want the touch version to pop up automatically when needed.
- Open Taskbar Settings: Right-click the taskbar and select "Taskbar settings," or go to Settings > Personalization > Taskbar.
- Find the Touch Keyboard Option: Look for "Touch keyboard" under the "Notification area" or "System tray icons" settings.
- Set to "When no keyboard attached": Select this option from the dropdown menu.
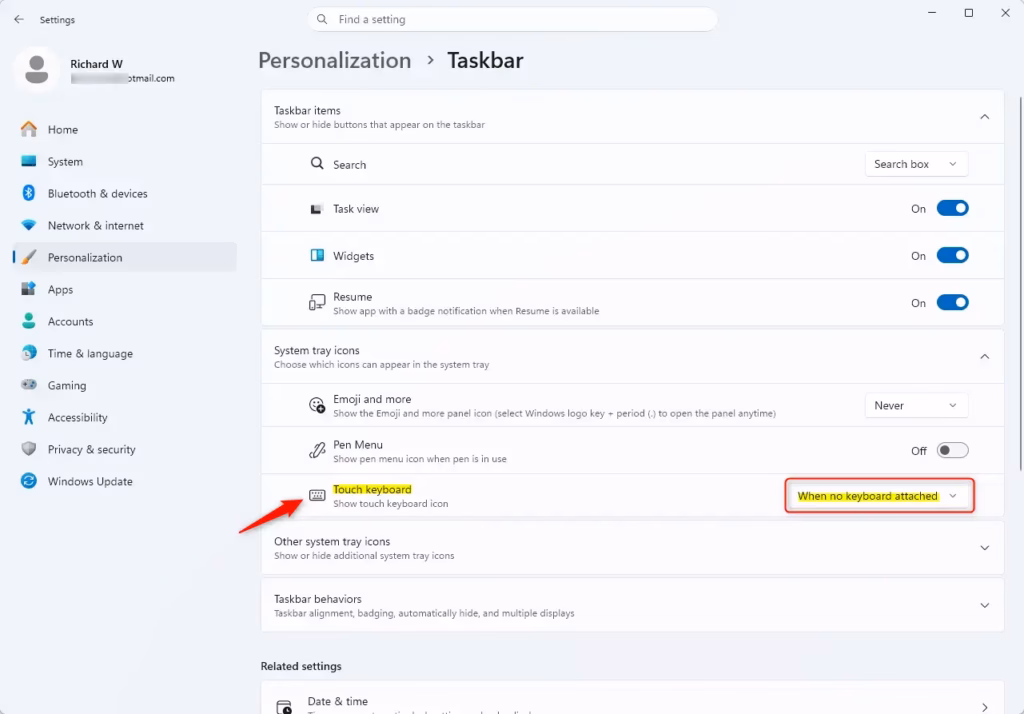
The touch keyboard setting is excellent for laptops with foldable or detachable keyboards. When using the device as a tablet, the touch keyboard appears. Reattaching the physical keyboard automatically hides the touch keyboard.
Summary
The Windows 11 touch keyboard's appearance can be easily changed. You can adjust settings to hide the touch keyboard, always keep it visible, or only show it when you need it.
How do I enable touch keyboard on 🪟 Windows 11?
To enable the touch keyboard in Windows 11, right-click the taskbar and select 'Taskbar settings.' Under 'Taskbar corner icons,' toggle 'Touch keyboard' to 'On.' You can then tap the keyboard icon in the system tray to open it.
How do I disable the touch keyboard in 🪟 Windows 11?
To disable the touch keyboard in Windows 11, right-click the taskbar, choose 'Taskbar settings,' and then 'Taskbar corner icons.' Toggle 'Touch keyboard' to 'Off.' This prevents the keyboard icon from appearing and stops the keyboard from showing automatically.
How to enable and disable touchscreen on 🪟 Windows 11?
To enable or disable the touchscreen on Windows 11, search for 'Device Manager.' Expand 'Human Interface Devices,' right-click your touchscreen device, and select 'Enable device' or 'Disable device.' This action controls the entire touchscreen functionality.
How to enable disable keyboard keys in 🪟 Windows 11?
To enable or disable specific keyboard keys in Windows 11, use the 'Ease of Access keyboard settings.' You can turn on 'Filter Keys' to ignore brief or repeated keystrokes or 'Sticky Keys' to press modifier keys one at a time. Access these via Settings > Accessibility > Keyboard.
Was this guide helpful?

About the Author
Richard
Tech Writer, IT Professional
Richard, a writer for Geek Rewind, is a tech enthusiast who loves breaking down complex IT topics into simple, easy-to-understand ideas. With years of hands-on experience in system administration and enterprise IT operations, he’s developed a knack for offering practical tips and solutions. Richard aims to make technology more accessible and actionable. He's deeply committed to the Geek Rewind community, always ready to answer questions and engage in discussions.


No comments yet — be the first to share your thoughts!