

This guide will show you how to turn on or off Point-in-Time Restore in Windows 11. This handy feature helps you quickly fix problems by restoring your computer to how it was a short time ago.
What is Point-in-Time Restore?
Point-in-Time Restore is a new Windows 11 feature (available from build 26220.7271) that lets you restore your PC to exactly how it was within the last 72 hours. It uses “restore points” that Windows creates automatically in the background.
Restore points are stored on your computer using a tool called Volume Shadow Copy Service (VSS). This means if something goes wrong, you can quickly get your system back to a recent working state.
How Restore Points Work
- Automatic Creation: Windows saves restore points roughly every 24 hours.
- Keep for 72 Hours: Each restore point stays for up to 3 days before Windows deletes it.
- Space Management: If your PC runs low on space, Windows will delete the oldest restore points first to free up space.
How to Turn On or Off Point-in-Time Restore Using Settings
Follow these simple steps to enable or disable Point-in-Time Restore:
- Open the Settings app:
- Click the Start menu and choose Settings, or
- Press Windows key + I on your keyboard.
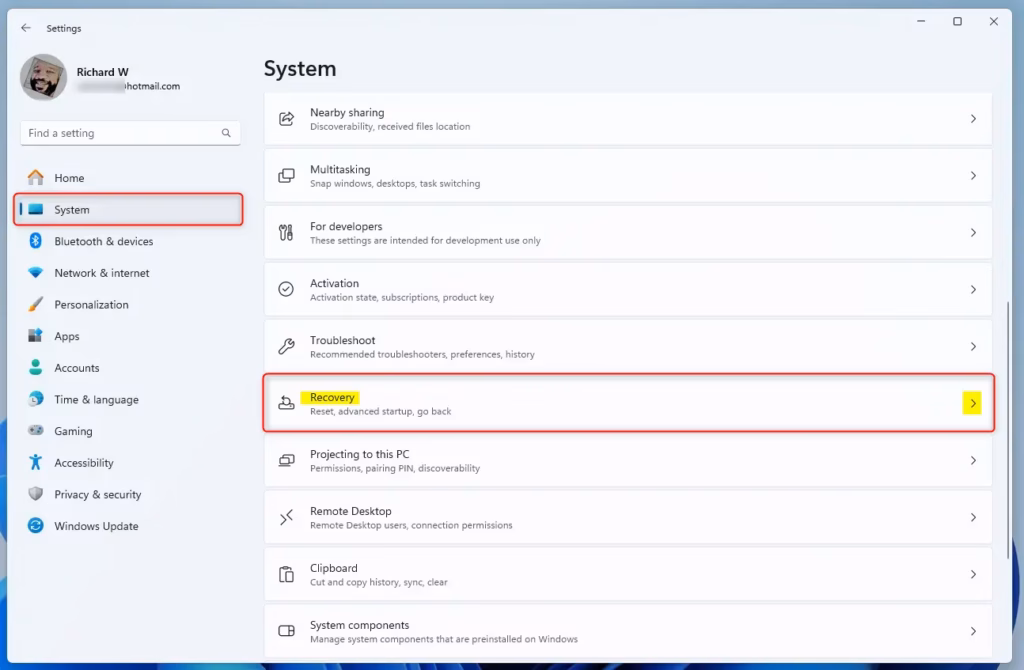
- In Settings, click System on the left side.
- On the right, click Recovery.
- Find the Point-in-time restore option and toggle it On or Off.
- Close the Settings app when done.

How to Enable or Disable Point-in-Time Restore Using Registry Editor
If you prefer, you can turn this feature on or off by editing the Windows Registry. Warning: Editing the Registry can cause problems if done incorrectly, so please back up your registry first or create a system restore point before you start.
Here’s how:
- Open the Registry Editor:
- Press Windows key + R, type
regedit, and press Enter.
- Press Windows key + R, type
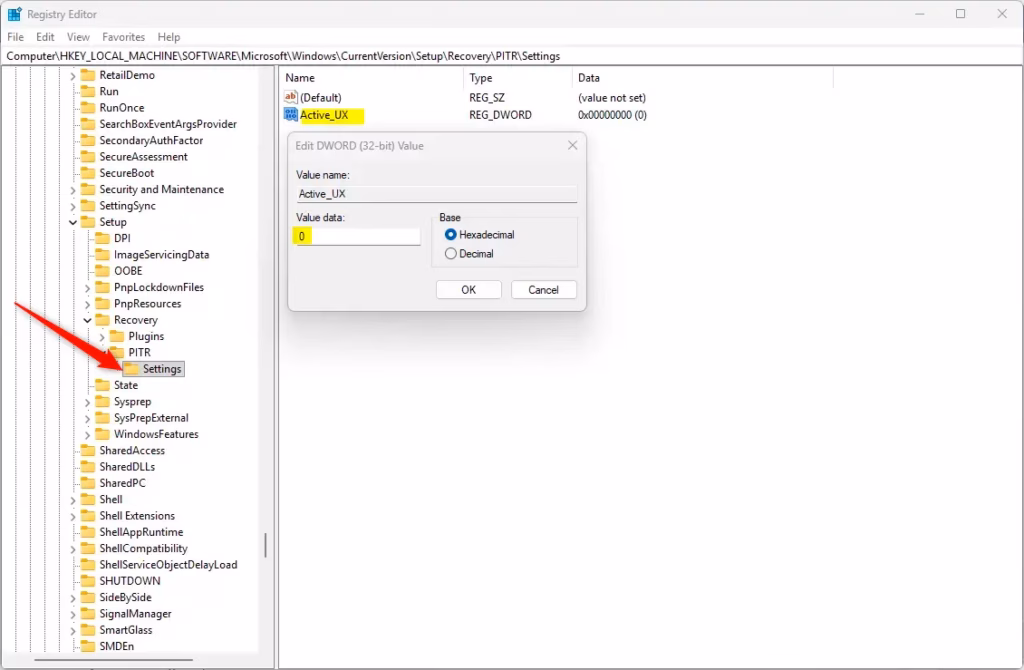
- Navigate to this folder path:
ComputerHKEY_LOCAL_MACHINESOFTWAREMicrosoftWindowsCurrentVersionSetupRecoveryPITRSettings
- Right-click on Settings in the left panel, select New → DWORD (32-bit) Value.
- Name this new value
Active_UX. - Double-click
Active_UXand set its value to:1to enable Point-in-Time Restore0to disable it
- Click OK and close the Registry Editor.
- Restart your computer to apply the changes.
Summary
- Quick Fix: Easily restore your PC to a recent working state if something goes wrong.
- Automatic Backups: Windows creates restore points every 24 hours without you needing to do anything.
- Simple Control: Turn the feature on or off from Settings or the Registry.
- Temporary Storage: Restore points last for 3 days, giving you plenty of time to fix issues.
- Smart Space Use: Windows deletes old restore points when space is low, so your PC keeps running smoothly.
- Be Careful: Always back up before changing Registry settings.
Using Point-in-Time Restore can help keep your PC safe and make fixing problems faster and easier.
More info from Microsoft: Point-in-time restore official guide


Leave a Reply Cancel reply