How to Enable or Disable Graphics Acceleration in Chrome
You enable or disable graphics acceleration in Google Chrome to manage how your browser utilizes your GPU for rendering web pages.
Graphics acceleration offloads demanding visual tasks from your CPU to your graphics card, often improving performance and speed, especially for content like videos and web games.
This feature, critical for versions like Chrome 120 released in late 2023, can sometimes cause visual glitches or instability on certain hardware configurations.
Disabling it reverts rendering to your CPU, which can resolve display issues like black screens or flickering.
To enable or disable graphics acceleration in Chrome, go to Settings, search for “Hardware acceleration,” and toggle the “Use graphics acceleration when available” switch. Relaunch Chrome for changes to take effect.
Enable/Disable Hardware Acceleration in Chrome
You can turn graphics acceleration on or off in Chrome using the browser’s settings menu.
- Open Google Chrome browser.
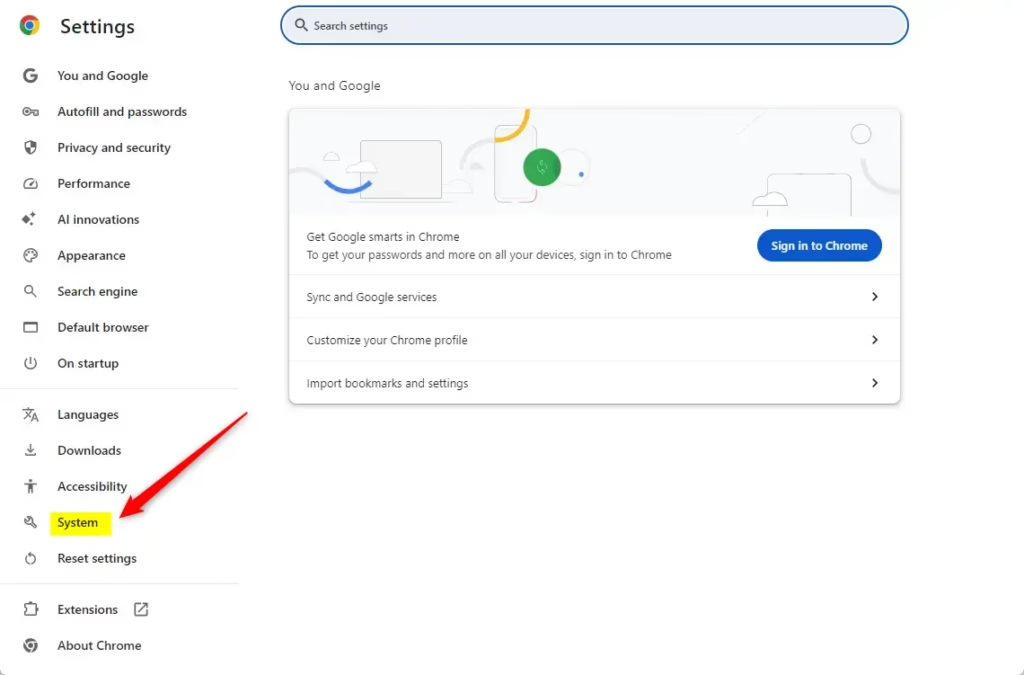
- Click the three dots in the top right corner and choose Settings.
- Use the Search settings bar at the very top of the page. Type “Hardware acceleration” to find the setting immediately, as menu paths often change in updates.
- Toggle the switch next to “Use graphics acceleration when available” to On or Off.
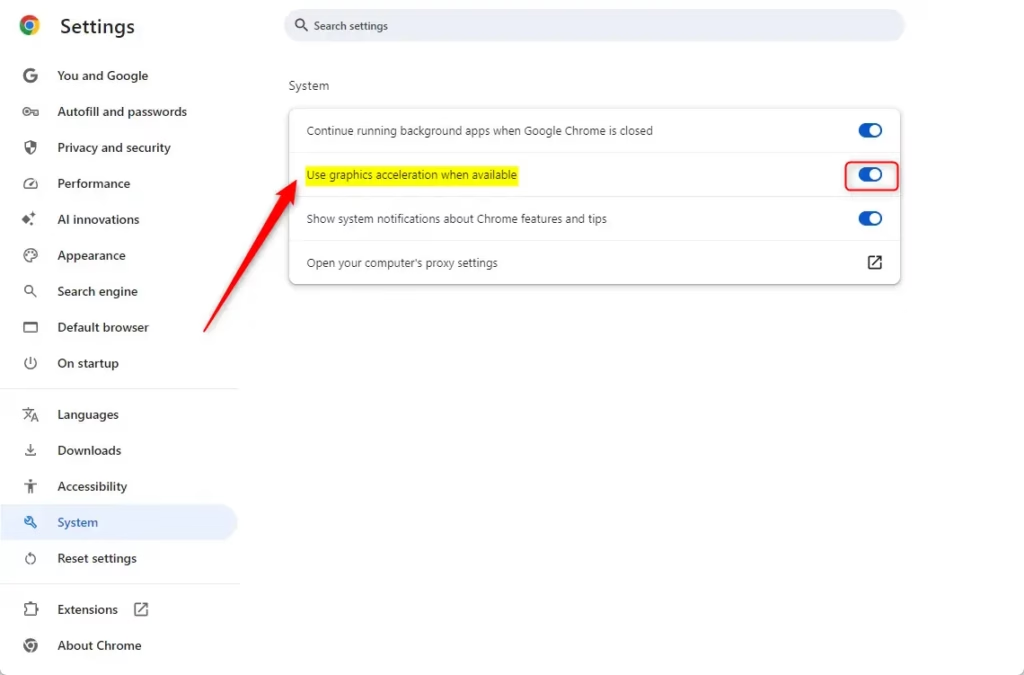
You might need to click the Relaunch button to apply your changes.
Enable / Disable Graphics Acceleration in Chrome using the Registry
Changing Chrome’s graphics acceleration through the Windows Registry is an advanced method best left for IT pros managing many computers, not for everyday users.
If you must use the registry, please back up your Windows Registry (a database of settings) or create a System Restore point first.
- Open the Windows Registry.
- Navigate to: Computer\🗝️HKEY_LOCAL_MACHINE\SOFTWARE\Policies\Google\Chrome
- If the folders do not exist, right-click and create them.
- Right-click in the empty space, select New > DWORD (32-bit) Value, and name it HardwareAccelerationModeEnabled.
- Set the value to 0 to disable or 1 to enable.

Conclusion
If Chrome is still slow or acting up after changing graphics acceleration settings, check the chrome://gpu page to see if it’s blocked or failing, and update your graphics drivers.
Keeping all your software up to date is always a good idea for the best experience.
Reference: Chrome Enterprise Policy
Should I disable graphics acceleration?
If your computer has a capable graphics card and you’re experiencing crashes, freezing, or graphical glitches while browsing, you might want to consider disabling graphics acceleration.
Was this guide helpful?

About the Author
Richard
Tech Writer, IT Professional
Richard, a writer for Geek Rewind, is a tech enthusiast who loves breaking down complex IT topics into simple, easy-to-understand ideas. With years of hands-on experience in system administration and enterprise IT operations, he’s developed a knack for offering practical tips and solutions. Richard aims to make technology more accessible and actionable. He's deeply committed to the Geek Rewind community, always ready to answer questions and engage in discussions.


No comments yet — be the first to share your thoughts!