
Windows 11 comes with a built-in search tool. By default, it only looks for files in your personal folders like Documents and Pictures. This is called Classic indexing.
You can turn on Enhanced indexing to make Windows search your entire computer. This includes every hard drive and folder on your system. Why would you do this? It makes finding lost files much faster and easier. What happens when done? Windows will scan all your files, which might use extra battery and CPU power for a short time. You should keep your laptop plugged into power while it finishes this first scan.
How to turn on Enhanced Search
You can add additional locations if you need to add specific folders to the classic search instead of scanning the whole drive.
Follow these steps to enable the full search feature:
- Open your Settings app. You can do this by pressing the Windows key + I on your keyboard.

- Click on Privacy & security in the menu on the left.
- Select Searching Windows on the right side of the screen.

- Under the Find my files section, click the Enhanced button.
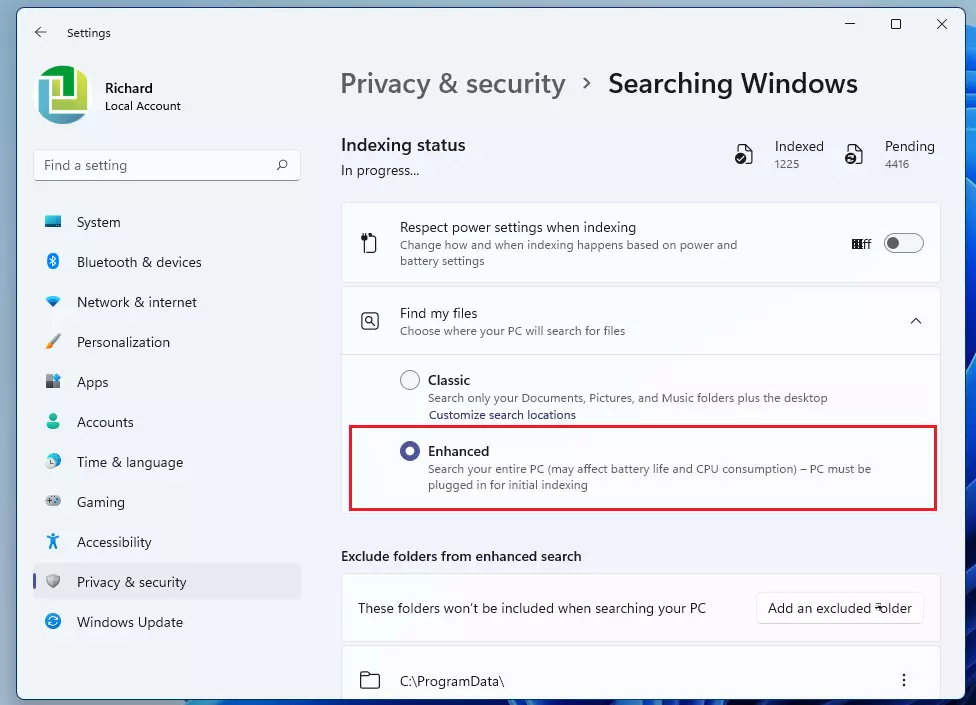
Windows will now start scanning your files. You can see the progress on the same screen.
How to go back to Classic Search
If you decide you want to save battery life, you can switch back to the standard settings at any time:
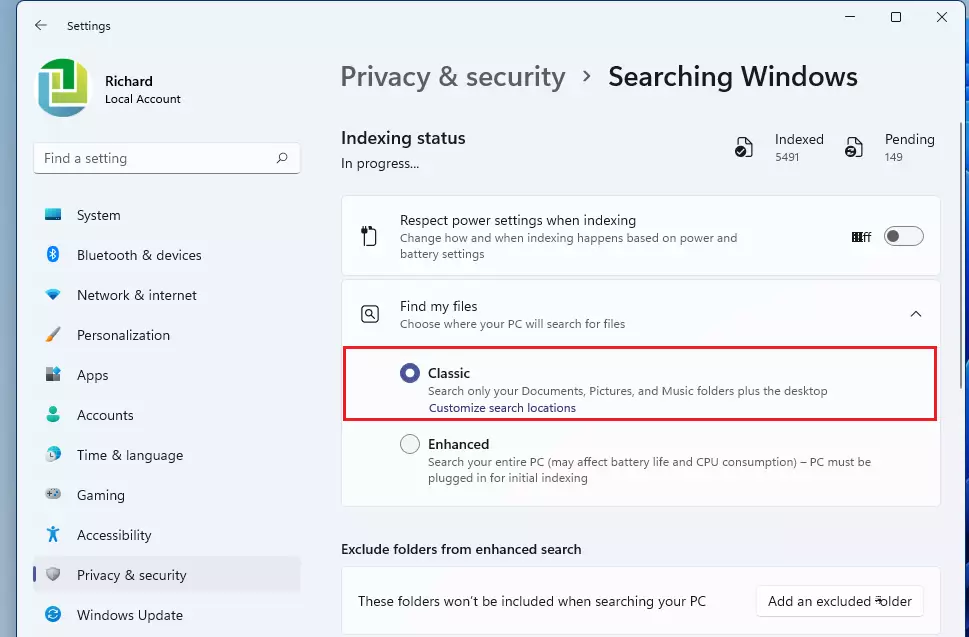
- Go to Settings > Privacy & security > Searching Windows.
- Under Find my files, select Classic.
Note: Administrative privileges are required to modify system search settings.
Summary
Enhanced Search Indexing lets Windows look through every folder on your computer to help you find files faster. While this is very useful, it uses more system resources. Always keep your computer plugged in while the initial scan completes to avoid draining your battery. You can easily switch back to the Classic mode if you prefer.

Leave a Reply