

This article explains how to enable or disable the Address bar search filters in Microsoft Edge.
Microsoft Edge is the default browser in Windows 11. However, users can switch to their preferred or favorite browser anytime. Edge is based on Chromium, similar to Google Chrome and other Chromium-based browsers today.
Microsoft Edge lets you filter search by work, history, favorites, and tabs. While searching, you can select your preference from the bottom of your address bar.
If desired, you can turn on or off, showing search filters in the Edge address bar autosuggestion dropdown.
Turn on or off search filter in the address bar in Edge
As mentioned, a new search feature recently added to Edge lets you filter search results in the address bar.
Here’s how to enable or disable it.
First, open the Microsoft Edge browser.
Then click on Setting and more (Alt+F) 3 horizontal dots button on the top right corner and select Settings.

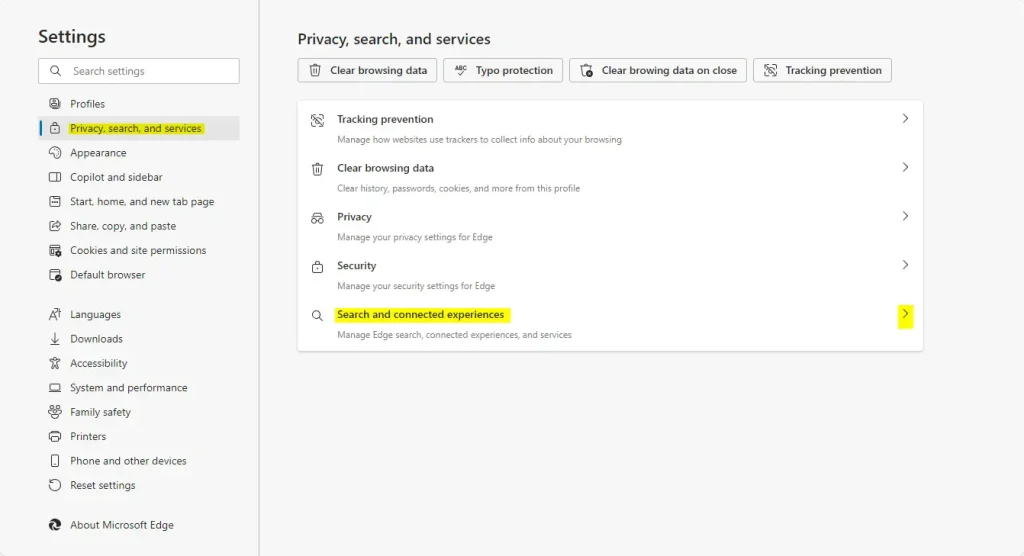
Select “Privacy, search, and services” on the Settings page on the left and click the “Search and connected experiences” tile on the right to expand it.
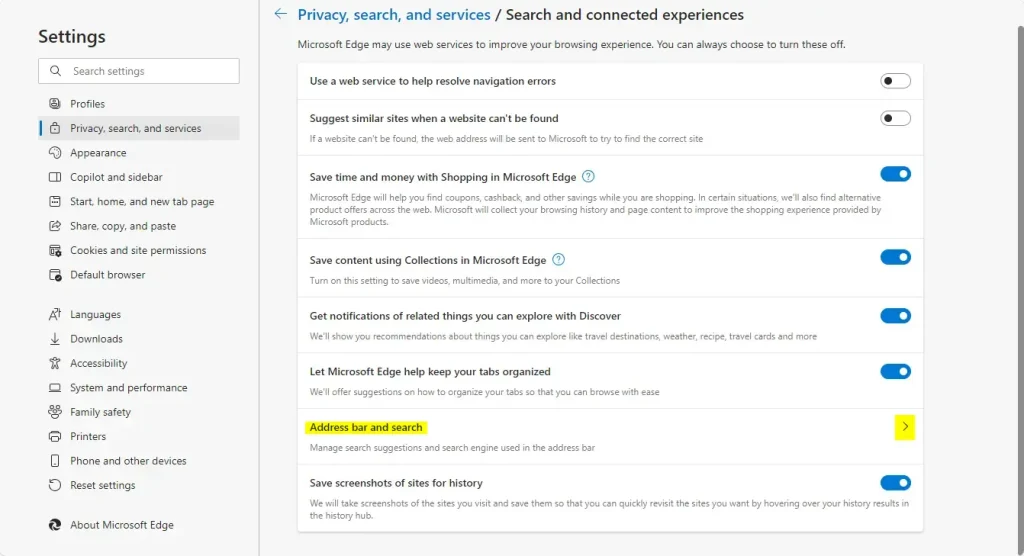
Next, click the “Address bar and search” tile to expand it.
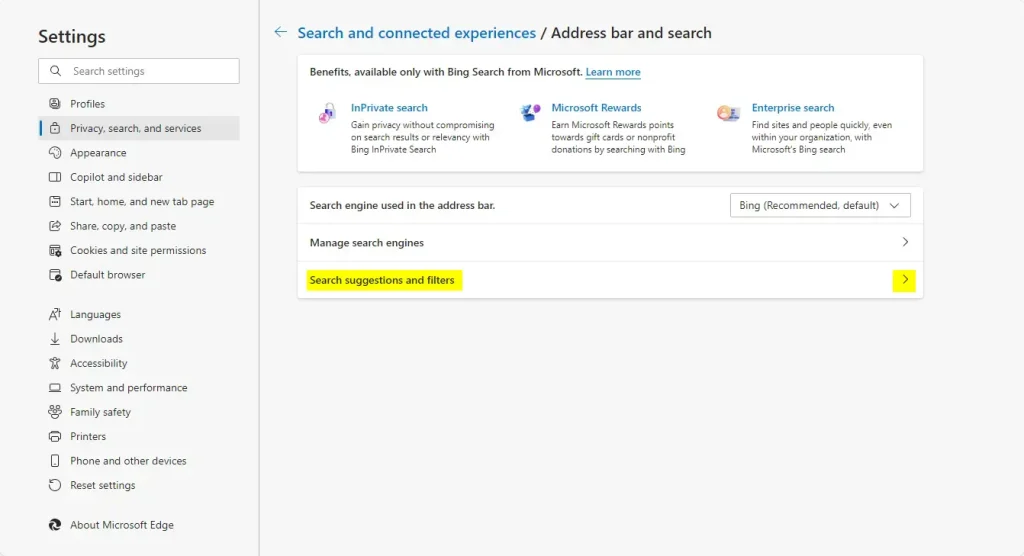
Click the “Search suggestions and filters” tile on the next page to expand it.
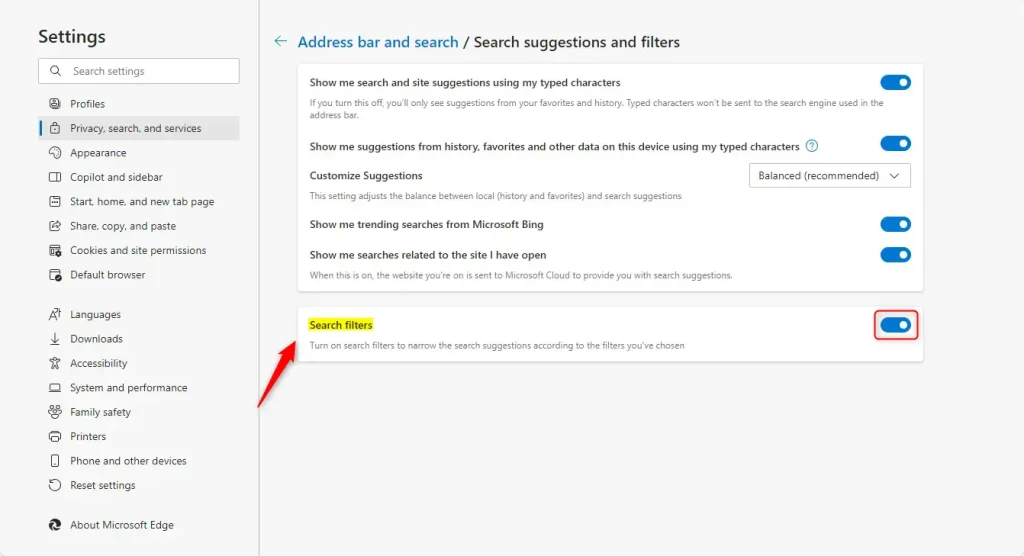
Then, select the “Search filter” tile and toggle the switch button to turn it on or off.
You can close the Edge settings page when finished.
Enable / Disable Search filter in address bar in Edge
Another way to enable or disable Edge’s search filter is to use Windows Registry Editor.
First, open the Windows Registry and navigate to the folder key path below.
Remember to back up your registry before making any changes or create a System Restore point as a precaution.
ComputerHKEY_LOCAL_MACHINESOFTWAREPoliciesMicrosoftEdge
Right-click Edge > New > DWORD (32-bit) Value and name the new DWORD SearchFiltersEnabled.
Double-click and open the SearchFiltersEnabled name and set the value to 1 to enable the search filter feature in Edge.
To disable the search filter, set the value to 0.
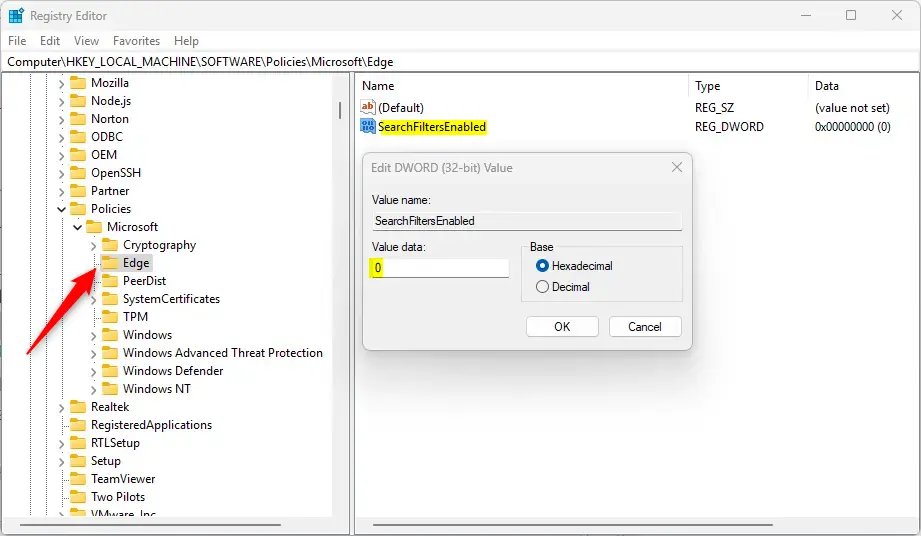
Delete the “SearchFiltersEnabled” name created above to restore the default behavior and allow collections in Edge.
SearchFiltersEnabled
You may have to reboot your computer to apply the changes.
That should do it!
Reference:
Conclusion:
In summary, enabling or disabling the Address bar search filters in Microsoft Edge can enhance your browsing experience by providing more control over search results. To recap:
- Easy Access: The search filter feature can be found within the Edge settings under “Privacy, search, and services.”
- Quick Toggle: You can turn the search filters on or off using the toggle switch.
- Registry Method: For advanced users, the Windows Registry Editor allows the enabling/disabling the search filter with specific values.
- Backup Precaution: Always back up your registry and create a System Restore point before making changes.
- Reboot Required: Changes may require a computer restart to take effect.
These steps ensure that you can customize your search experience based on your preferences in Microsoft Edge.


Leave a Reply Cancel reply