
Do you share your computer with other people? Do you have old accounts you don’t use anymore? It’s a smart idea to delete those accounts. Removing unused accounts keeps your computer clean, safe, and fast.
Why Remove User Accounts?
- Remove old or unused accounts to reduce clutter on your PC.
- Improve your computer’s security by removing accounts that no longer need access.
- Make it easier to manage who can use your computer.
How to Delete User Accounts Using Windows Settings
Windows 11 makes it easy to delete accounts right from the Settings app. Here’s how:
- Press the Windows key + I on your keyboard to open Settings. Or click the Start button (the Windows logo) and then click Settings.

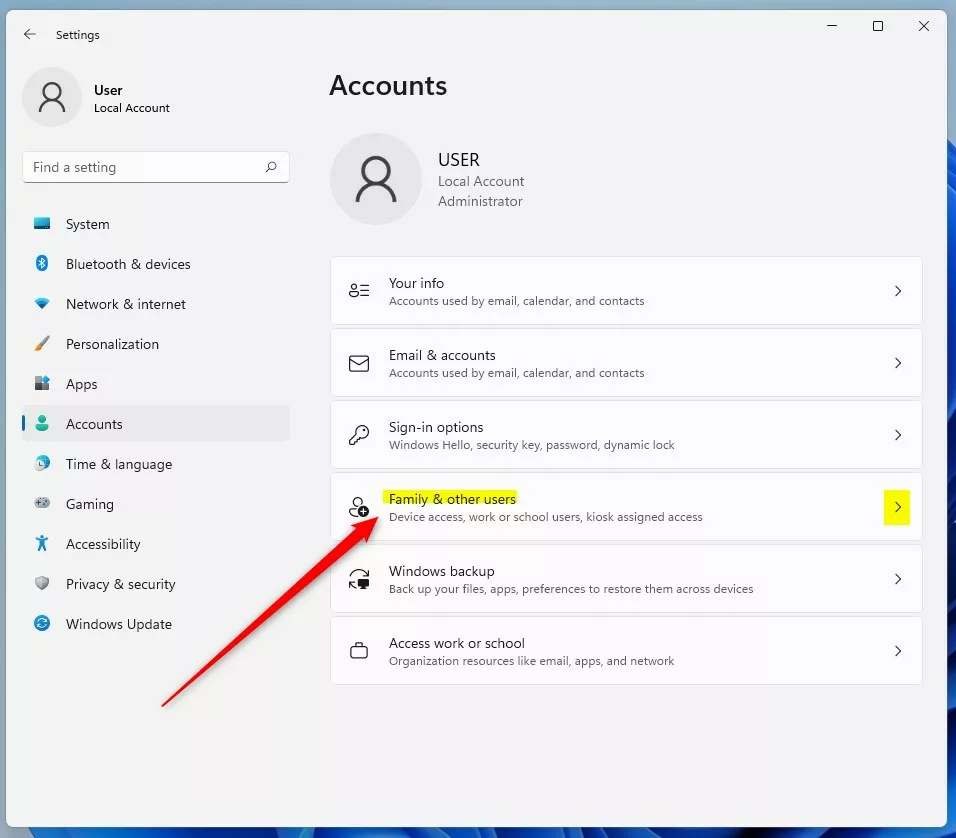
- In the Settings window, click on Accounts.
- On the right side, click Family & Other Users.
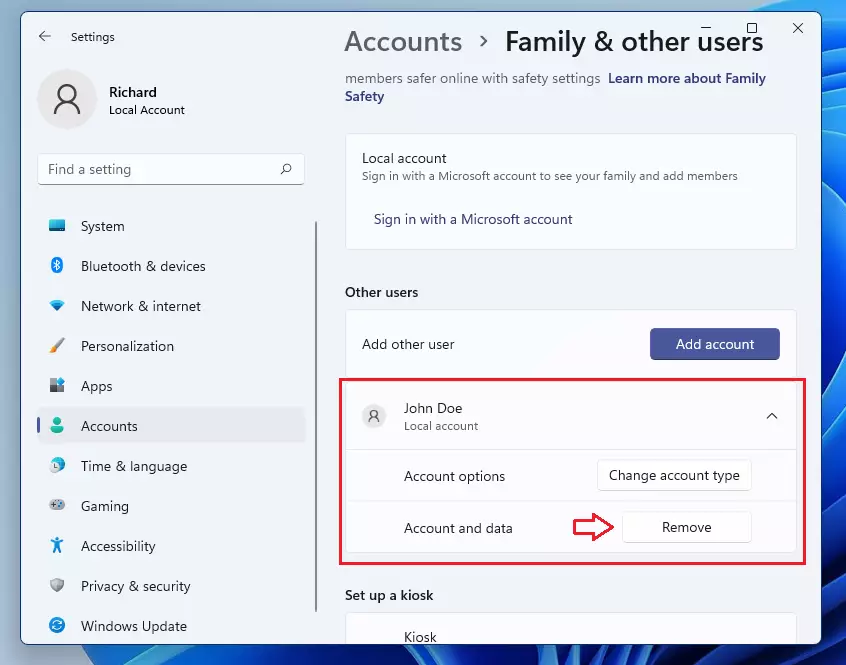
- Find the user account you want to remove under Other users. Click on the account to see the options.
- Click the Remove button.
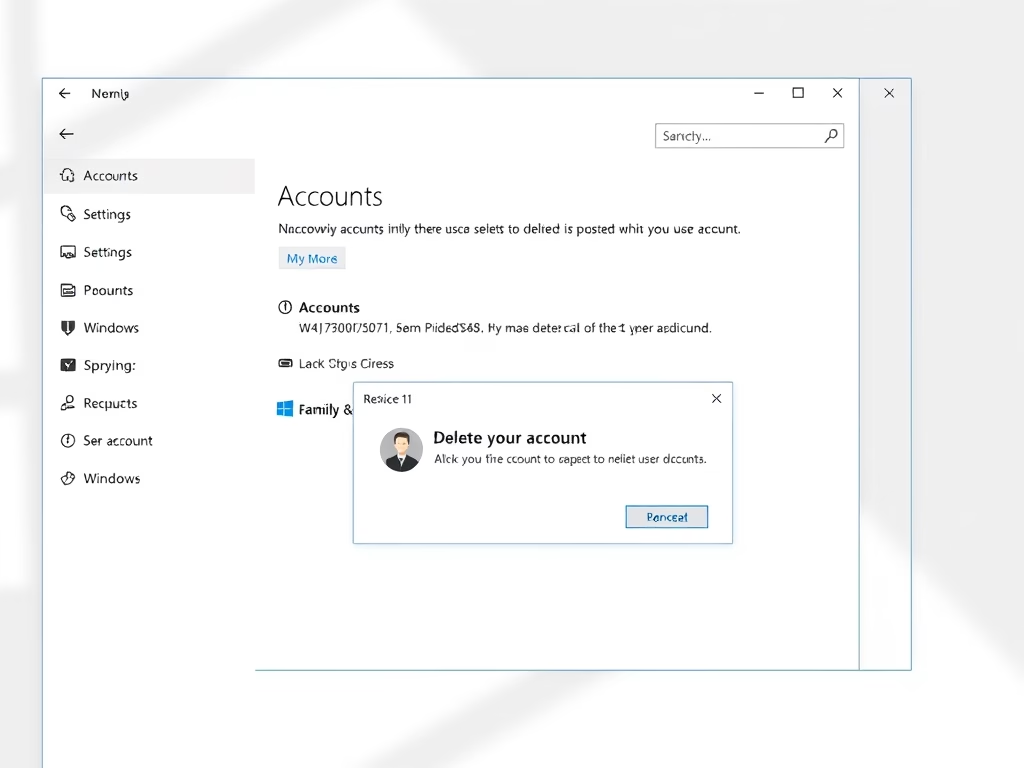
- A box will pop up and ask you to confirm. Click Delete account and data to finish.
Note: This will delete the user account and everything saved under it, like files and settings. This action cannot be undone.
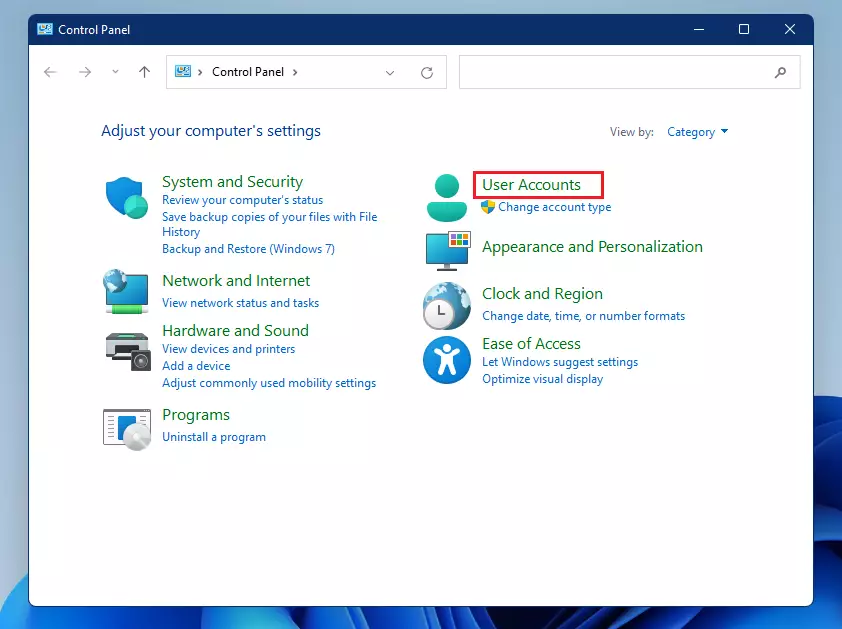
How to Remove a User Account Using Control Panel
If the method above doesn’t work, you can try deleting accounts using the Control Panel instead.
- Open the Start menu and type
Control Panelin the search box. Click the Control Panel app to open it.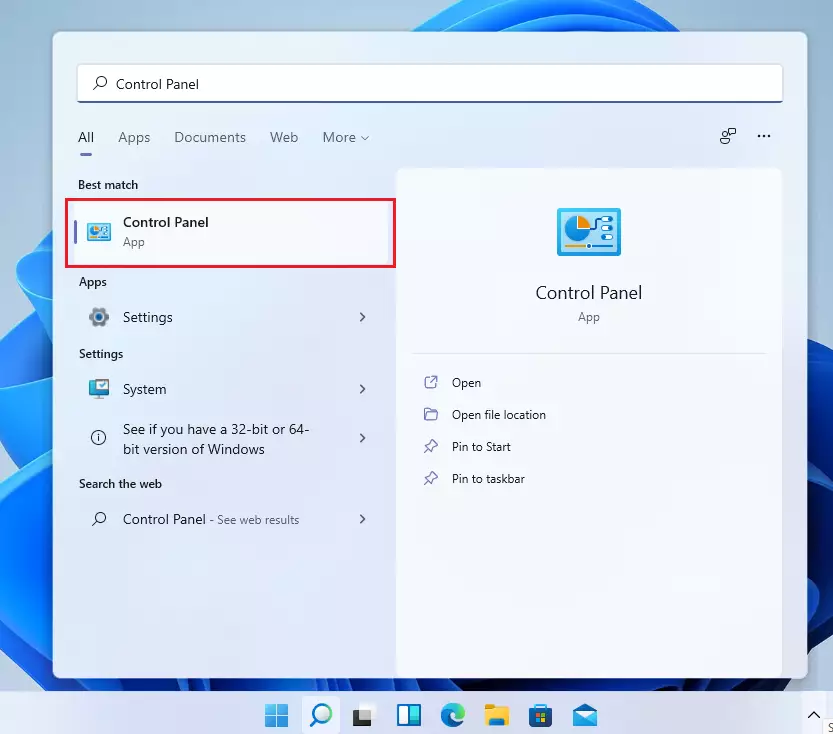
- In Control Panel, click on User Accounts.
- Click Remove User Account.

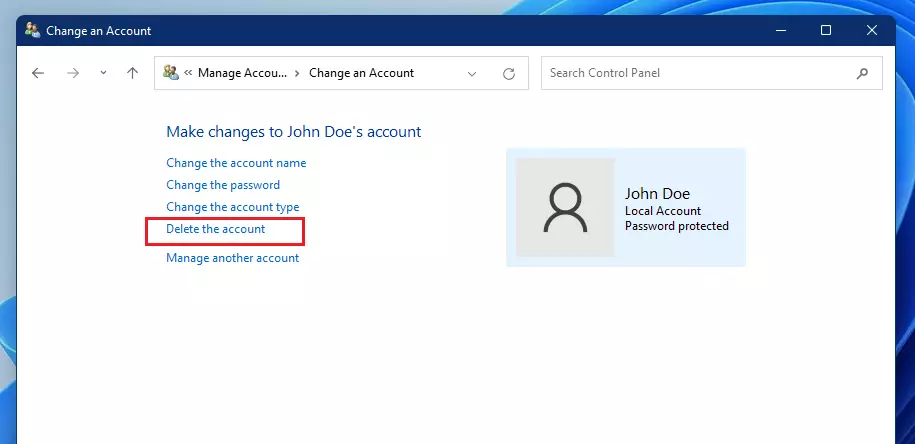
- Select the user account you want to delete.

- Click the Delete the Account link.
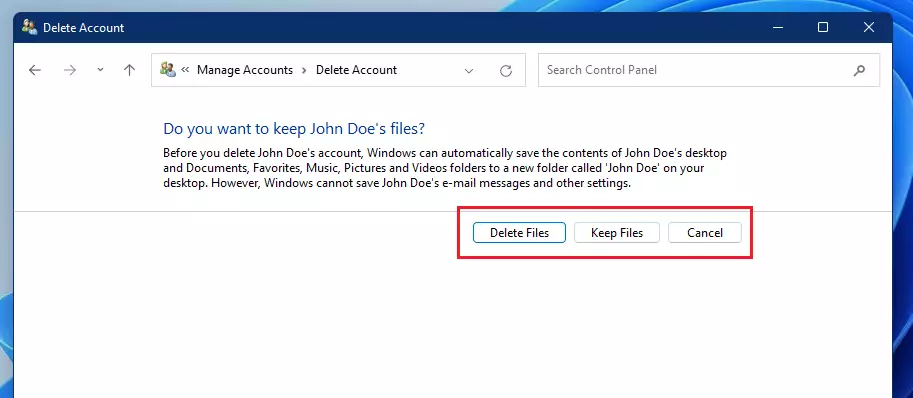
- Choose whether to delete the user’s files or keep them. Then click your choice to delete the account.
That’s it! The account will be removed from your PC.
Summary
- Deleting old user accounts keeps your computer clean and safer.
- You can remove accounts from the Settings app or the Control Panel.
- Be careful: deleting an account can also delete all files saved under that account.
- Always double-check which account you are deleting to avoid losing important data.
- For more tips about Windows 11, visit the official Microsoft support page: Microsoft Windows Support.
Frequently Asked Questions
Why Remove User Accounts?
Remove old or unused accounts to reduce clutter on your PC.
Improve your computer's security by removing accounts that no longer need access.


Leave a Reply