How to Use Microsoft Print to PDF in Windows
Microsoft Print to PDF creates PDF files from any application in Windows 11 and older versions.
It’s a built-in virtual printer that converts documents into portable document format (PDF) files instead of printing them to paper.
You use this tool whenever you need to save a document in a universally compatible format, perfect for sharing or archiving. PDF ensures your document looks the same on any device.
Once you choose to “print” to PDF, Windows saves the file directly to your computer, ready for you to email, store, or share.
How to Print to PDF
- Open the file or document you want to save.
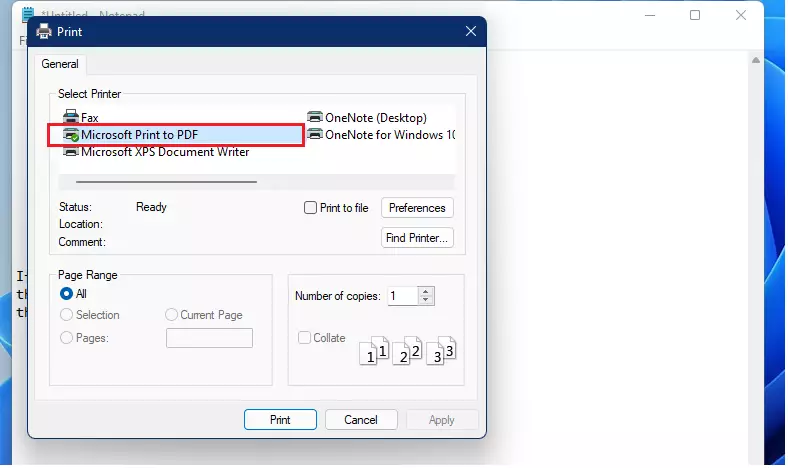
- Go to the File menu and select Print.
- In the printer list, select Microsoft Print to PDF.
- Click the Print button.
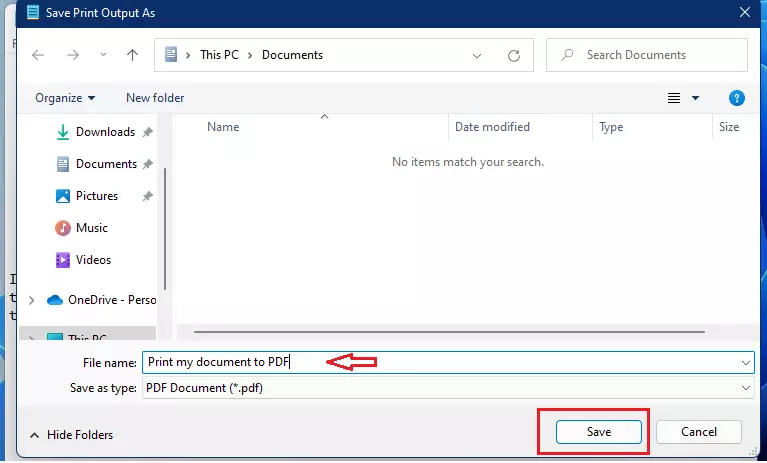
A window will pop up asking where you want to save your file. Choose a folder, give your file a name, and click Save.
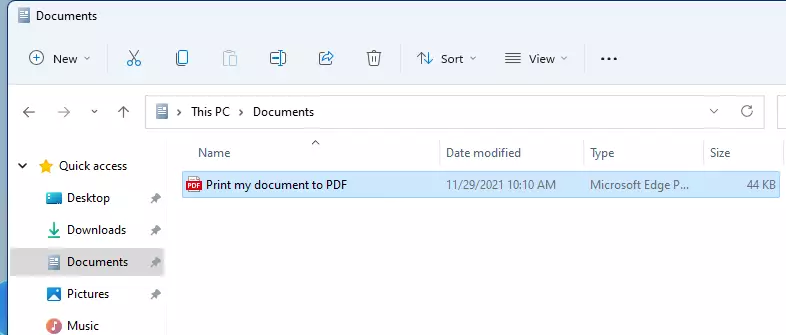
Your document is now saved as a PDF in the folder you selected.
Troubleshooting: Why is Microsoft Print to PDF missing?
If you do not see the printer in your list, it might be disabled in Windows features or the driver might be corrupted. You can fix this using the optionalfeatures.exe tool.
[Requires Admin Privileges]
- Press the Windows key and type Turn Windows features on or off.
- Find Microsoft Print to PDF in the list.
- Uncheck it, click OK, and restart your computer.
- Repeat the steps to check the box again to reinstall the driver.
Advanced Registry and Driver Fixes
If the feature is still missing, you may need to check the print spooler or registry. [Requires Admin Privileges]
Check the printer status via Command Prompt:
dism /Online /Get-FeatureInfo /FeatureName:Printing-PrintToPDF-Features
If the printer is missing entirely, use this command to add it back:
dism /Online /Enable-Feature /FeatureName:Printing-PrintToPDF-Features
You can also check the registry path at 🗝️HKEY_LOCAL_MACHINE\SYSTEM\CurrentControlSet\Control\Print\Printers to ensure the driver is registered correctly.
Microsoft Print to PDF vs. Save as PDF
Many apps have a Save as PDF option. This is often faster than using the virtual printer. However, Microsoft Print to PDF is more reliable for legacy applications that do not have built-in PDF export tools. It acts as a universal bridge for any printable content.
Summary
Microsoft Print to PDF is a powerful, free tool for document management. By following these steps, you can turn any file into a PDF. If you run into issues, use the optionalfeatures.exe menu or the command-line tools provided to restore your printer driver. For more help, visit the official Microsoft support documentation.
Is Microsoft Print to PDF free?
Yes, Microsoft Print to PDF is a completely free, built-in feature of the Windows operating system. You do not need to download any extra software or pay for a subscription to use this virtual printer driver to convert your documents into professional PDF files.
How do I fix Microsoft Print to PDF showing as offline?
If the printer shows as offline, open the Services app, find the Print Spooler service, and restart it. You should also check the Device Manager to ensure the virtual printer driver is not showing any yellow warning icons. If issues persist, reinstall the feature via Windows Features.
Was this guide helpful?

About the Author
Richard
Tech Writer, IT Professional
Richard, a writer for Geek Rewind, is a tech enthusiast who loves breaking down complex IT topics into simple, easy-to-understand ideas. With years of hands-on experience in system administration and enterprise IT operations, he’s developed a knack for offering practical tips and solutions. Richard aims to make technology more accessible and actionable. He's deeply committed to the Geek Rewind community, always ready to answer questions and engage in discussions.


No comments yet — be the first to share your thoughts!