How to Create a Google Cloud Server with Ubuntu Linux
Creating a Google Cloud server with Ubuntu Linux involves using Google’s Compute Engine to set up a virtual computer within their network. This virtual machine, called an instance, acts as a computer for hosting websites or running applications.
Compute Engine provides the raw computing power you need, letting you choose specific operating systems like Ubuntu 22.04 LTS (Jammy Jellyfish) for a solid base. This makes your server ready to handle your projects.
Once your Ubuntu server is ready on Google Cloud, you can make your website available to anyone around the world. You connect your website’s address to the server’s unique IP number to guide visitors to your content.
Navigate to Compute Engine > VM instances in the Google Cloud console. Click CREATE INSTANCE, configure your server details like region and machine type, and select Ubuntu Linux for the boot disk. Finally, click Create to launch your new server.
How to sign up for Google Cloud
Signing up for Google Cloud is straightforward if you already have a Gmail account. New users get $300 in free credit to try out hosting on Google’s powerful system. Head to the Google Cloud Platform website and register for an account to begin setting up your Google Cloud server with Ubuntu.
Head to Google Cloud Platform (GCP) and register for an account if you don’t already have one.
Click the blue button: “Get started for free” in the page’s upper-right corner.

New Google Cloud users receive a $300 credit upon registration with a Gmail account. This $300 credit applies to server costs for the first 90 days. It’s a great incentive to explore Google Cloud services.
Once registration is complete, you should have a Google Cloud Platform account. You won’t be charged anything because you aren’t using any of Google’s Cloud services yet.
How to create a Google Cloud server
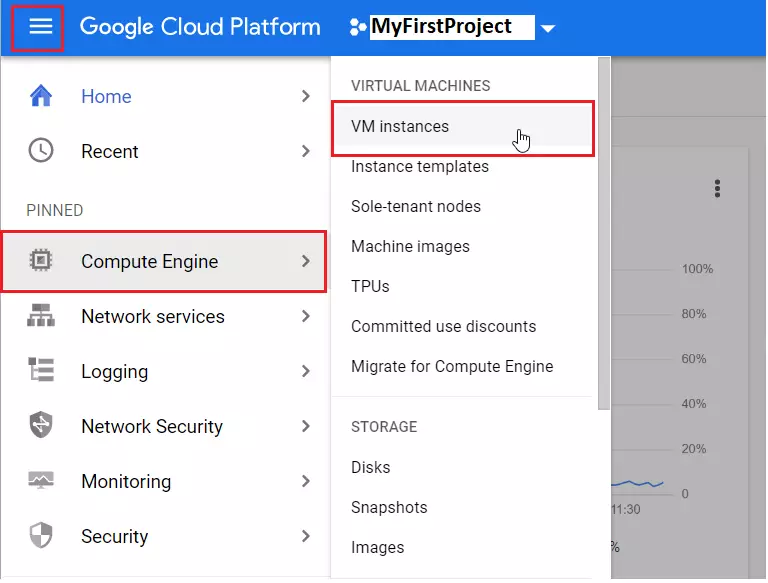
Creating your Google Cloud server is the next step to hosting your online content. To start, go to the top left menu, select Compute Engine, then VM instances. This is where you’ll set up your new virtual machine specifically for your Ubuntu Linux server, preparing it to host your website or application.
The domain created in the previous post will forward to the Google server. This Google server will host content online.
To create a new Google Cloud Server, go to the menu on the top left and navigate to Compute Engine ==> VM instances, as shown in the image below.
If you haven’t created a project yet, the system will prompt you to create a new one before you can make a VM instance.
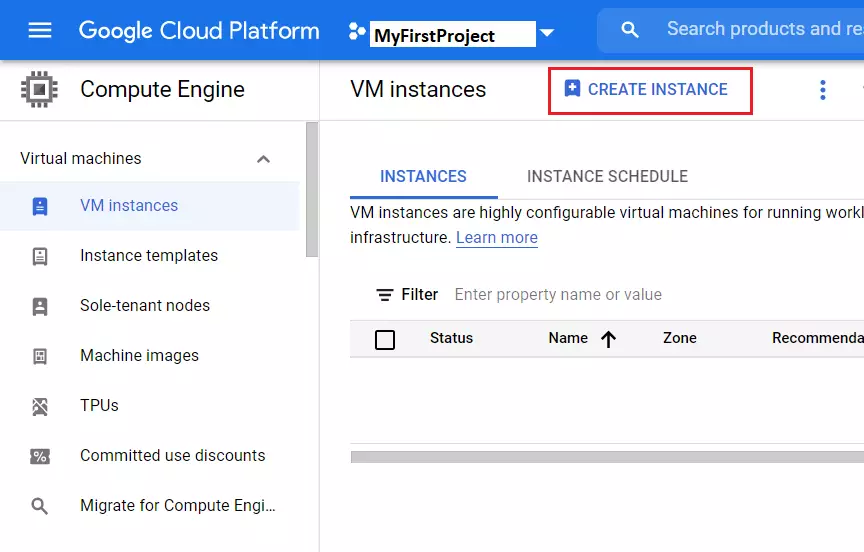
You create a Google Cloud virtual server on the “VM instances” page. Clicking “CREATE INSTANCE” on the “VM instances” page starts setting up a new virtual machine. This virtual machine setup lets you pick an operating system, such as Ubuntu Linux version 22.04.
Doing this will create a new virtual machine in Google Cloud infrastructure that we can use to host our content.
Compute Engine usually takes a few minutes to prepare your VM instance. Once it’s ready, you’ll see a page with the VM setup details.
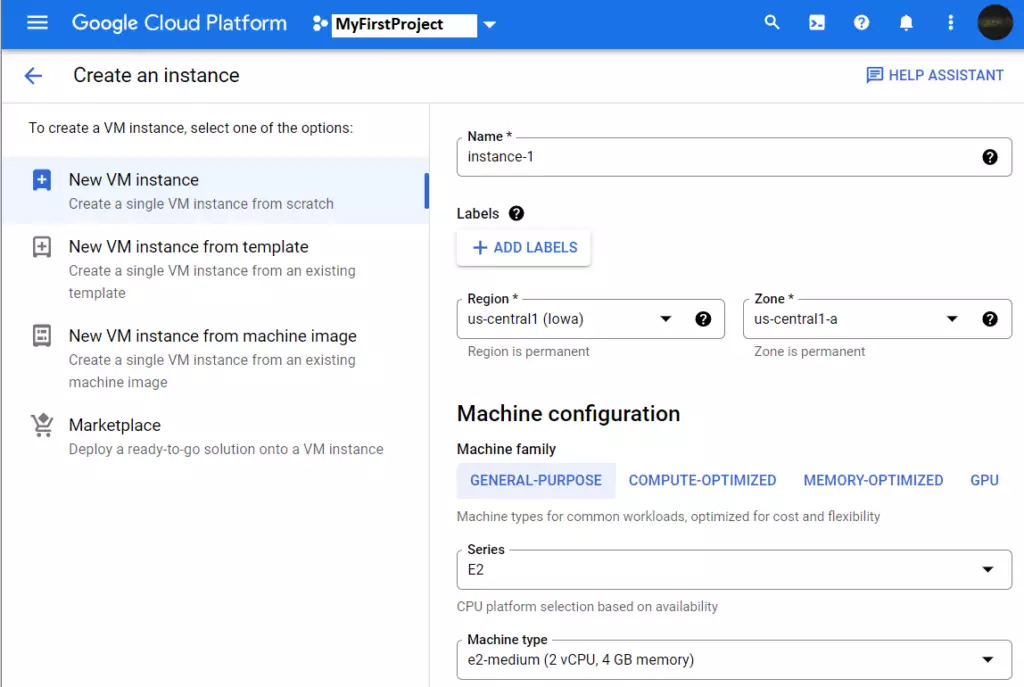
On the VM creation page, choose to Create a new VM from scratch.
Selecting server details is the next step for creating your new Ubuntu Linux virtual machine. Provide specific information, such as the desired region and machine type, to configure your server effectively within Google Cloud.
Your server name must start with a lowercase letter. If you enter a server name that is incompatible with Google Cloud’s naming rules, the system will prompt you to change that server name.
Region: Think of a region as a specific geographical location where you’ll run your Google Cloud resources. You’ll typically want to select the region that your server will primarily be accessed.
A zone is an isolated location within a Google Cloud region; it determines where your data is stored. A zone is typically closer to its parent region.
Machine configuration: Google Cloud offers various virtual machine configurations. Selecting the right one depends on your needs and budget.
Machine family – General purpose
CPU Series – CPU generation
Machine Type – CPU and Memory allocation.
Boot disk: This is where you choose the operating system for your Google Cloud server. Linux Debian is selected by default. There are other types of operating systems you can choose from. For this tutorial, we’re going to be using Ubuntu Linux.
Click Change; choose Ubuntu Linux.

Firewall: If you want to connect to the web from your Google Cloud server, allow HTTP and HTTPS traffic. Add tags and firewall rules to allow specific network traffic from the Internet.
- Allow HTTP traffic
- Allow HTTPS traffic
Once you select the VM instance details, click the Create button to create your first VM.
After a few moments, the first VM server should be created and ready.
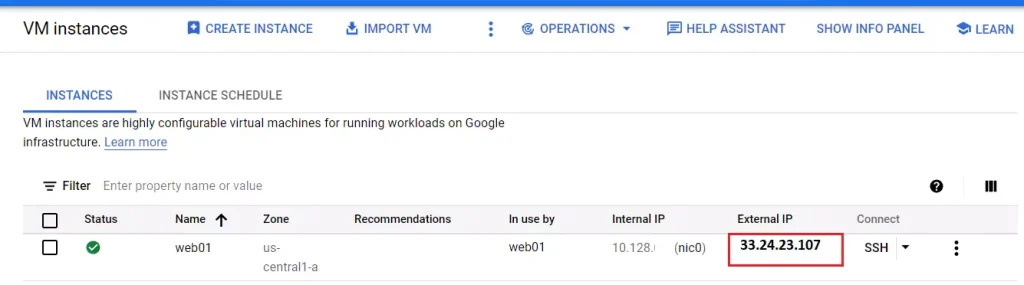
Under External IP, you’ll find your server’s public or external IP address.
How to point a domain name to the server
Your domain name acts as your Google Cloud server’s online street address for visitors. You will use the server’s external IP address, such as 34.102.76.12, to point your domain. If you use Google Domains, log in, click your domain name, and select DNS to change the settings.
For us, it’s Google Domains.
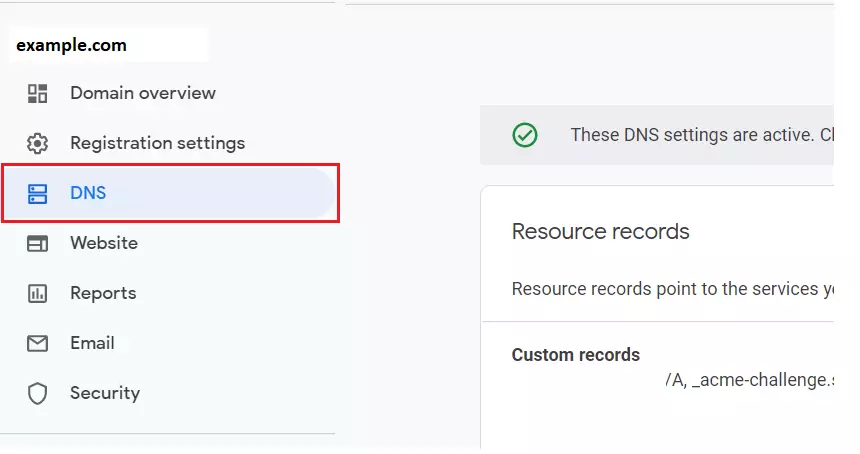
Once you log in to Google Domains, click the domain name and select DNS.
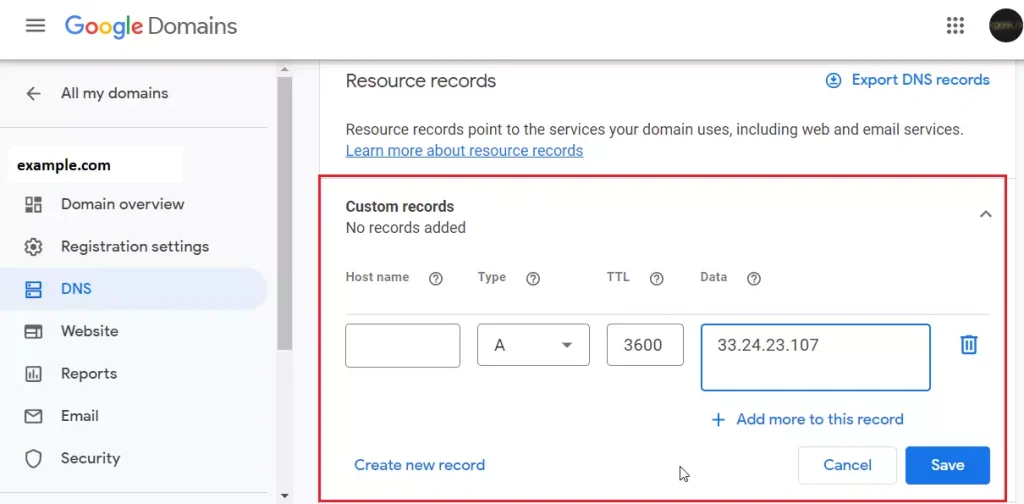
On the DNS page, scroll down to Custom Records in the middle. Then, expand the Custom Records tile and add your first record.
- Host name field, leave blank.
- Type = A
- TTL 3600
- Data: IP address of the host
When you’re done, click the Save button.
When you’re done, a new record will appear showing the website domain pointing to the server’s IP address.
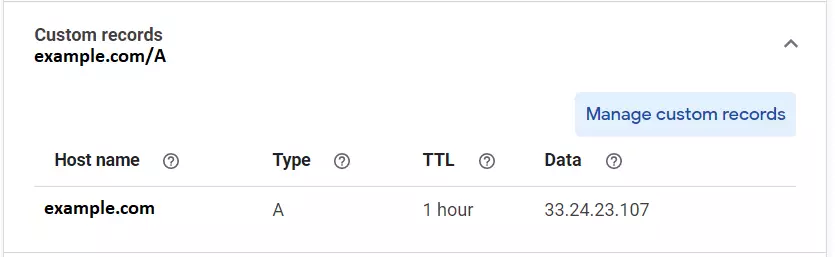
The domain name is pointing to a server or host’s IP address. The server is live, but no content has been created yet.
Our next post will show you how to create a web server and content on the Google Cloud server we created above.
That should do it!
Conclusion:
- Setting up a Google Cloud server with Ubuntu Linux is a straightforward process.
- You successfully created a Google Cloud account and a virtual machine (VM) instance.
- Pointing your domain name to the server makes your website accessible online.
- The server is live, but you must create web content to establish your online presence.
- In our next post, we will guide you through creating a web server and adding content to your new Google Cloud server.
Does Google Cloud support Linux?
# AlmaLinux OS on Google Cloud Platform. AlmaLinux OS is a fully supported operating system on Google Cloud Platform (GCP) and is available as a default offering in both the gcloud CLI and the Google Cloud Console GUI.
Does Ubuntu have free cloud storage?
Ubuntu is the world’s most popular cloud operating system across public clouds. Thanks to its security, versatility and policy of regular updates, Ubuntu is the leading cloud guest OS and the only free cloud operating system with the option of enterprise-grade commercial support.
Was this guide helpful?

About the Author
Richard
Tech Writer, IT Professional
Richard, a writer for Geek Rewind, is a tech enthusiast who loves breaking down complex IT topics into simple, easy-to-understand ideas. With years of hands-on experience in system administration and enterprise IT operations, he’s developed a knack for offering practical tips and solutions. Richard aims to make technology more accessible and actionable. He's deeply committed to the Geek Rewind community, always ready to answer questions and engage in discussions.

No comments yet — be the first to share your thoughts!