
This article explains how to connect or disconnect a Storage Space in a Storage pool on Windows 11.
Storage Spaces is a feature in Windows that allows you to combine multiple hard drives into a single virtual drive, also known as a storage pool. This feature enables you to create a more flexible and scalable storage solution for your computer.
With Storage spaces, you can create a Storage pool, rename a Storage pool, add physical disk drives to a Storage pool, add a Storage space to an existing Storage pool, optimize a storage pool, rename a physical disk in a Storage pool, and more.
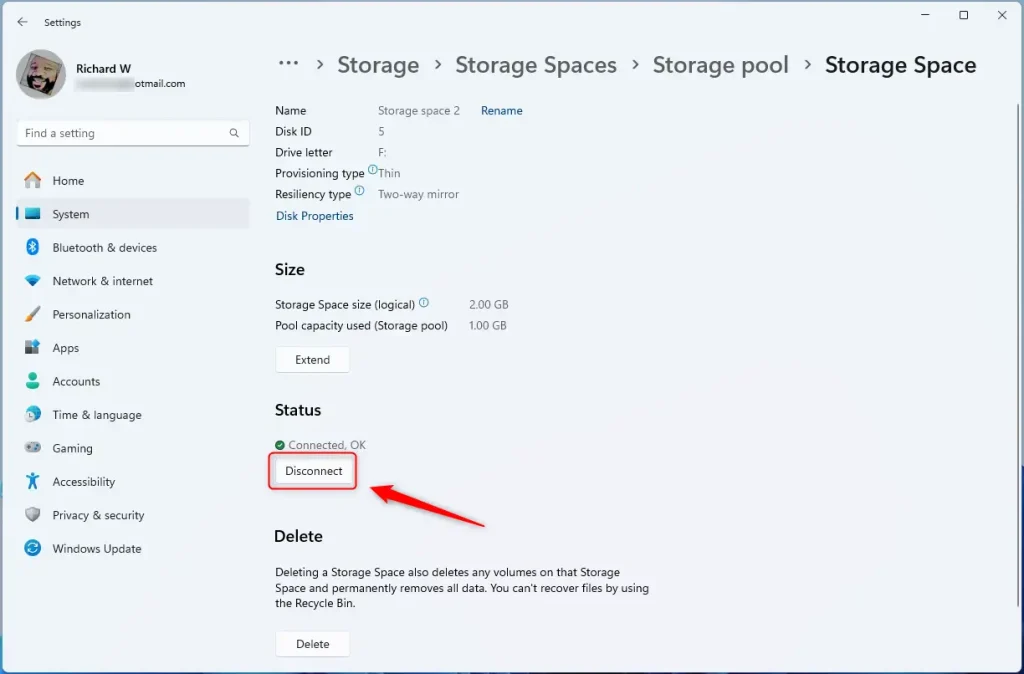
Creating a new Storage space will appear in File Explorer as a virtual drive with a drive letter. You can disconnect or offline a space using the “Disconnect” button.
Disconnecting a space will hide it from File Explorer until it is reconnected or brought back online. Disconnecting and reconnecting storage spaces will not delete data from them.
You may want to temporarily disconnect a storage space to hide it from File Explorer or prevent any changes to its data. This can be useful if you want to limit access to specific files or folders or if you’re experiencing issues with the storage space and need to troubleshoot the problem.
On the other hand, you may want to connect a previously disconnected storage space to regain access to the data stored within it. This can be useful if you need to access specific files or folders that were previously hidden or if you want to resume using the storage space.
Connect or disconnect a Storage space within a Storage pool on Windows
As mentioned, users can disconnect to hide a Storage space from File Explorer or connect it to access stored data.
Here’s how to do it.
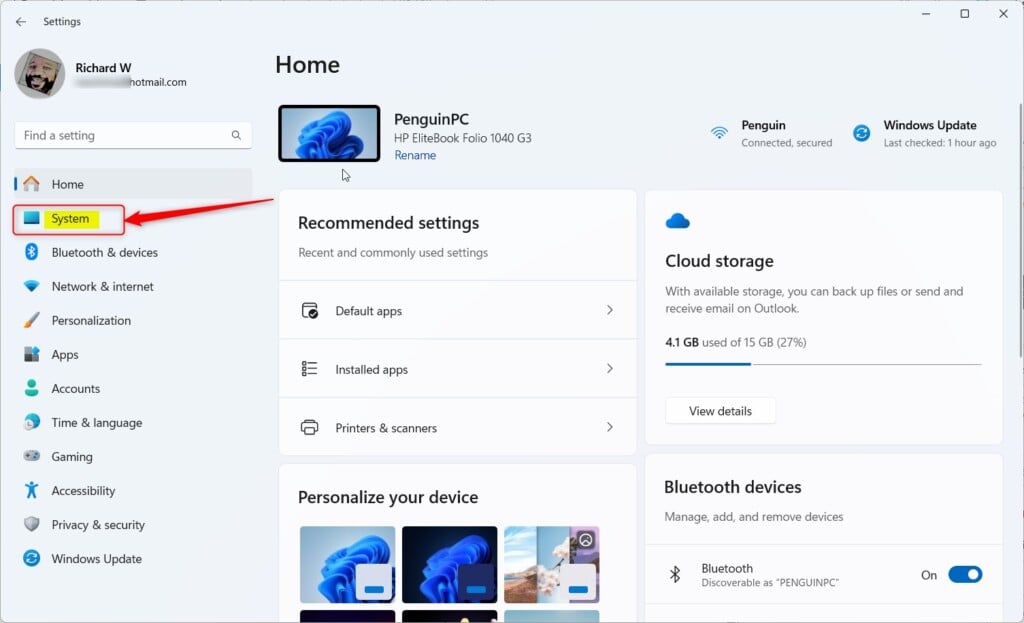
First, open the Windows Settings app.
You can do that by clicking on the Start menu and selecting Settings. Or press the keyboard shortcut (Windows key + I) to launch the Settings app.
When the Setting app opens, click the System button on the left.
Select the Storage tile on the right to expand it.
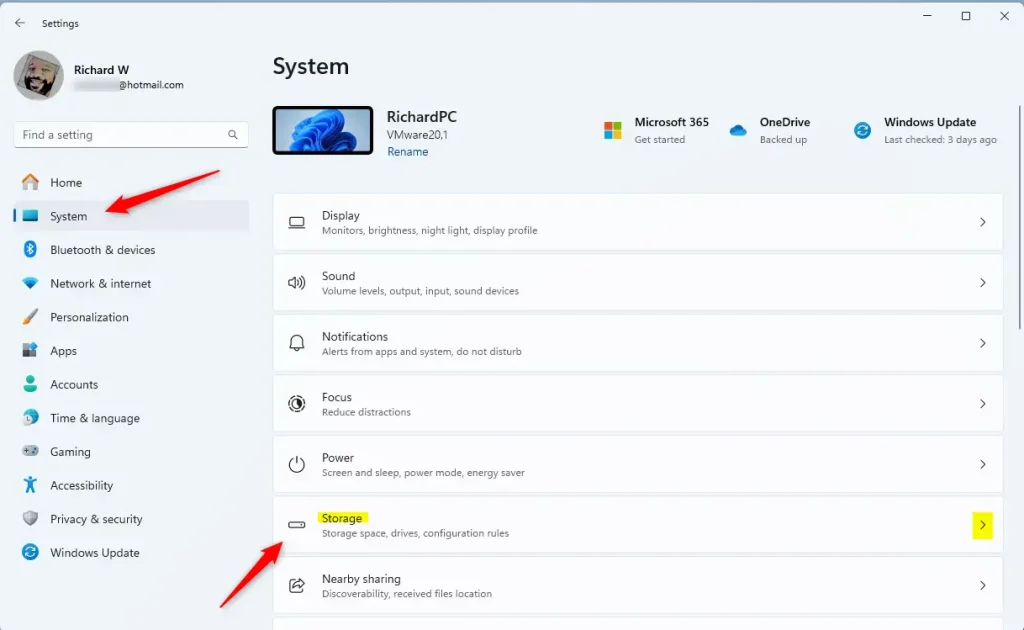
On the System -> Storage settings page, select and expand the “Advanced storage settings tile, and click the “Storage Spaces” tile to expand it.
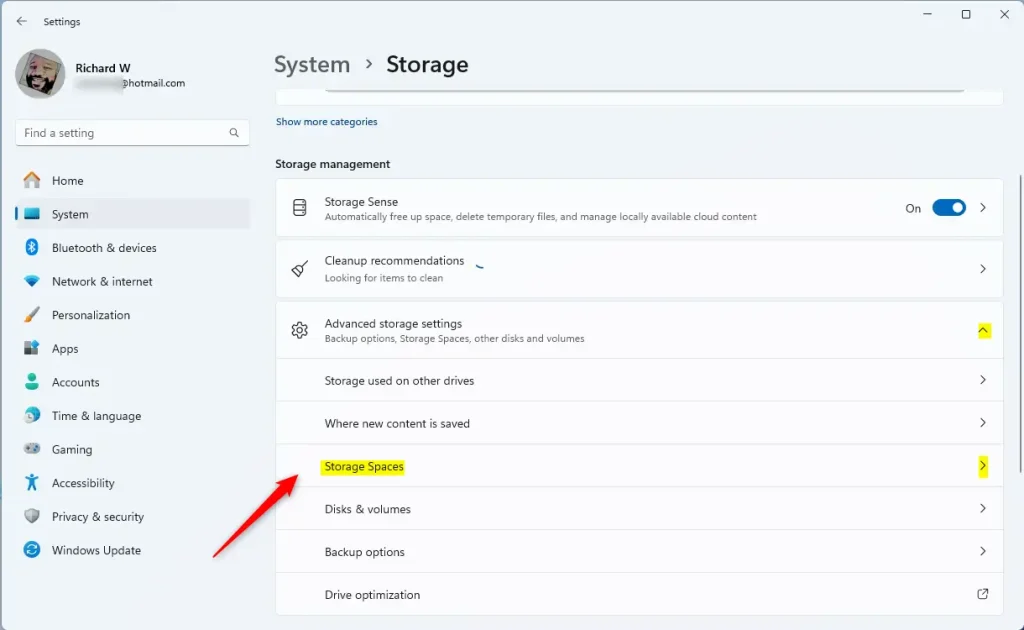
Next, select the “Storage pool” tile to expand it.
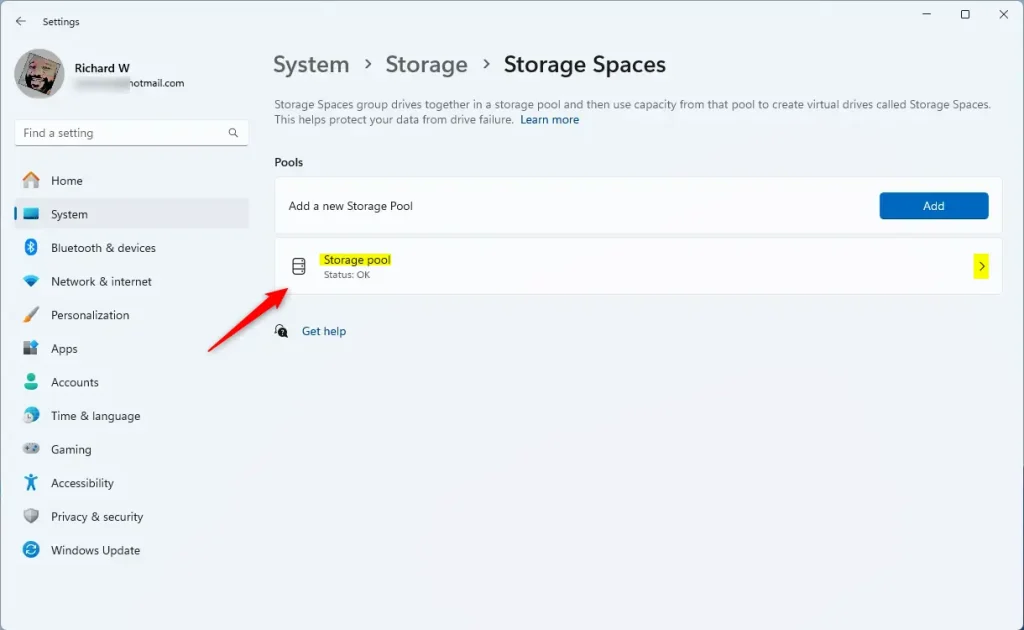
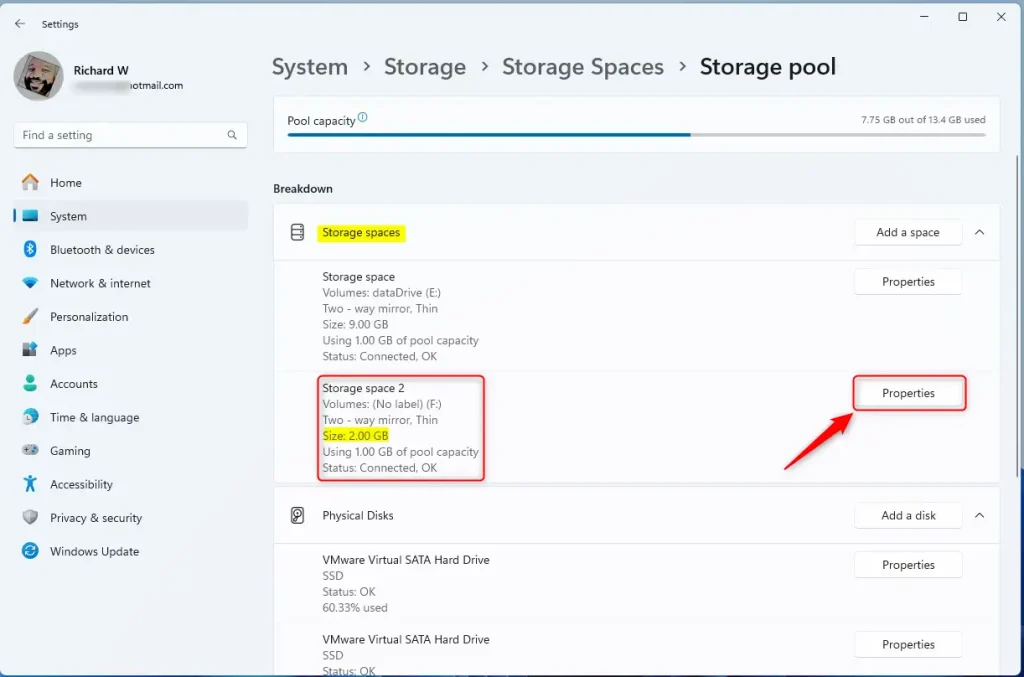
On the Storage pool status page, select the Storage space you want to extend, then click the “Properties” button.
On the Storage space properties pane, check to see if the space is connected or disconnected. To change the status, click on Disconnect or Connect.
Close Settings when done.
That should do it!
Conclusion:
- Connecting or disconnecting a storage space within a Windows storage pool is straightforward, and the process can be accessed through the Windows Settings app.
- This feature allows users to hide or regain access to specific data stored within the storage space.
- Users can effectively manage their storage spaces and troubleshoot any issues by following the steps outlined in this guide.

Leave a Reply