
This brief tutorial shows students and new users how to configure Do Not Track requests in the Microsoft Edge browser in Windows 10.
The new Microsoft Edge browser has adopted the Chromium open-source project code base, offering better web compatibility and performance over the legacy Edge.
Edge browser is a cross-platform which supports all Windows, macOS, and Linux systems. If you’re currently using Edge and want to learn how to send Do Not Track requests to websites that ask for your tracking info, the steps below should show you how to do it.
Do Not Track is an Edge feature that specifies whether to send Do Not Track requests to websites that ask for tracking info. This lets websites you visit know you don’t want your browsing activity tracked. This feature is turned off by default, but you can turn it on.
Sending Do Not Track doesn’t automatically protect your Privacy. Websites have the options to choose whether to honor your request or not. Some websites will simply ignore your requests and keep tracking your info.
To get started with enabling Do Not Track, follow the steps below:
Do Not Track in Edge
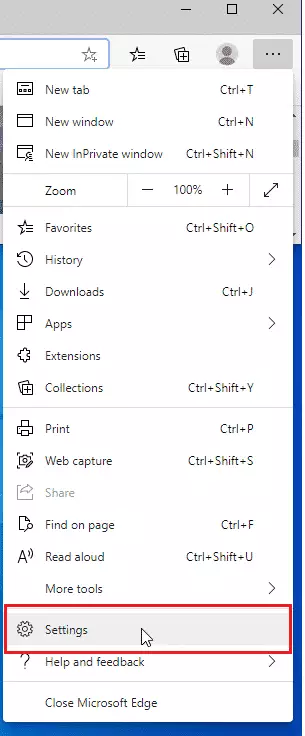
To enable “Do Not Track” in Edge, open Microsoft Edge and click the 3 horizontal dots ( . ) at the top right corner of your screen as shown in the image below.
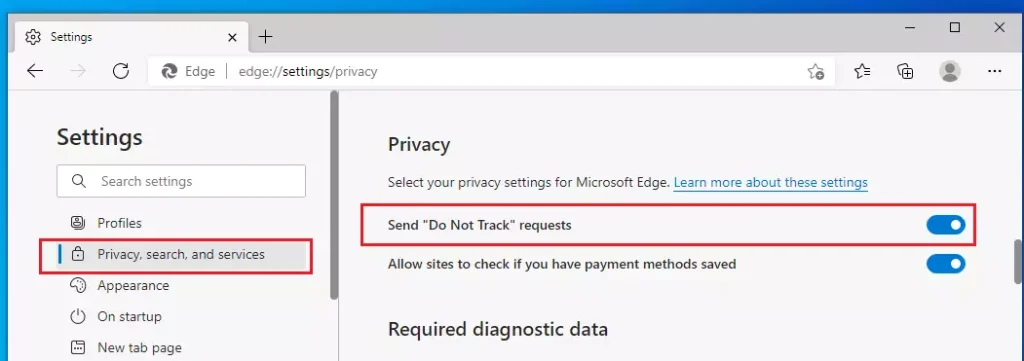
When the Settings page opens, click on Privacy, search, and services on the left, and click on Send “Do Not Track” request on the right.
When you turn on, Do Not Track, requests are always sent to websites asking for tracking info.
Enable in Edge via registry
You can also enable the Do Not Track in the Microsoft Edge feature from the Windows registry.
You can also enable this feature via the Windows registry if logged in as an administrator. To do that, use the steps below:
Using the Windows registry is one way to force all users on the system to send Do Not Track. There are multiple ways to do this in Windows; however, using the Windows registry is the easiest and most effective way.
To enable, press the Windows Key + R on your keyboard to open the run command box. Or use the search function to search for the Run app.
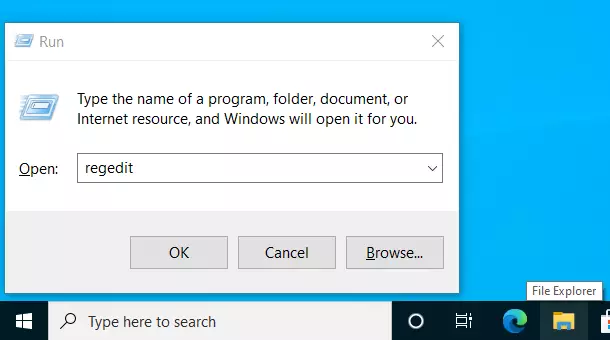
In the command box, type the commands below and press Enter.
regedit
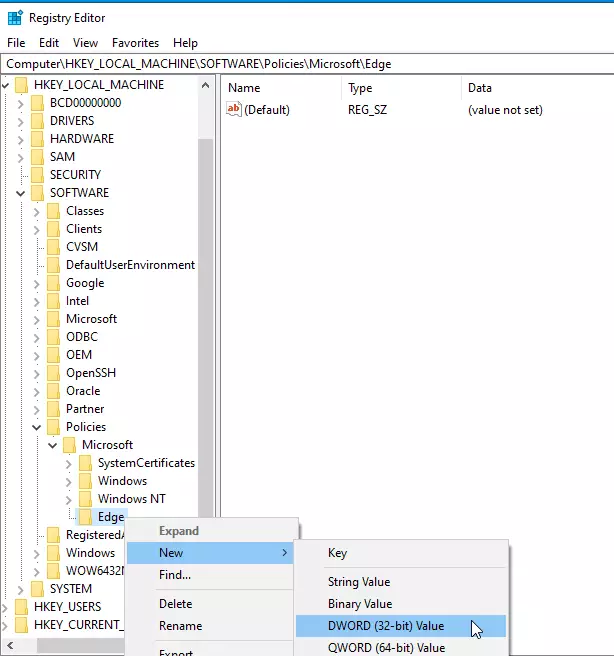
Then the registry opens; navigate to the path below. If you don’t see the Edge key, create one.
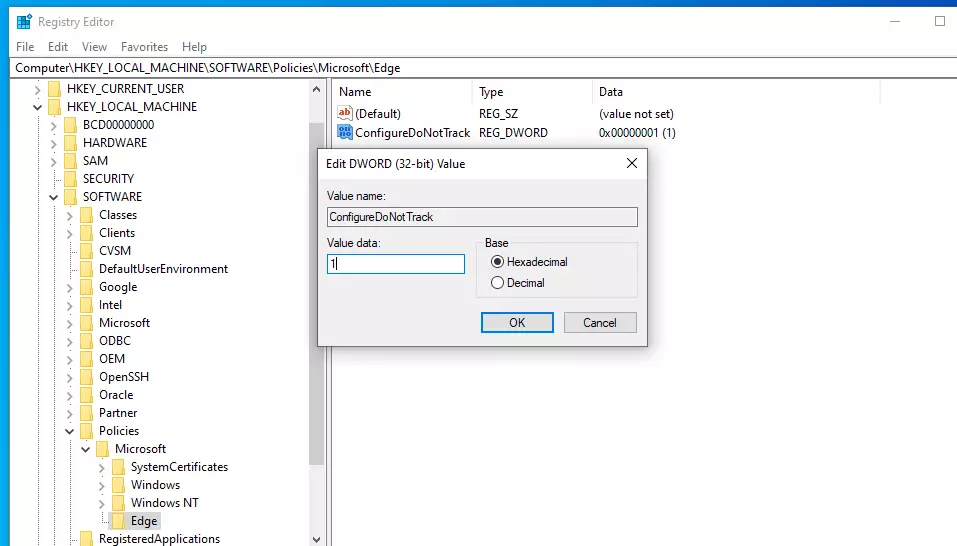
HKEY_LOCAL_MACHINE\SOFTWARE\Policies\Microsoft\Edge
From there, right-click on the Edge key and select the New > DWORD (32-bit) Value option to create a REG_DWORD value if you don’t see the existing ConfigureDoNotTrack value already created.
If you don’t see the Edge key or folder, create one.
Name the new DWORD value as:
ConfigureDoNotTrack
After saving the DWORD above, double-click it to open. Then enter the value of 1 to enable.
(delete) = Default
0 = Always disabled
1 = Always enabled
If you enable this policy, Do Not Track requests are always sent to websites asking for tracking info.
If you disable this policy, requests are never sent.
That should do it!
Conclusion:
This post showed you how to turn off the “Do Not Track” feature in the Microsoft Edge browser. If you find any error above, please use the comment form below to report.
Leave a Reply