
This tutorial will show you how to change the name of a local account or Microsoft account in Windows 10 and Windows 11.
Why Change Your Account Name?
Having different accounts on a shared PC lets multiple people use the same device. Each person gets their own sign-in info, files, browser favorites, and desktop settings.
You can add a local user account (an offline account) or a Microsoft account for a user to sign in to the PC with.
What’s the Difference Between User Name and Full Name?
The user name of an account is used to identify the account in Windows.
The full name of an account is the display name used in Windows. The account’s display name will show in places like the Sign-in screen, Start Menu, and Settings.
When you create a Microsoft account, you specify a changeable full name. This name is used as the display name.
If a local account doesn’t have a full name specified, then its user name is used as the display name instead.
Important Things to Know
How to change your user account name – Microsoft Support
- You must be signed in as an administrator to change the user name of an account.
- Changing the name of an account will not change the name of its profile folder (ex:
C:\Users\Generic_User) used in paths. - User names can’t contain these characters: / \ [ ] ” : ; | < > + = , ? *
Option One: Change Name of Microsoft Account Online
Why use this option? This option will change the name of your Microsoft account on all devices you sign in with the same Microsoft account.
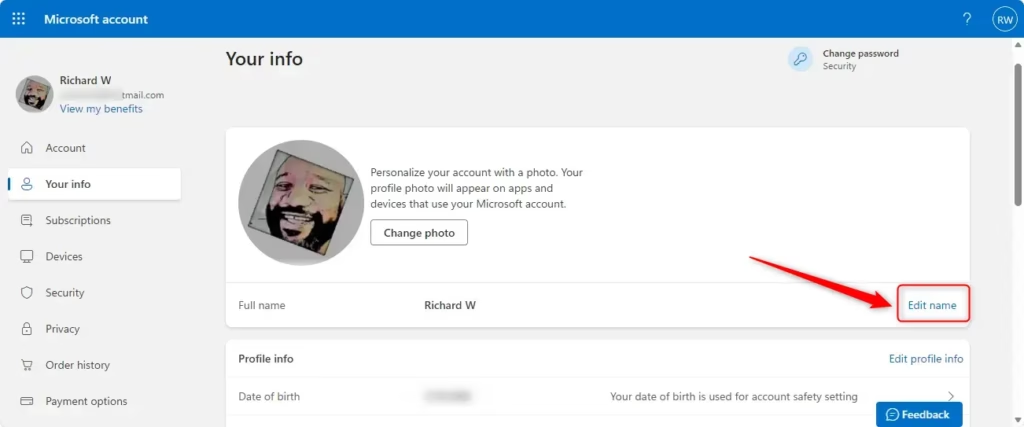
- Go to the “Your info” page on the Microsoft account website, and sign in to your Microsoft account if not already.
- Click/tap on the Edit name link.
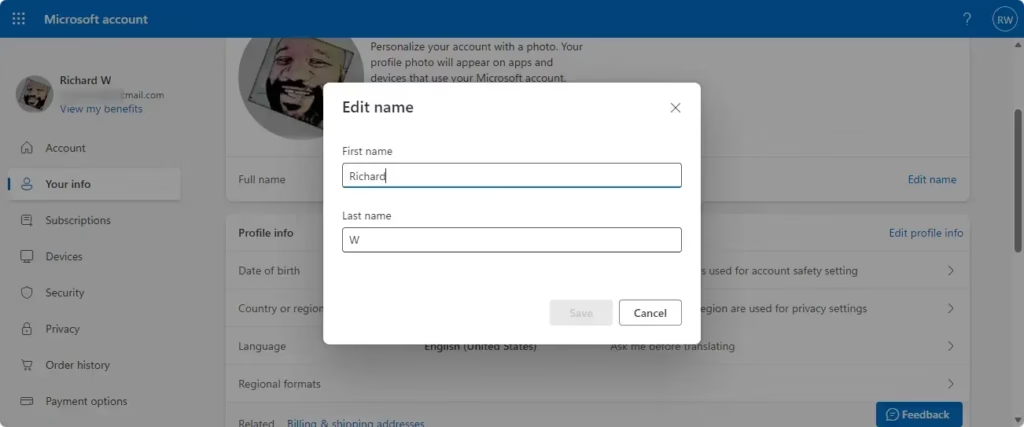
- Type a new First name and Last name you want as the display name for your Microsoft account. Enter the Captcha characters you see to verify, and click/tap on Save.
- The First name and Last name you enter will be used as the full name of your Microsoft account shown on the lock screen and at sign in on your devices.
- While connected to the Internet, sign out and sign in to your Microsoft account on your Windows 11 PC to apply the changes.
Option Two: Change Name in Settings
What happens when you use this option? You can change the name of a local account or Microsoft account directly from Windows Settings. This option is still only gradually rolling out to some starting with Windows 11 build 26220.8062 (Beta 25H2) and build 26300.8068 (Dev 25H2).
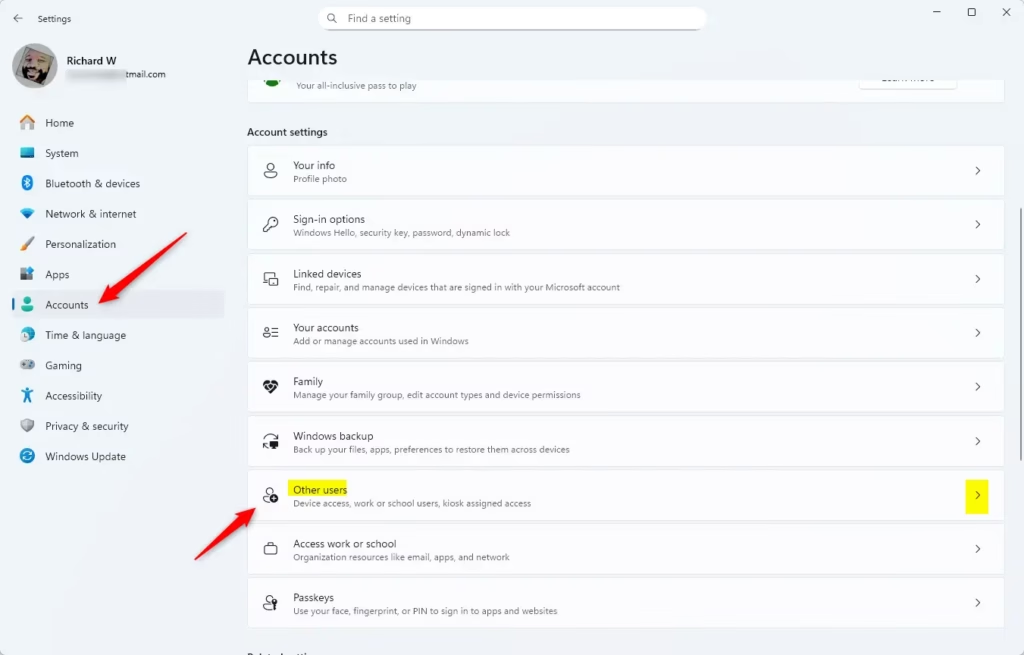
- Open Settings by pressing
Win+I. - Click/tap on Accounts on the left side, and click/tap on Other users on the right side.
- Open Other users settings
- Under Other users, click/tap on the account you want to change the name of to expand it open, and click/tap on Change account name.
- Type a new account name you want, and click/tap on OK.
- You can now close Settings if you like.
Option Three: Change Name in Control Panel
What happens when you use this option? You can change the name of a local account through the Control Panel.
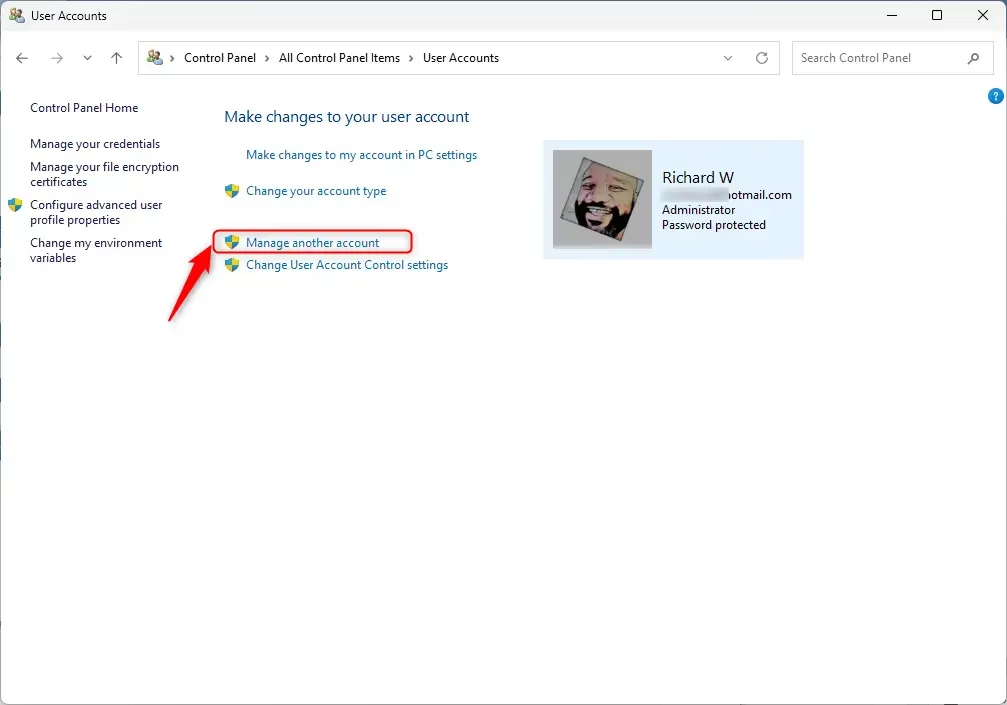
- Open the Control Panel (icons view), and click/tap on the User Accounts icon.
- Click/tap on the Manage another account link.
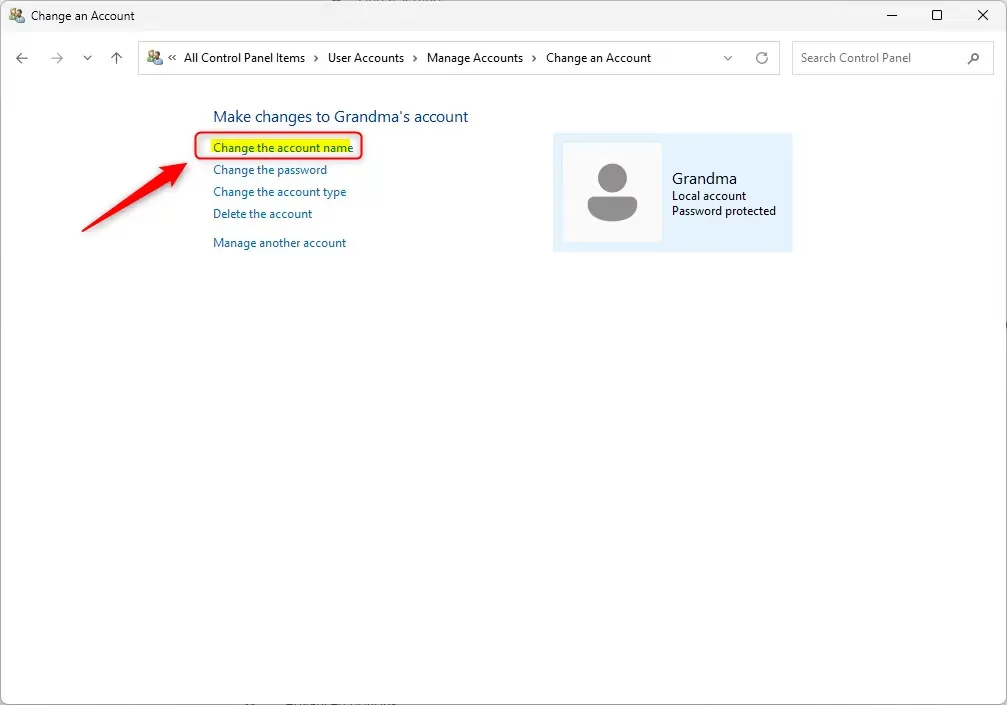
- Click/tap on a local account you want to change the name of.
- Click/tap on the Change the account name link.
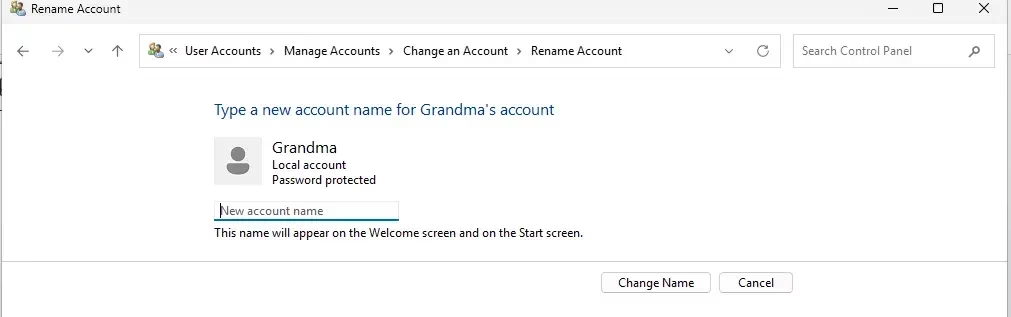
- Type a new account name you want, and click/tap on Change Name.
- You can now close the Control Panel if you like.
Option Four: Change Name in netplwiz
What happens when you use this option? You can change the name of a local account using the netplwiz tool.
- Open netplwiz.
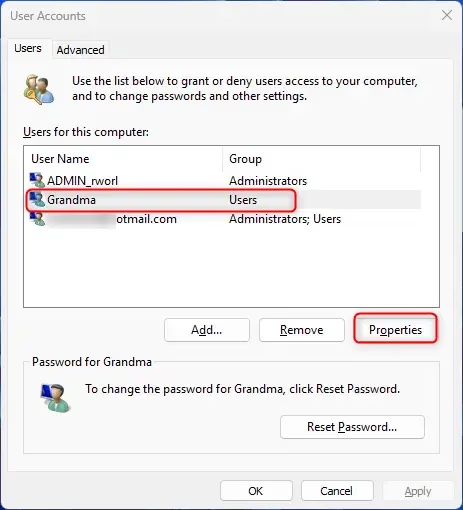
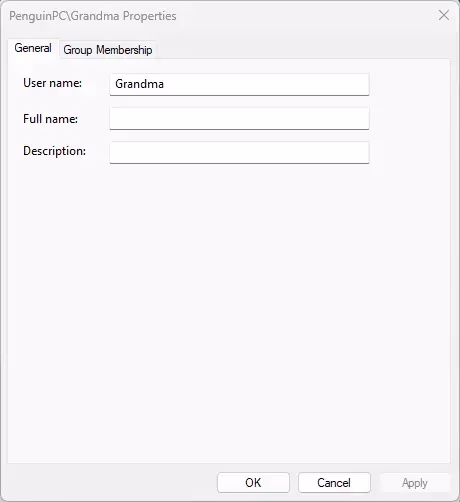
- Check the Users must enter a user name and password to use this computer box if available. Select the local account you want to change the name of, and click/tap on the Properties button.
- Note: If you turned on For improved security, only allow Windows Hello sign-in for Microsoft accounts on this device (aka: passwordless sign-in), you will not see the Users must enter a user name and password to use this computer check box until you turn off this setting. If your PC is currently joined to a domain, then the Users must enter a user name and password to use this computer box will not be available.
- In the General tab, type the new User name (ex:
"Generic_User3") you want for the local account, and click/tap on OK. - If you wanted to have Windows automatically sign in to an account at startup, then you will need to set this up again now.
- When finished, click/tap on OK.
- If you are currently signed in to this local account, click/tap on Yes when prompted to sign out and apply your changes.
Option Five: Change Name in Command Prompt
Why use this option? Using Command Prompt is a quick way to change a local account name if you’re comfortable with command-line tools.
⚠️ Admin Privileges Required
- Open Windows Terminal (Admin), and select Command Prompt.
- Copy and paste the command below into the elevated command prompt, and press Enter. Make note of the current name of the local account you want to change the name of.
wmic useraccount get fullname, name- Type the command below into the elevated command prompt, and press Enter.
wmic useraccount where name="Current Name" rename "New Name"- Substitute Current Name in the command above with the actual current name of the local account from step 2 above. Substitute New Name in the command above with the actual new name you want for the local account.
- For example:
wmic useraccount where name="Generic_User2" rename "Generic_User3" - You can now close Windows Terminal (Admin) if you like.
Option Six: Change Name in PowerShell
Why use this option? PowerShell is a more modern command-line tool that gives you more control over local account management.
⚠️ Admin Privileges Required
- Open Windows Terminal (Admin), and select Windows PowerShell.
- Copy and paste the command below into the elevated PowerShell, and press Enter. Make note of the current name of the local account you want to change the name of.
Get-LocalUser- Type the command below into the elevated PowerShell, and press Enter. (see screenshot below)
Rename-LocalUser -Name "Current Name" -NewName "New Name"- Substitute Current Name in the command above with the actual current name of the local account from step 2 above. Substitute New Name in the command above with the actual new name you want for the local account.
- For example:
Rename-LocalUser -Name "Generic_User2" -NewName "Generic_User3" - You can now close Windows Terminal (Admin) if you like.
Option Seven: Change Name of Built-in Administrator Account
What happens when you use this option? You can change the name of the built-in Administrator account using Local Security Policy.
Note: This option is only available in the Windows 10/11 Pro, Enterprise, and Education editions.
⚠️ Admin Privileges Required
- Open Local Security Policy by typing
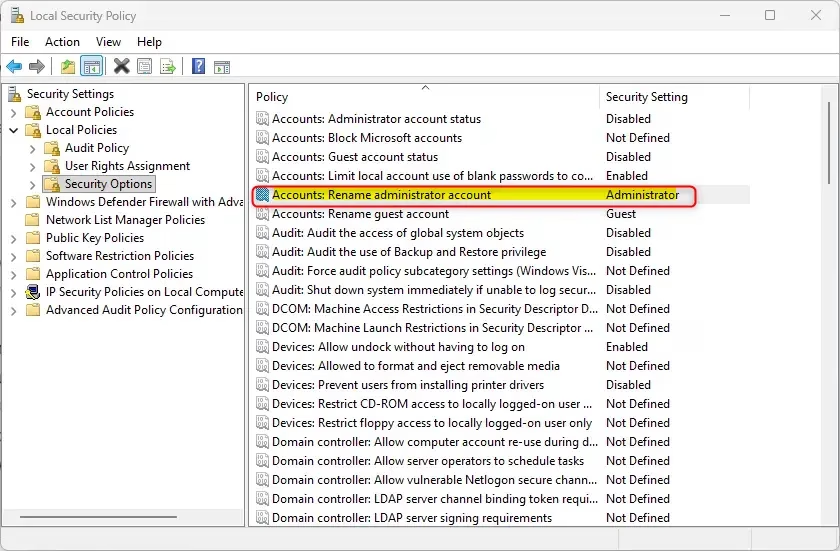
secpol.mscin the search box. - Expand open Local Policies in the left pane, and click/tap on Security Options.
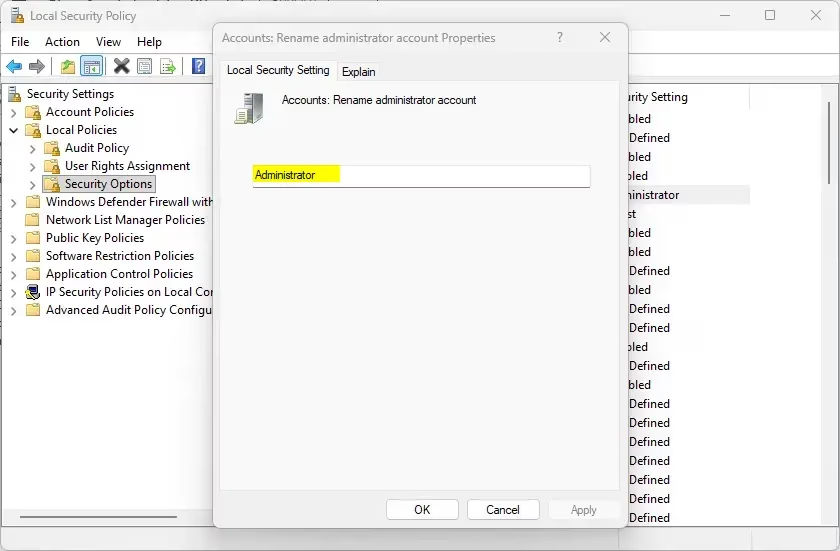
- In the right pane of Security Options, double click/tap on Accounts: Rename administrator account.
- Type a new name you want for the built-in Administrator account, and click/tap on OK.
- You can now close Local Security Policy if you like.
Summary
Changing your account name in Windows 11 is easy. You have seven different options to choose from depending on what type of account you have and what tools you prefer to use.
Quick recap:
- Option One: Change your Microsoft account name online. This works on all your devices.
- Option Two: Use the Settings app to change a local or Microsoft account name. (New feature, rolling out gradually)
- Option Three: Use Control Panel to change a local account name. Works on most Windows versions.
- Option Four: Use netplwiz to change a local account name. Good if you need to manage multiple accounts.
- Option Five: Use Command Prompt to change a local account name. Fast if you know command-line tools.
- Option Six: Use PowerShell to change a local account name. More modern than Command Prompt.
- Option Seven: Change the built-in Administrator account name. Only works on Pro, Enterprise, and Education editions.
Remember: Changing your account name does not change your user profile folder name (like C:\Users\Generic_User). You need administrator privileges to make these changes. Choose the option that works best for you!

Leave a Reply