

This tutorial will show you how to change the touchpad cursor speed on your Windows 11 computer.
If your Windows 11 laptop or device has a built-in precision touchpad, you can adjust its cursor speed if it feels too slow or too fast for you.
Reference:
Precision touchpad tuning (touchpad-tuning-guidelines)
This page has information about touchpad settings in Windows 10 and newer versions.
Option One
Change Touchpad Cursor Speed in Settings
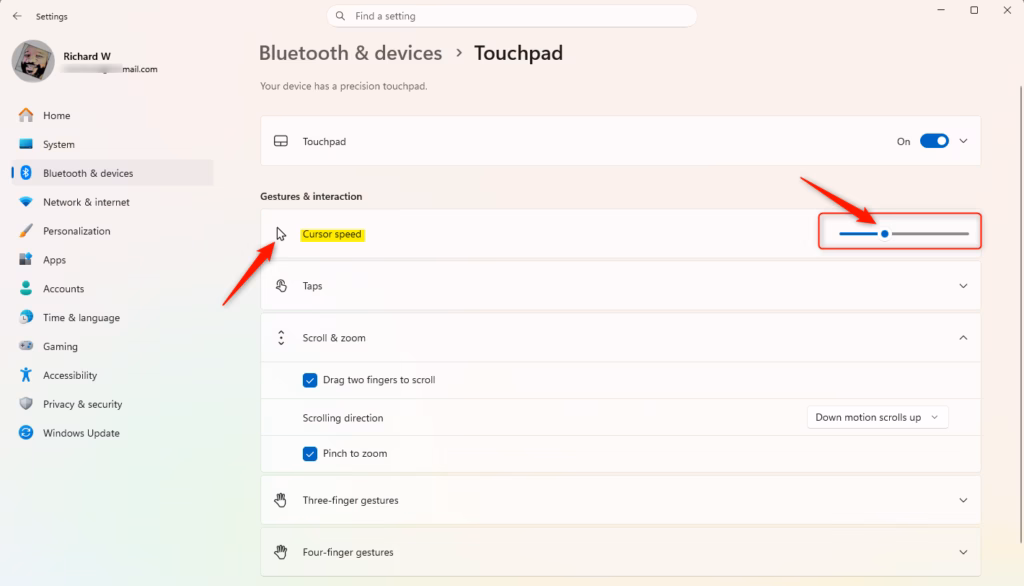
- Open Settings (press Win+I).
- Click on Bluetooth & devices on the left side. Then click on Touchpad on the right side.
- Find the Cursor speed slider. Move it left to make the cursor slower or right to make it faster. Choose the speed you want.
- When you hover your pointer over the slider, you will see the current speed (it goes from 1 to 10). The default speed is 5.
- You can close Settings when you are done.
Option Two
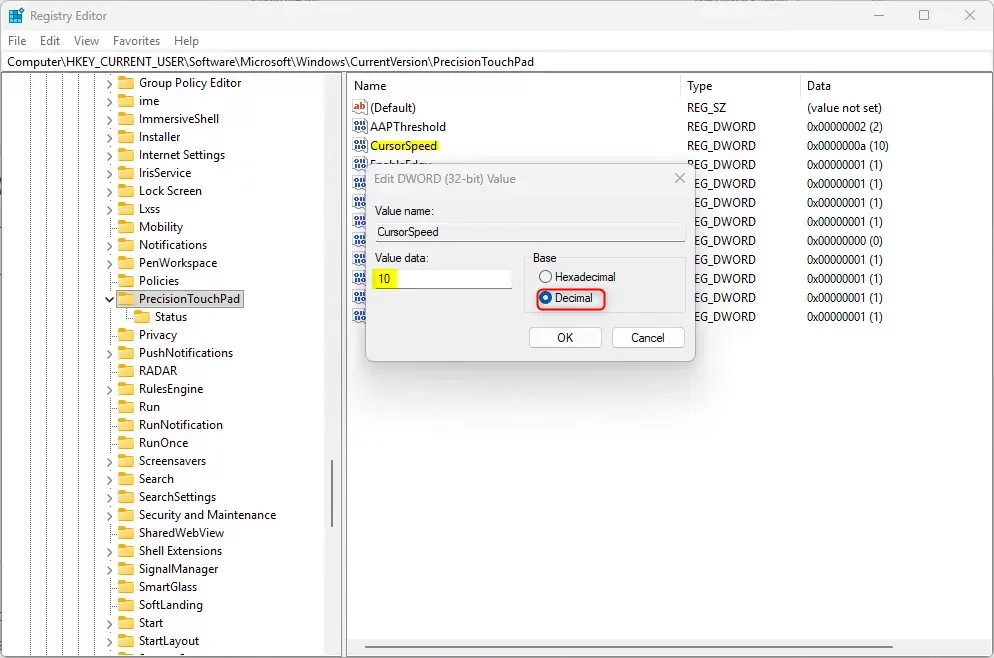
Change Touchpad Cursor Speed in Registry Editor
- Admin required: Open Registry Editor by typing
regedit.exein your search bar. - In the left pane, navigate to this location:
HKEY_CURRENT_USER\Software\Microsoft\Windows\CurrentVersion\PrecisionTouchPad - In the right pane, find CursorSpeed and double-click it to open it.
- Click on Decimal. Type a number between 2 (slower) and 20 (faster) for your cursor speed. Click OK.
- The default cursor speed is 10. (Note: The Settings option in Option One divides this number by 2.)
- Close Registry Editor.
Summary
You can change your touchpad cursor speed in two ways. The easiest way is through Settings. Just go to Bluetooth & devices, then Touchpad, and move the Cursor speed slider. You can also change it in Registry Editor if you prefer. Remember that the Settings slider goes from 1 to 10, while the Registry Editor value goes from 2 to 20.

Leave a Reply