
This article explains how to change or set the display resolution in Windows 11.
Display resolution in Windows refers to the number of pixels shown on the screen, measured horizontally and vertically. It is typically expressed in the format “width x height” in pixels. A higher resolution leads to sharper and more detailed images and text on the screen.
Higher resolutions display more content, but the items on the screen appear smaller. Lower resolutions show larger items, but fewer of them are visible.
You may want to adjust the display resolution in Windows for several reasons. First, changing the display resolution can help enhance the clarity of images and text on your screen, making them easier to read.
How to adjust display resolutions in Windows 11
Changing Windows 11 resolutions is easy and can be done from the System settings pane.
To get to System Settings, you can use the Windows key + I shortcut or click on Start ==> Settings, as shown in the image below:

Alternatively, you can use the Search box on the taskbar to search for Settings and then select it to open it.
In Windows Settings, click System and Display on the right pane of your screen to expand it.

Windows will automatically select the best resolution for your display monitor, but you don’t have to settle for it.
Use the drop-down option on the “Display resolution” tile to choose a different display resolution.
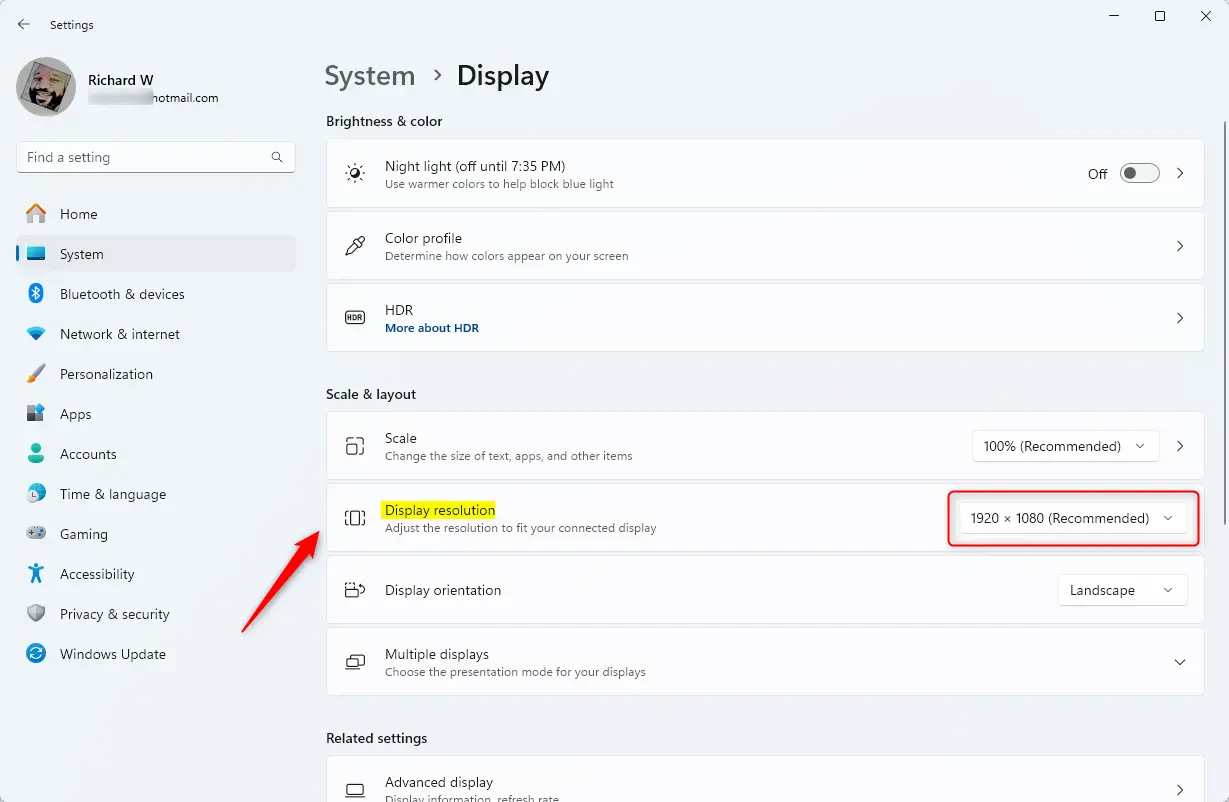
If your Display can support a higher resolution with the best pixels and sharper images, you can select that instead.
Once you select the new resolution and apply your changes, you’ll be prompted with a message to either key the new change or revert to the previous resolution.
You will have 15 seconds to decide.
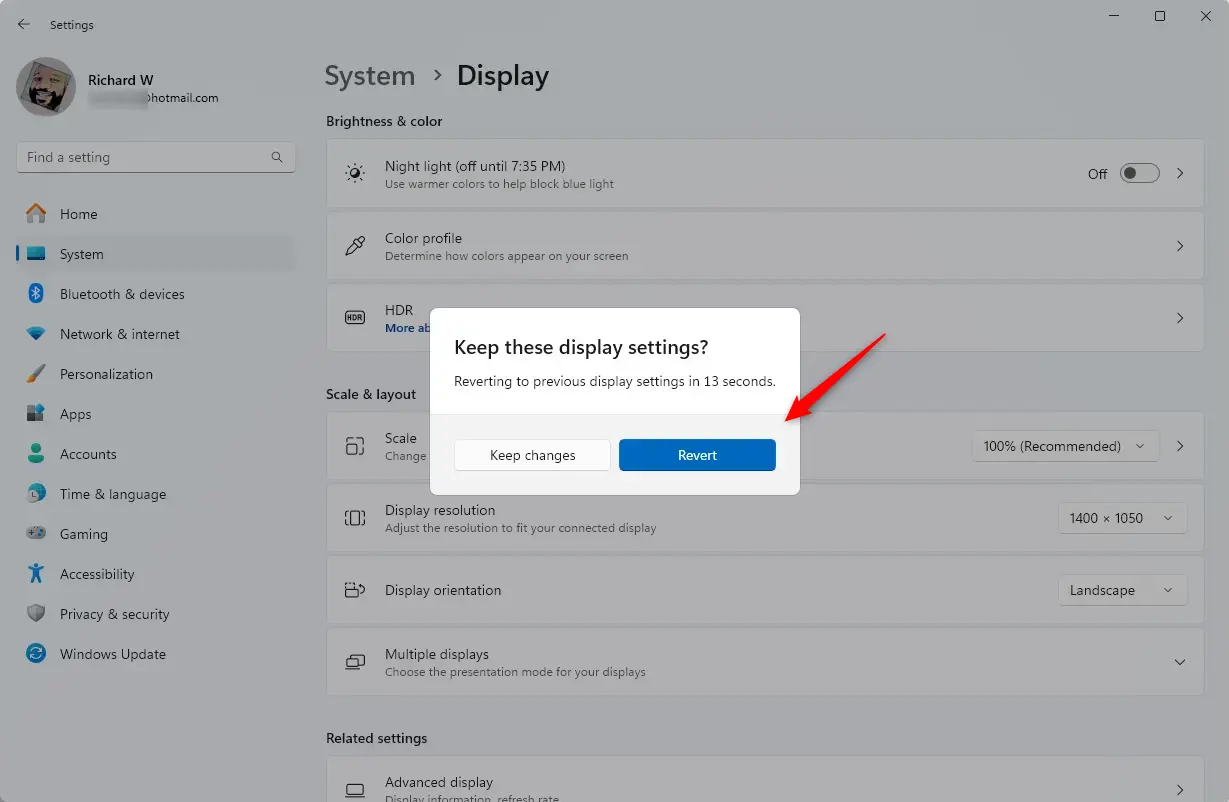
If you like the new resolution, click the Keep Changes button. If you don’t, the Revert changes will be selected automatically.
That should do it!
Conclusion:
- Adjusting display resolution in Windows 11 is a straightforward process that enhances your viewing experience.
- Higher resolutions provide clearer images and text, especially on high-resolution monitors.
- Users can experiment with different resolutions to find the most comfortable setting for their needs.
- Remember to apply changes and confirm your selection within the given timeframe to avoid reverting to the previous resolution.
- Optimizing your display settings can significantly improve productivity and ease of use on your computer.


Leave a Reply