

This guide shows you how to calibrate your screen for HDR content in Windows 11. HDR stands for High Dynamic Range. It makes your colors look richer and your brights and darks look more realistic.
Why calibrate your HDR display?
Not all screens are the same. Calibrating your screen helps you find the perfect balance. It ensures you can see details in both the brightest and darkest parts of a movie or game. Without this, your HDR content might look washed out or too dark.
What happens when you finish?
Once finished, your screen will be tuned to show HDR video exactly as it should look. Your movies and games will have better contrast and more accurate colors.
Windows lets you stream high dynamic range (HDR) content if your screen supports it. If your display does not support HDR, it will stream in the appropriate Standard dynamic range (SDR).
Steps to calibrate your HDR display
Note: You must have administrator privileges to change these system settings.
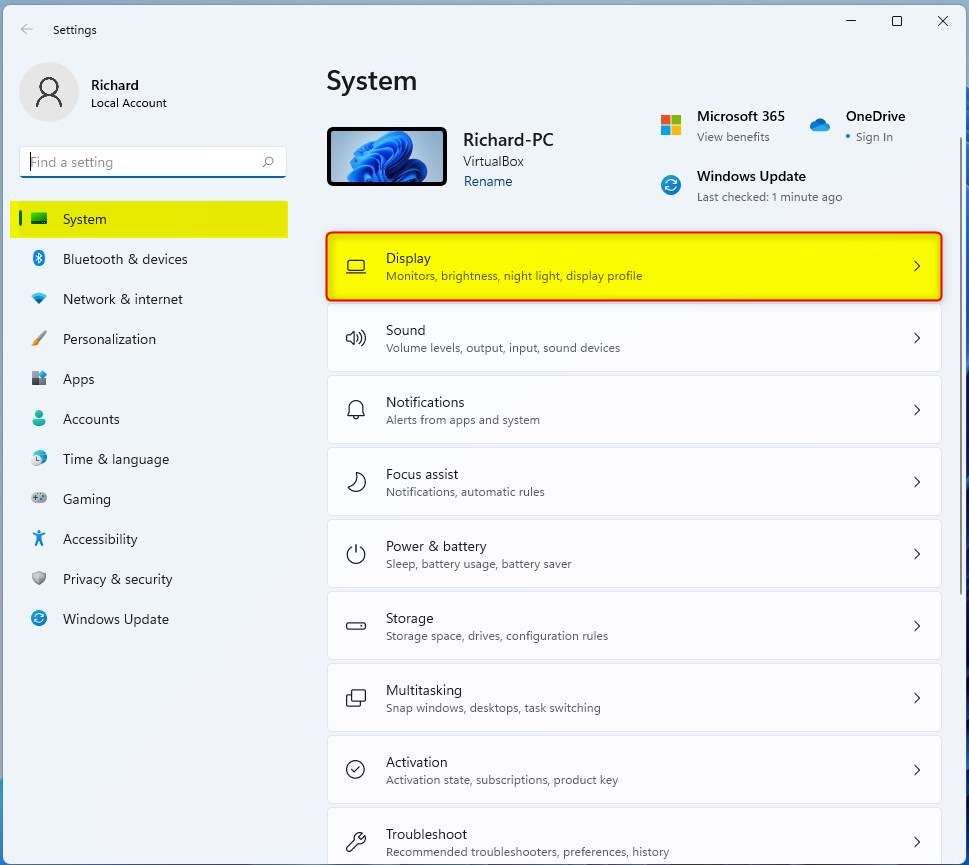
- Open the Settings app. You can do this by pressing the Windows key + I on your keyboard or by clicking Start > Settings.

- In the Settings menu, click on the Display tile on the right side of the window.
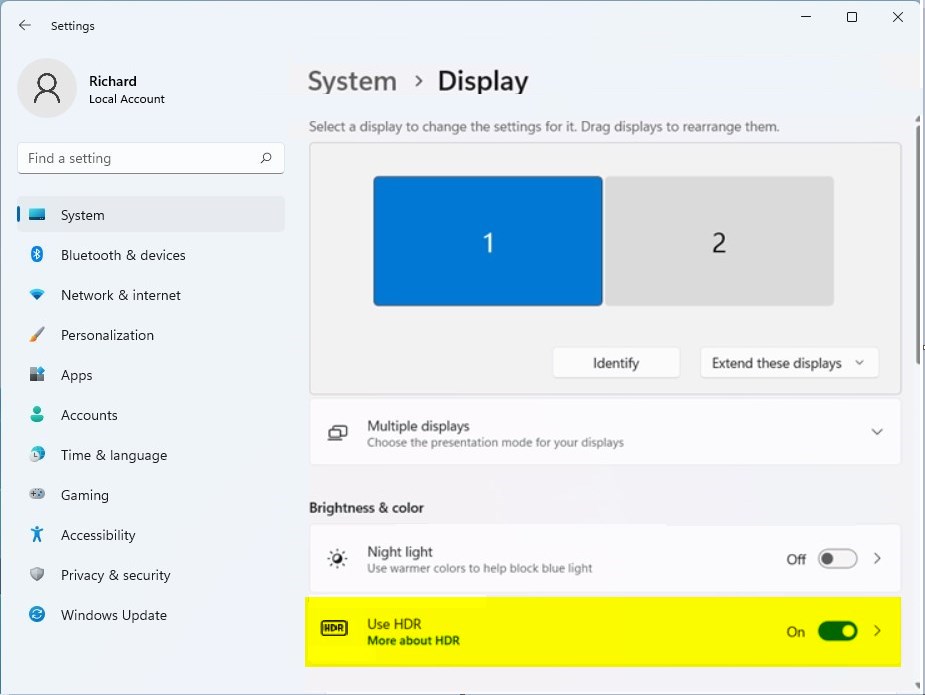
- Under the Brightness & color section, click on the HDR or Use HDR tile to see more options.
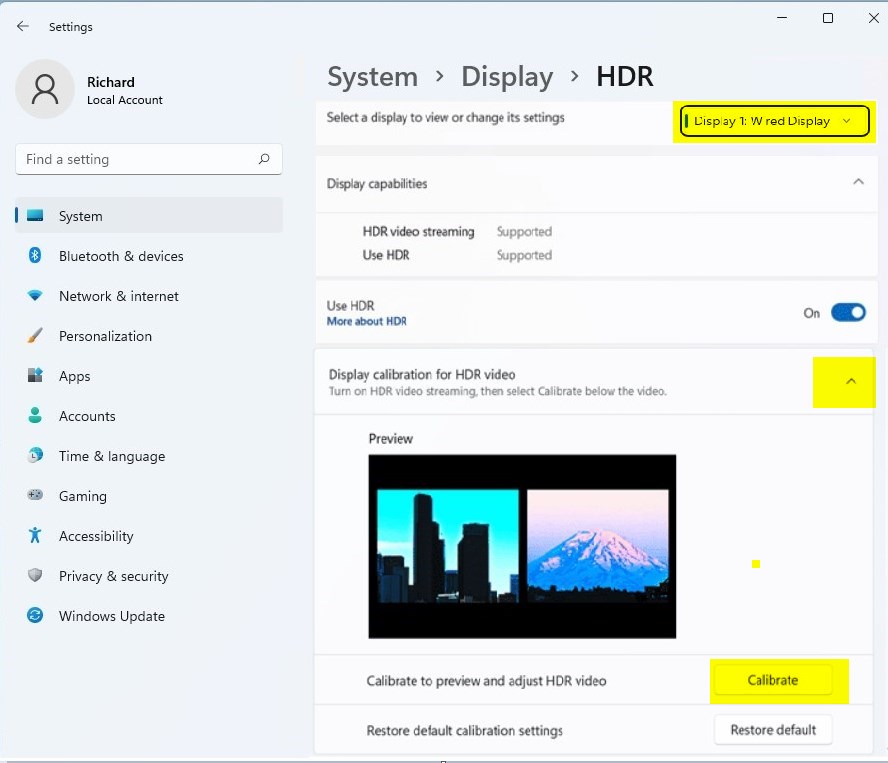
- At the top of the screen, make sure your built-in display is selected.
- Look for Display capabilities and click on HDR content brightness.
- Select Display calibration for HDR video to expand that section.
- Click the Calibrate button to start the process.
- On the calibration screen, choose Fullscreen to watch the sample video.
- Move the slider at the bottom left or right until the image looks right to you.
- When you are happy with how it looks, click Exit full screen in the bottom-right corner.
Summary
Calibrating your screen is a simple way to improve your viewing experience. By following these steps in the Windows Settings menu, you can balance your brightness and contrast settings. This ensures that your HDR videos look sharp and detailed, giving you the best picture quality your hardware can provide.


Leave a Reply