
This article explains how to change or assign a drive letter to a storage device, either external or internal, in Windows 11.
Windows 11 assigns drive letters to connected internal and external hard drives. Drive letters from A to Z are used to identify and name storage devices linked to Windows.
By default, the drive letters A and B are permanently assigned to floppy disk drives. However, it’s unlikely that you’ll find a computer with a slot for a floppy disk. In such cases, you can assign the letters A or B to another storage device connected to your computer.
In a computer system, the main drive is assigned the letter C, where the Windows operating system is installed. If there is a second hard drive, it is typically designated as D. If no second drive is found, the letter D may be assigned to a CD/DVD drive.
Devices are assigned letters starting from E, F, G, and so on, with the first connected device receiving the next available letter in the alphabet.
If you want to rename a drive instead of using the automatically assigned name, follow the steps below.
How to change the drive letter in Windows 11
Letters are automatically assigned to storage devices when connected to Windows. To assign a different letter than the one given automatically, follow the steps below.
Windows 11 has a centralized location for the majority of its settings. Everything can be done, from system configurations to creating new users and updating Windows from its System Settings pane.
To get to System Settings, you can use the Windows key + I shortcut or click on Start ==> Settings, as shown in the image below:

Alternatively, you can use the search box on the taskbar to search for Settings. Then select to open it.
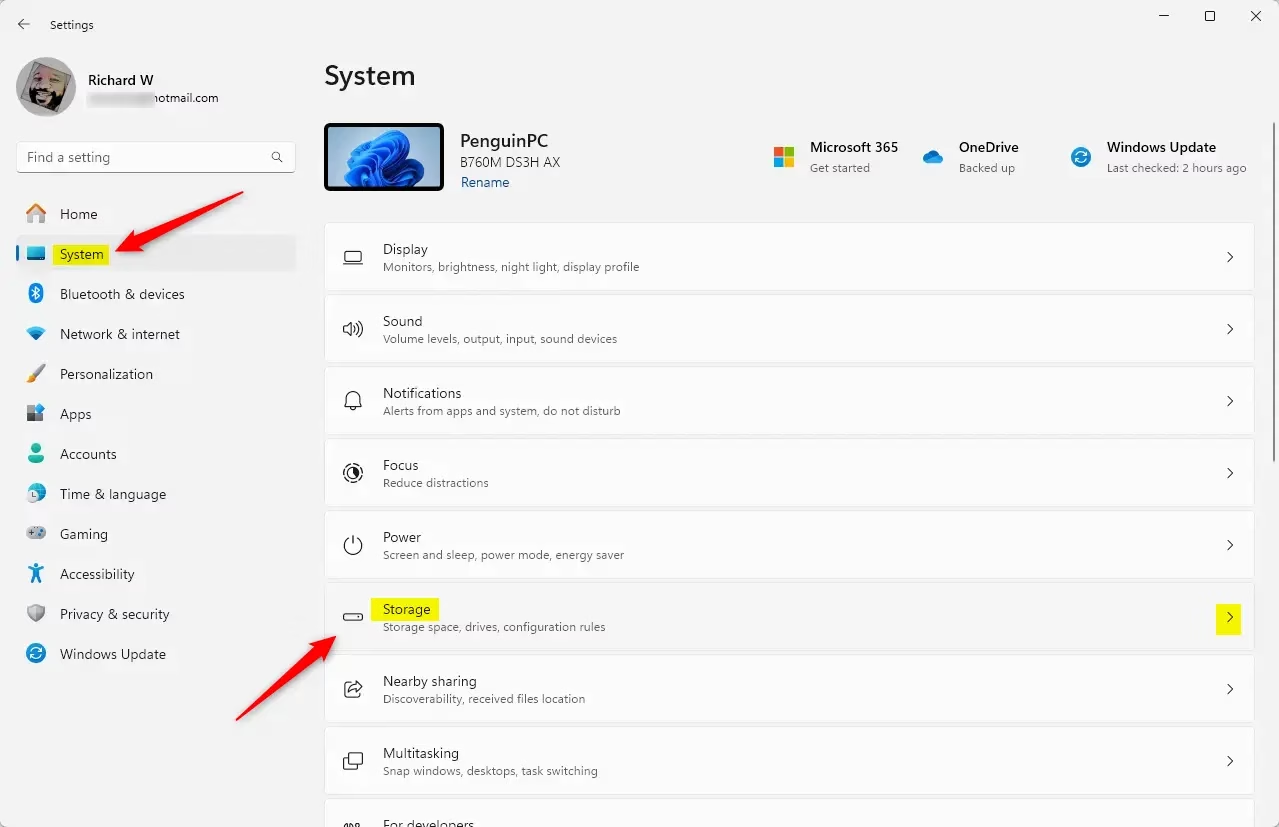
In Windows Settings, navigate to the System section and select Storage from the right pane of your screen.
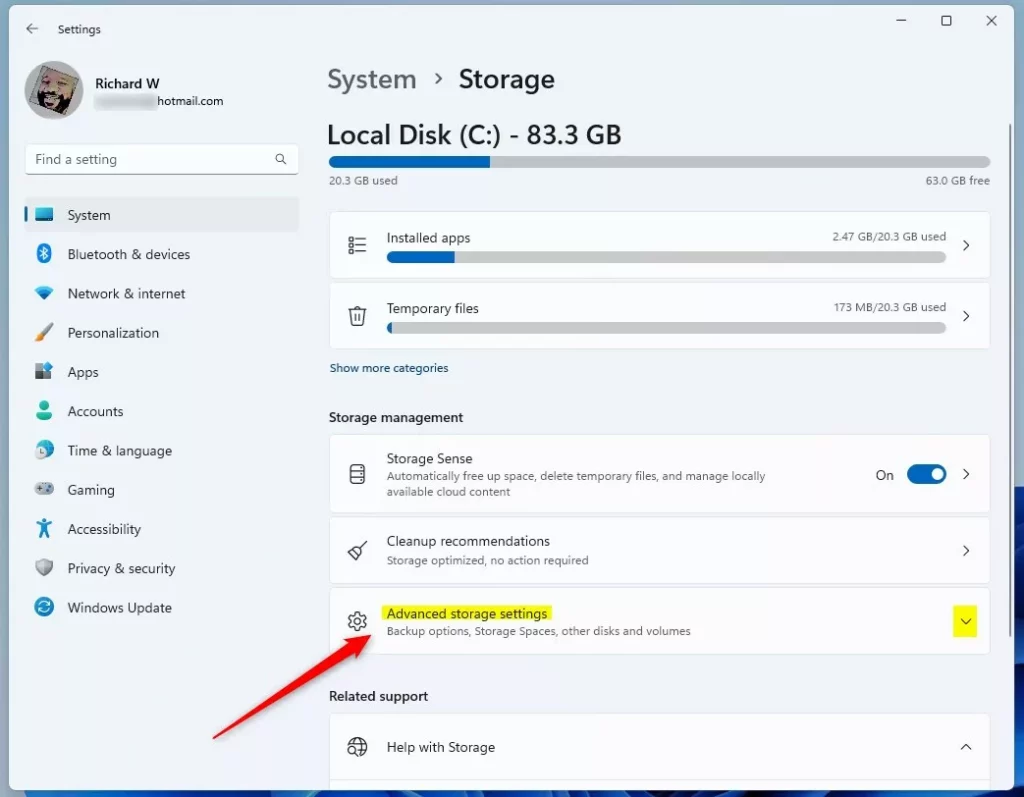
On the Storage settings pane, click on Advanced storage settings to expand.
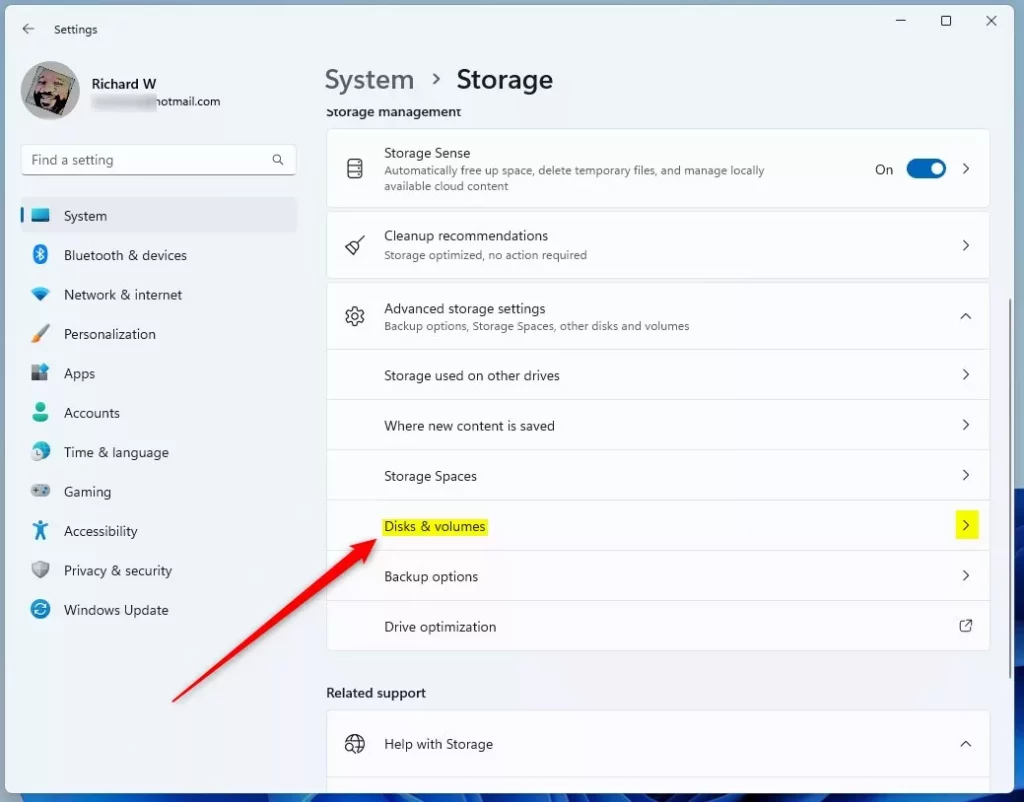
Then select Disks & volumes as highlighted below.
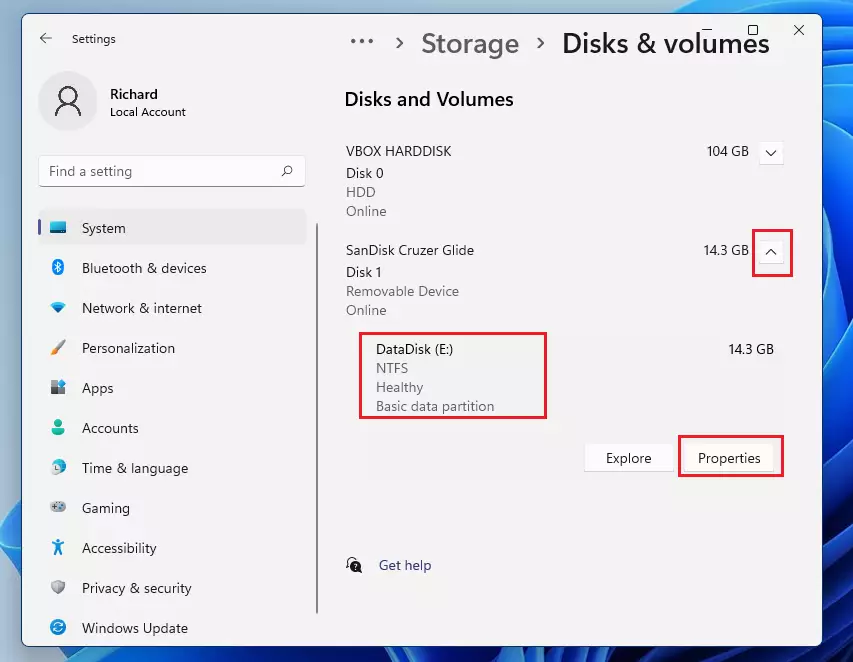
On the Disks & Volumes settings pane, select the disk drive you want to rename or change its letter. Then select Properties.
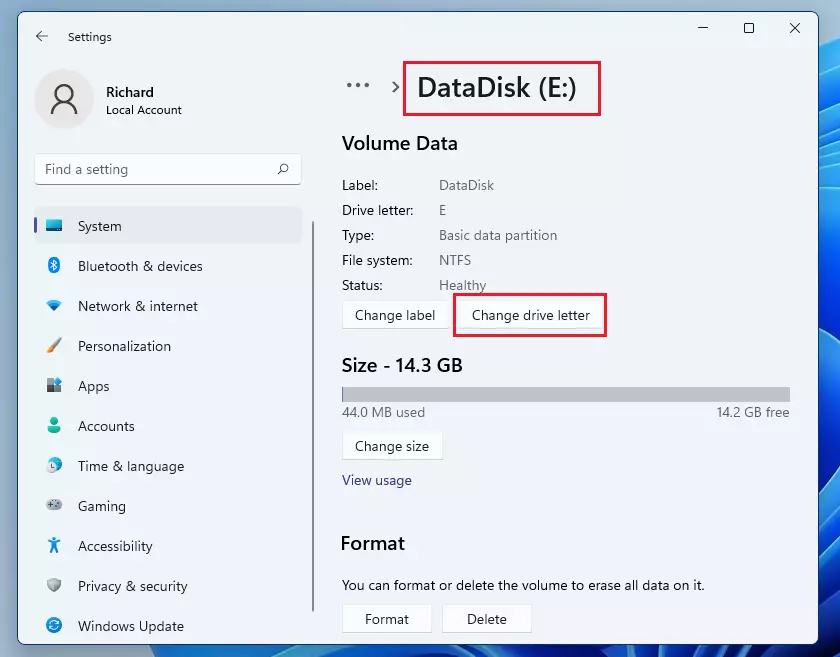
On the drive Properties pane, Windows automatically assigned an available letter. However, we want to change the letter from the one assigned to a different one.
Click on the Change drive letter button to change it.
Choose any available letter for the drive on the pop-up screen.
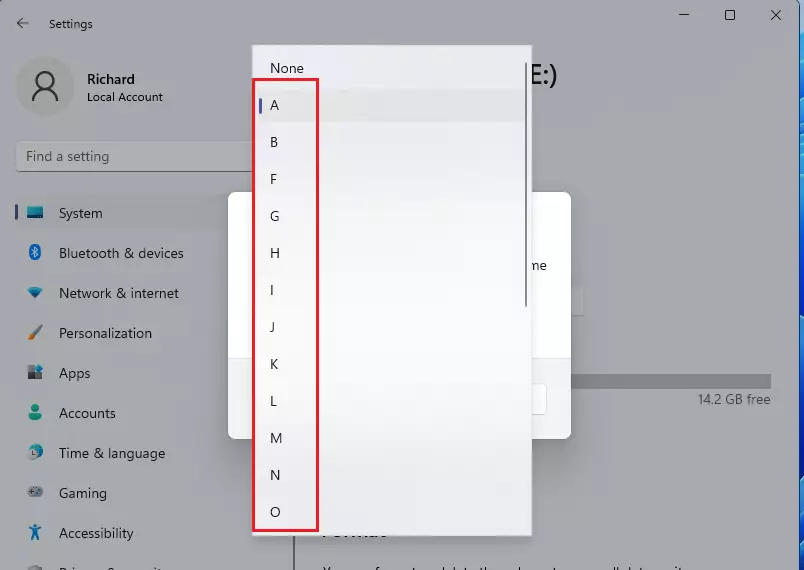
Then click OK to apply.

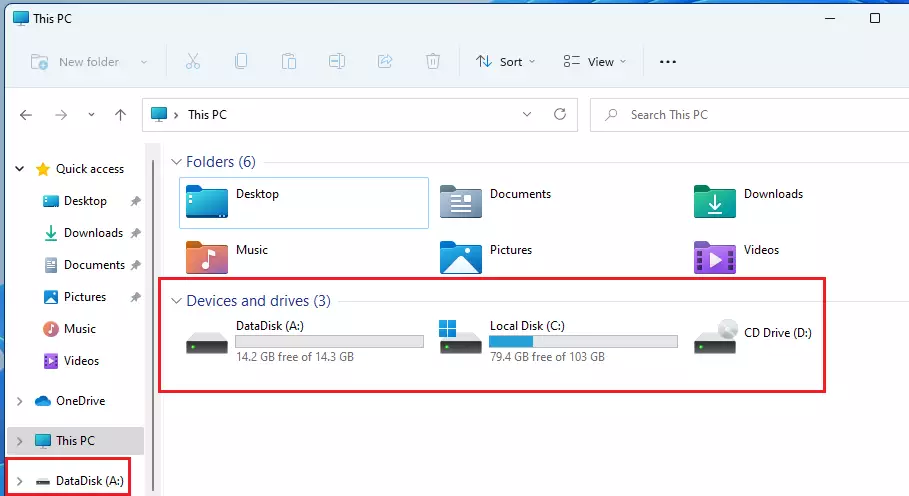
The drive will immediately be changed to the special letter you chose. File Explorer will now reference the drive by the new letter.
That should do it!
Conclusion:
- Changing or assigning a drive letter in Windows 11 is a straightforward process that can be done through the System Settings.
- Windows automatically assigns drive letters, but users have the flexibility to customize them as needed.
- This customization helps in better organization and easy identification of storage devices.
- Following the outlined steps will allow users to quickly change the drive letter for any connected internal or external device.
- Always remember to select an available letter to avoid conflicts with existing drives.

Leave a Reply Cancel reply