How to Enable or Disable Windows Security Notifications in Windows 11
This guide explains how to turn Windows Security notifications on or off in Windows 11.
Windows displays alerts in Notification Center on your Taskbar so you can see them quickly. You can also view these in the Notification Center, including those from Windows Security.
Usually, if you install third-party antivirus software, Windows will automatically turn off its own Microsoft Defender Antivirus to avoid conflicts. If you still see these messages, you can hide them manually.
Why manage these notifications?
Some users find constant security alerts distracting, especially if they already have other security software installed. Managing these settings helps keep your workspace clean and focused.
What happens when done?
Once you apply these changes and restart your computer, Windows Security will stop showing pop-up alerts. If you choose to enable them, you will receive all security-related updates again.
Method 1: Using Local Group Policy Editor
Note: This method requires administrator privileges.
First, open the Local Group Policy Editor.
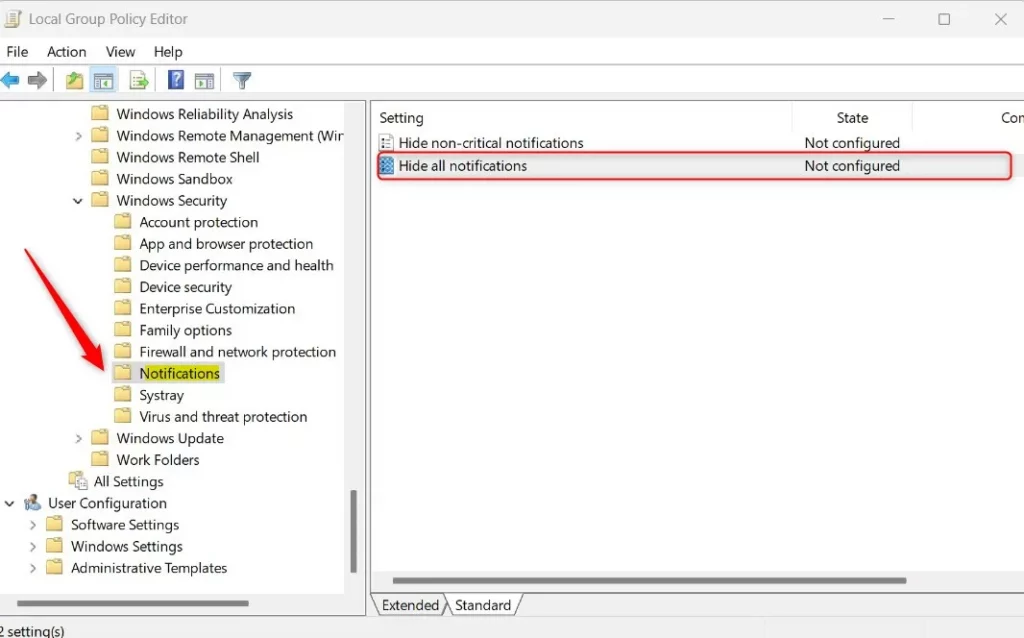
Navigate through these folders: Computer Configuration > Administrative Templates > Windows Components > Windows Security > Notifications.
Click the Notifications folder. On the right side, double-click the setting named “Hide all notifications.”
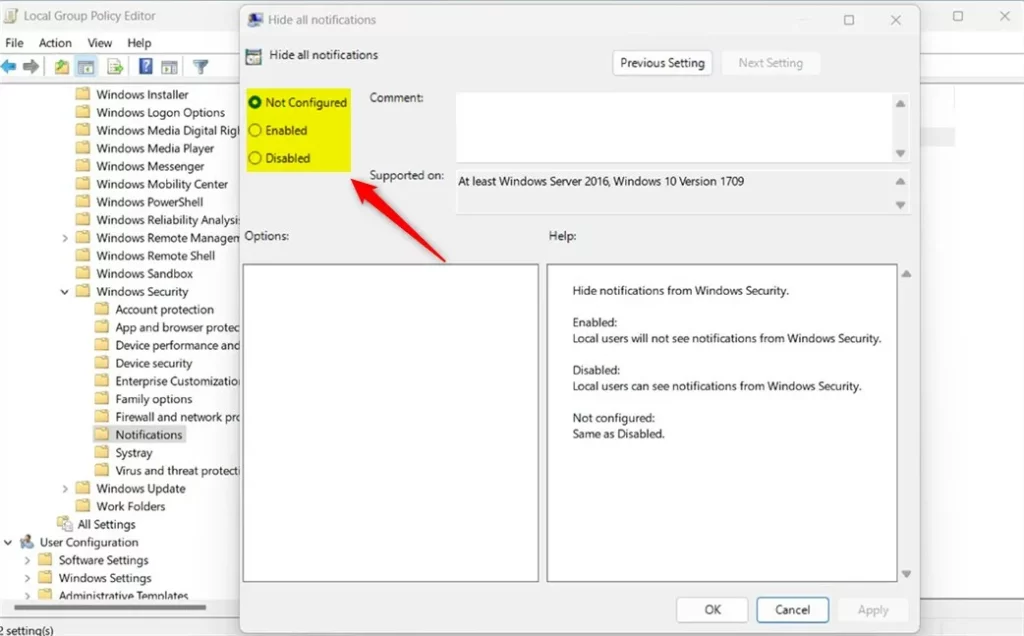
Select one of the following options:
- Not Configured: Windows handles notifications normally.
- Enabled: This hides all Windows Security notifications.
- Disabled: This forces notifications to stay visible.
Save your settings and restart your computer to apply the changes.
Method 2: Using Registry Editor
Note: This method requires administrator privileges.
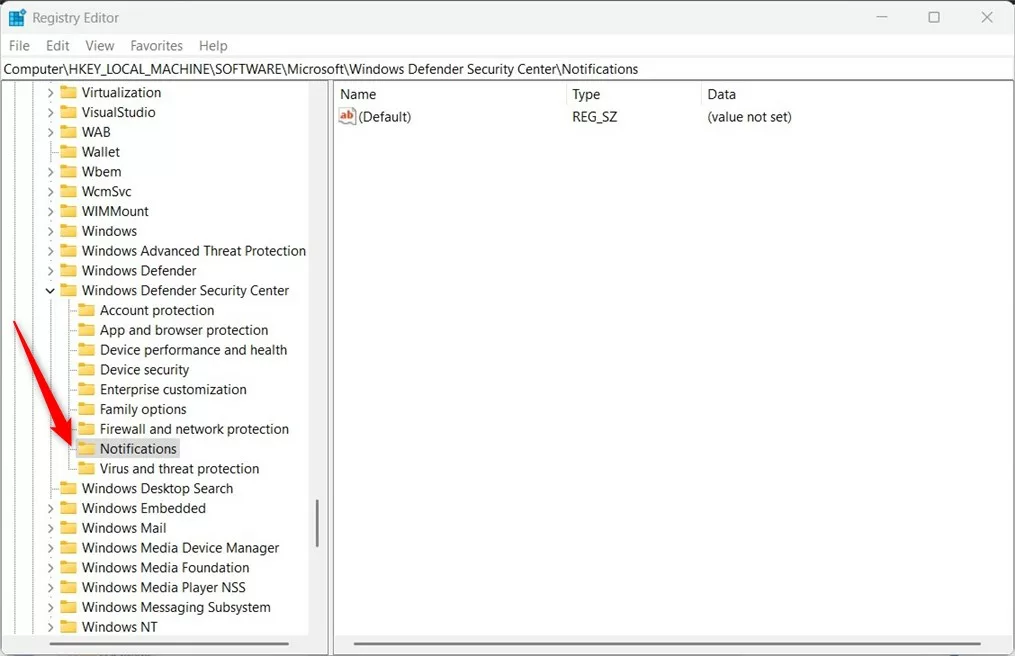
If you cannot use the Group Policy Editor, you can use the Windows Registry Editor or the Windows Registry instead. Open the Windows Registry and go to one of these paths:
HKEY_LOCAL_MACHINE\SOFTWARE\Microsoft\Windows Defender Security Center\Notifications
HKEY_LOCAL_MACHINE\SOFTWARE\Policies\Microsoft\Windows Defender Security Center\Notifications
If you do not see the Notifications folder, right-click the Windows Defender Security folder, select New, and create a new key named Notifications.
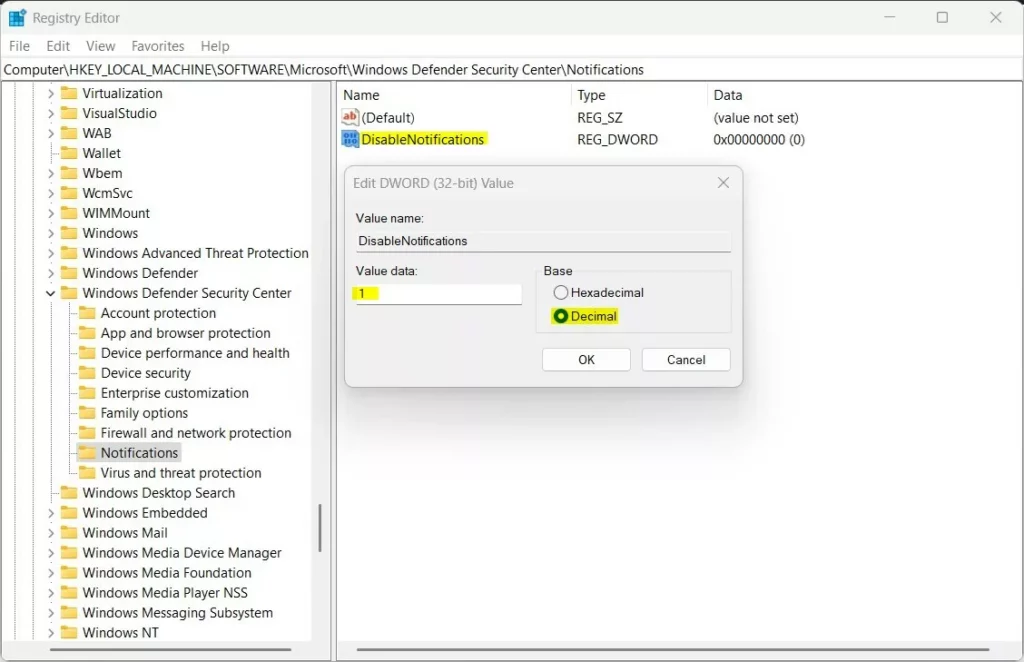
Right-click in the right pane, select New, and choose DWORD (32-bit) Value. Name it DisableNotifications.
Double-click DisableNotifications and set the Base to Decimal. Change the Value data:
- Type
1to hide all notifications. - Type
0to show all notifications.
You may also add a value named DisableEnhancedNotifications in the same way. Save your changes and restart your computer.
Summary
This guide showed you how to control Windows Security alerts using the Local Group Policy Editor and the Windows Registry Editor. By following these steps, you can customize your notification settings to suit your needs. If you run into issues, please share your feedback in the comments section.
Was this guide helpful?


Leave a Reply Cancel reply