This article explains how to add other languages to use with Live Captions in Windows 11.
Live captioning is a new feature released with Windows 11 build 22557 that will help everyone, including people who are deaf or hard of hearing, better understand audio by viewing captions of spoken content.
Live captions can be turned on with the WINDOWS + CTRL + L keyboard shortcut or from the Accessibility flyout under Quick Settings.
Users can also customize Live Captions, including changing the on-screen positions and adding other languages to view captions.
There are various reasons why adding other languages for live captioning can be useful. Firstly, it can enable people not fluent in the language spoken in the audio to understand the content better. This can be helpful when people need to watch content in a language that is not their native language.
Secondly, it can enhance accessibility for people who are deaf or hard of hearing and speak a language other than the one spoken in the audio.
Lastly, adding other languages to Live Captions can improve the accuracy of the captions by providing more options for the software to recognize and transcribe words.
Add other languages to use with Live Captions
As mentioned above, other languages to Live Captions can improve the accuracy of the captions by providing more options for the software to recognize and transcribe words.
If the Widows can better transcribe words in another language than you prefer, you can add it with Live Captions.
Here’s how to do that.
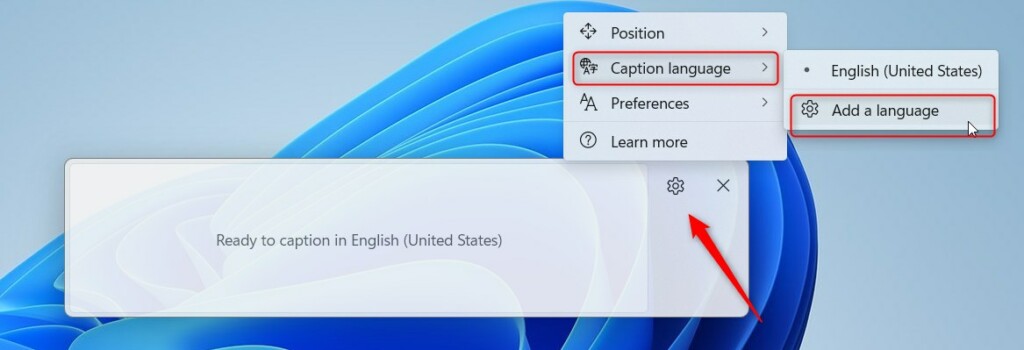
First, turn on Live Caption, then select the Settings button in the Live Captions window.
Select Caption language and click Add a language.
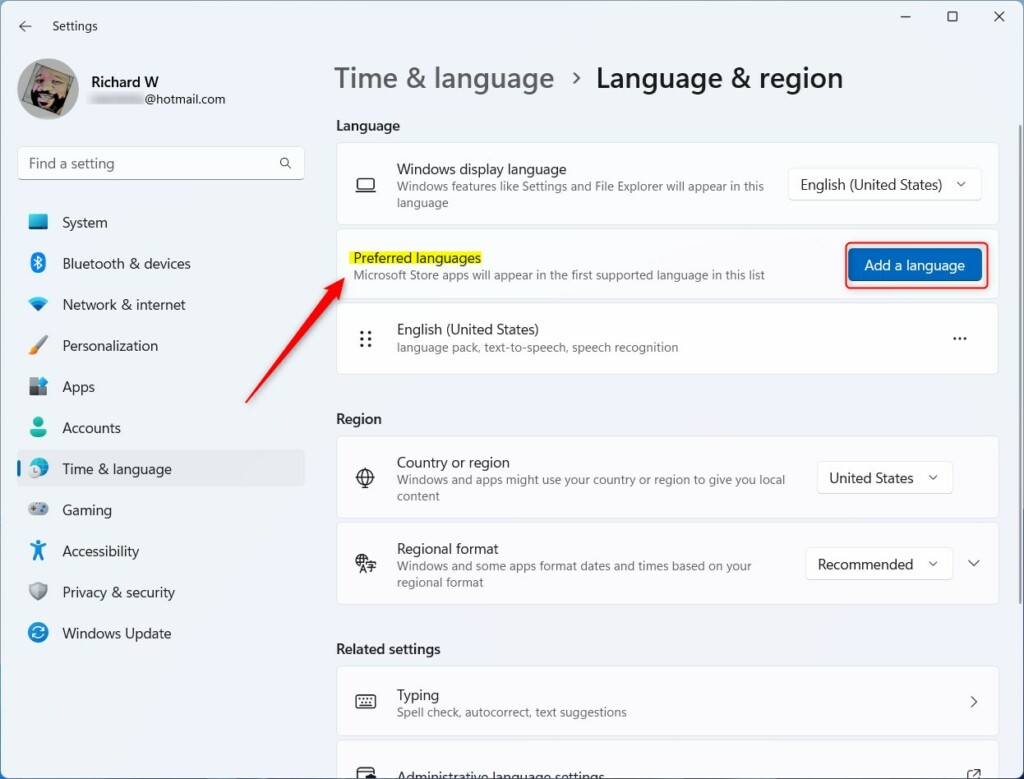
The Language & region settings window opens. Go to Preferred languages in the Language & region settings pane, then select Add a language.
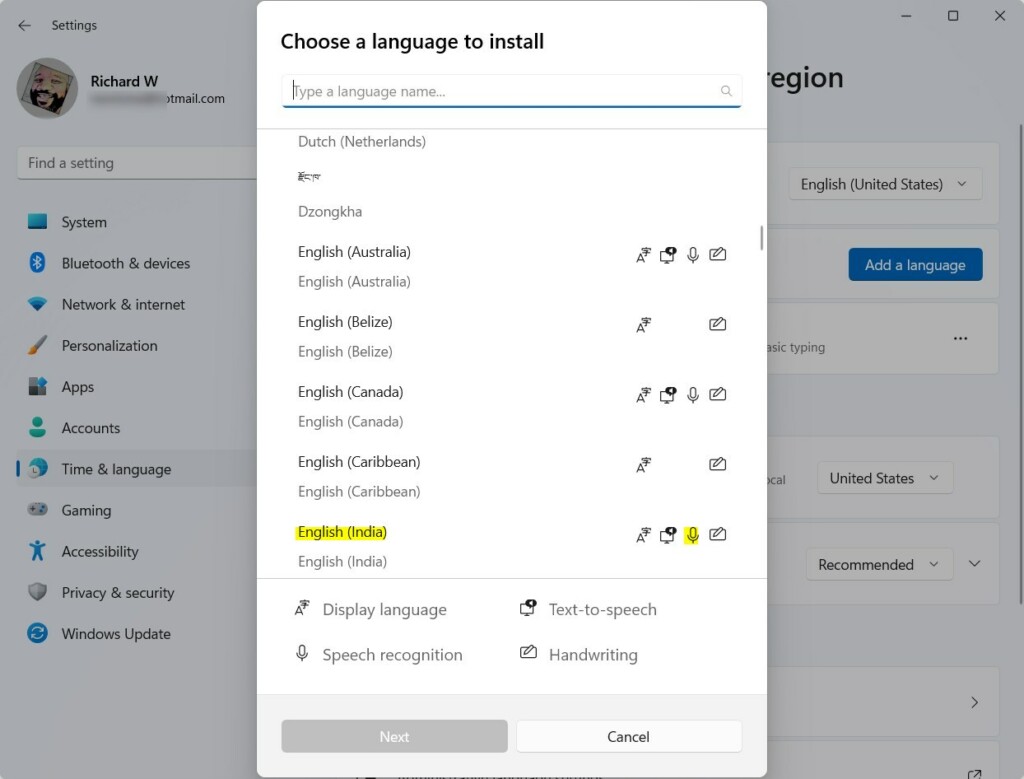
In Choose a language to install, browse or search for a language with support for Speech recognition, and then select Next.
In Install language features, select the features you want to use while ensuring Enhanced speech recognition is selected, and then select Install.
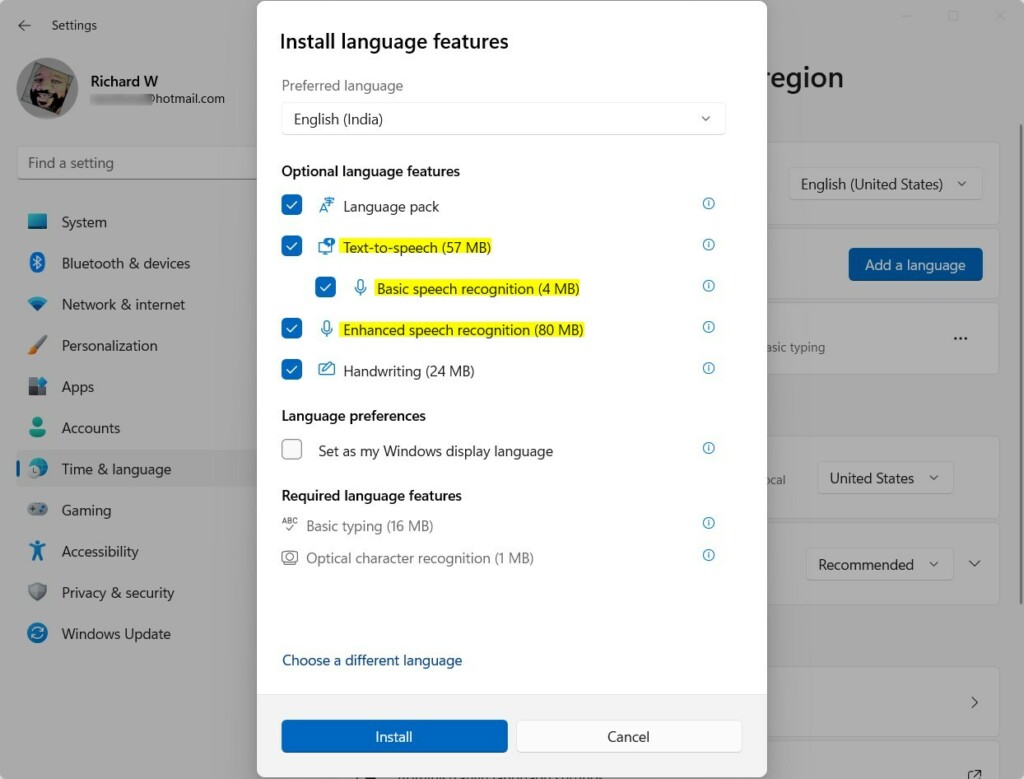
When the enhanced speech recognition feature installation has been completed for the language you selected, the language appears in the live captions’ Caption language menu.
That should do it!
Reference:
Conclusion:
- Adding other languages to Live Captions in Windows 11 enhances accessibility for individuals who are deaf or hard of hearing and speak a different language than the one spoken in the audio.
- It enables non-native speakers to better understand audio content in a language they are not fluent in.
- Improves the accuracy of captions by providing additional options for software to recognize and transcribe words.
- The process involves adding a language through the Language & region settings and ensures enhanced speech recognition is selected for the newly added language.
- By following these steps, users can expand the functionality of Live Captions to include multiple languages for a more inclusive and versatile user experience.


Leave a Reply Cancel reply