
This article explains adding an exclusion to Microsoft Defender on Windows 11.
Microsoft Defender (formerly Windows Defender) will scan your computer files for viruses and malware. If you’re performing specific tasks or running virtual machines, you may want to exclude specific files and folder areas so that Microsoft Defender does not scan these.
Exclusions may help improve the system’s performance; however, be cautious with this feature, as Microsoft Defender won’t scan your excluded files and directories for malware. If these excluded directories are compromised, there won’t be any detection, and your computer might be vulnerable to threats.
On the other hand, you wouldn’t want to scan all files and directories. Microsoft Defender has built-in exclusions to improve the system’s performance. You can do the same if Microsoft Defender impacts specific tasks or application scans.
How to add exclusions to Microsoft Defender on Windows 11
As mentioned above, one can add exclusions to Microsoft Defender when scans impact the system’s performance. Microsoft Defender has built-in exclusions, but you can add more.
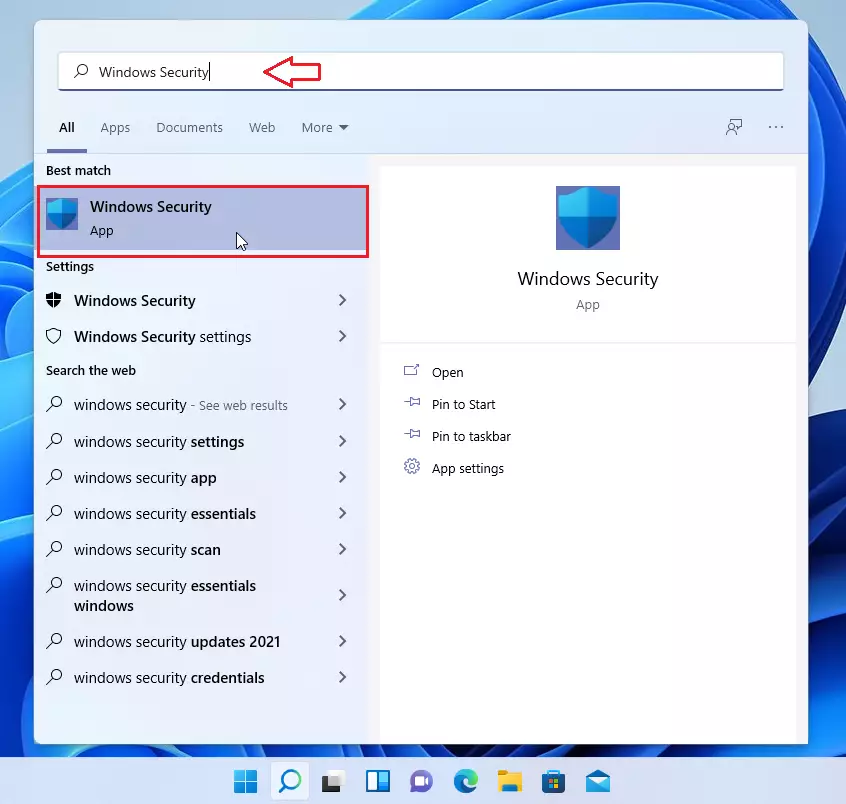
To do that, open the Windows Security app. Click the Start button and search for Windows Security, under Best match, select Open.
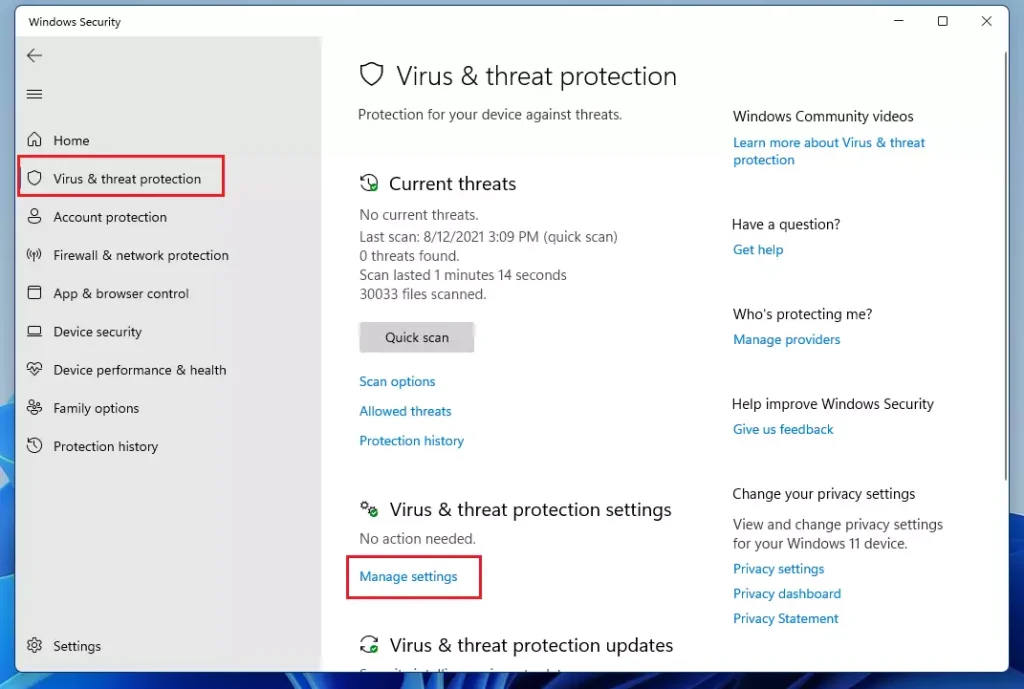
In the Windows Security dashboard, navigate to Virus & Threat Protection. Then, select Manage Settings under Virus & threat protection settings as highlighted below.
Next, scroll down to the very bottom of the page and click Add or Remove Exclusions to begin adding or removing items on the exclusion list.
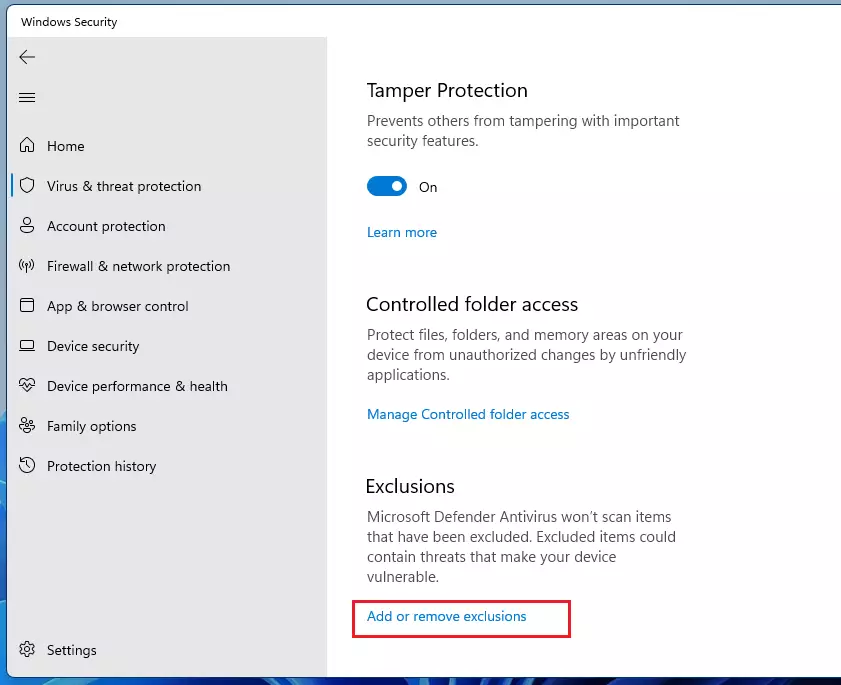
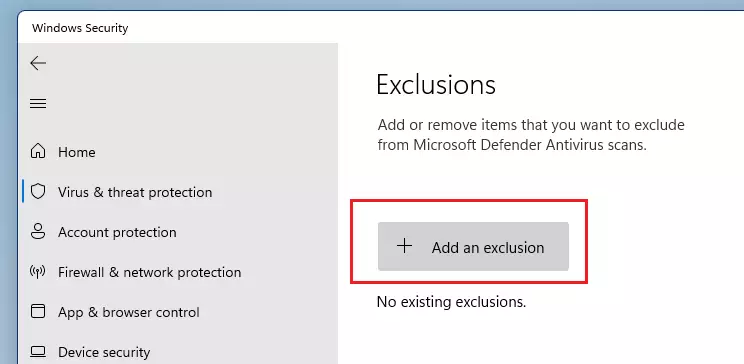
On the Exclusions page, you can add or remove files that you want to exclude from Microsoft Defender scans. Click the Add An Exclusion button with a plus sign to add an exclusion.
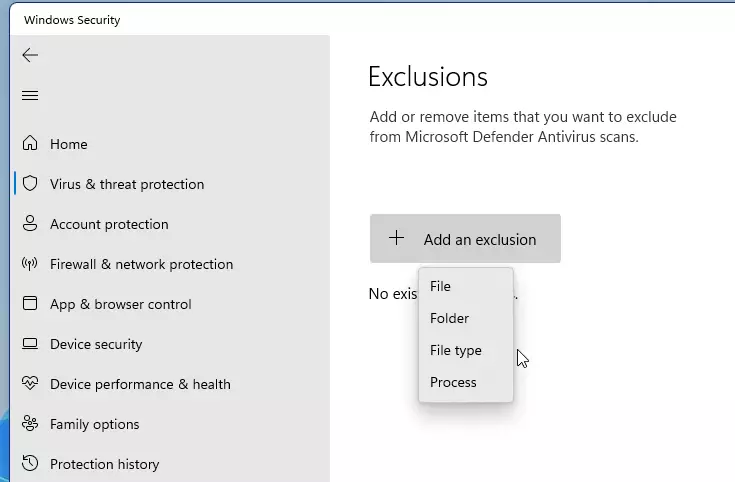
Choose the type of exclusions you want to add:
- File: Choose a file to select a single file that will be excluded from future scans. You’ll browse and choose the file you’d like to exclude.
- Folder: Choose a folder to exclude an entire folder from scans. The folder’s contents and subfolders will be excluded as well.
- File type: Choose a file type to enter a file extension (e.g., “.TXT”) representing the file type you’d like to exclude. All files of that type will be excluded from future scans.
- Process: Choose a method and enter the name of a process (a running program, i.e., “explorer.exe”) to exclude from scans.
When you’re done, close Windows Security, and your settings will be saved.
That should do it!
Conclusion:
Adding exclusions to Microsoft Defender can significantly enhance your system’s performance during specific tasks or applications. However, it’s essential to exercise caution when utilizing this feature, as excluded files and folders will not be scanned for malware. To summarize:
- Exclusions can improve system performance by reducing scan times.
- Always be cautious about what you exclude, as it may expose your computer to vulnerabilities.
- You can easily manage exclusions through the Windows Security app.
- Regularly review and update your exclusions as needed to ensure ongoing protection.
- Efficient use of exclusions allows uninterrupted tasks while maintaining a degree of security.


Leave a Reply