

This guide will help you add or remove the language bar on your Windows 11 taskbar and sign-in screen. You don’t need to delete any languages or keyboard layouts you have installed.
What Is the Language Bar?
When you have more than one language or keyboard layout installed, Windows shows a small language bar on the bottom right corner of your screen. This bar is also called the input indicator.
It’s a small tool that lets you quickly switch between your added languages and keyboard layouts whenever you want.
What Does the Language Bar Look Like?
Here is what the language bar looks like on the taskbar and sign-in screen:

How to Add or Remove the Language Bar
- Press the
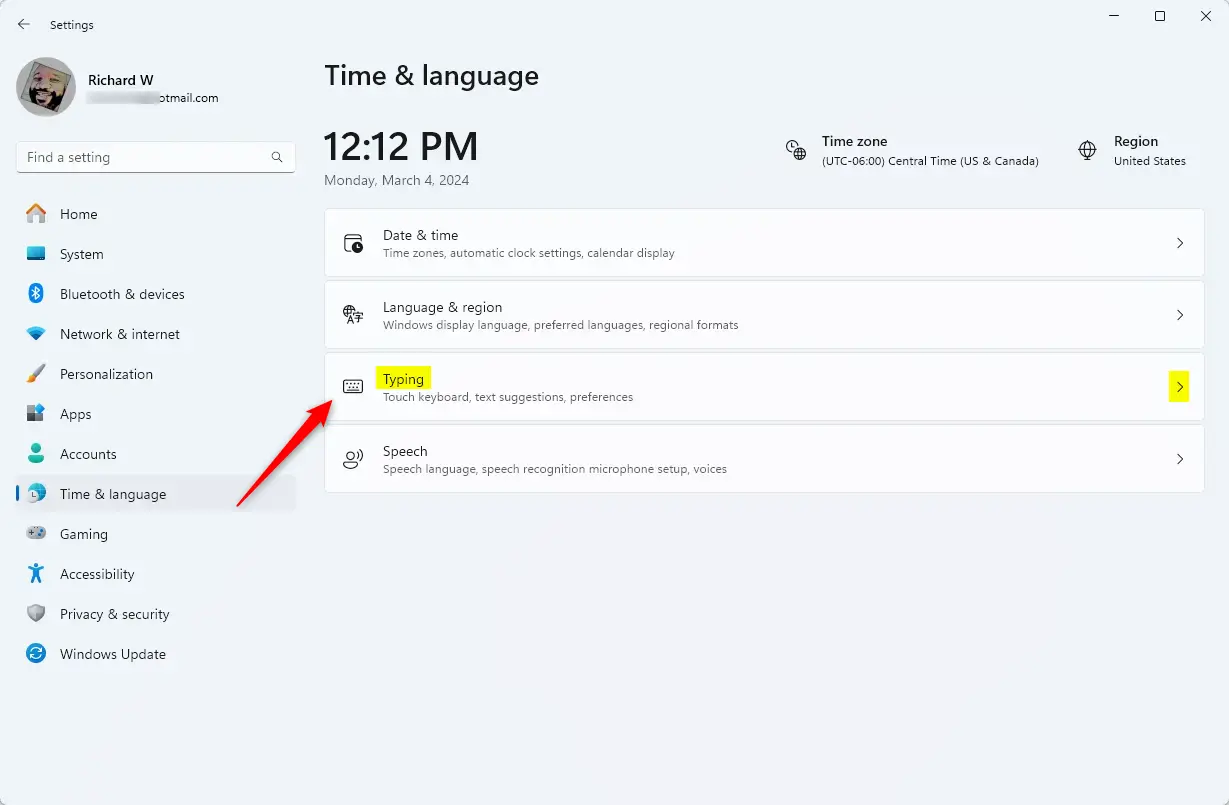
Windows key + Ion your keyboard to open Settings. - Click on Time & language on the left side. Then click Typing on the right side. Or you can click this link to open Typing settings directly: Open Typing settings
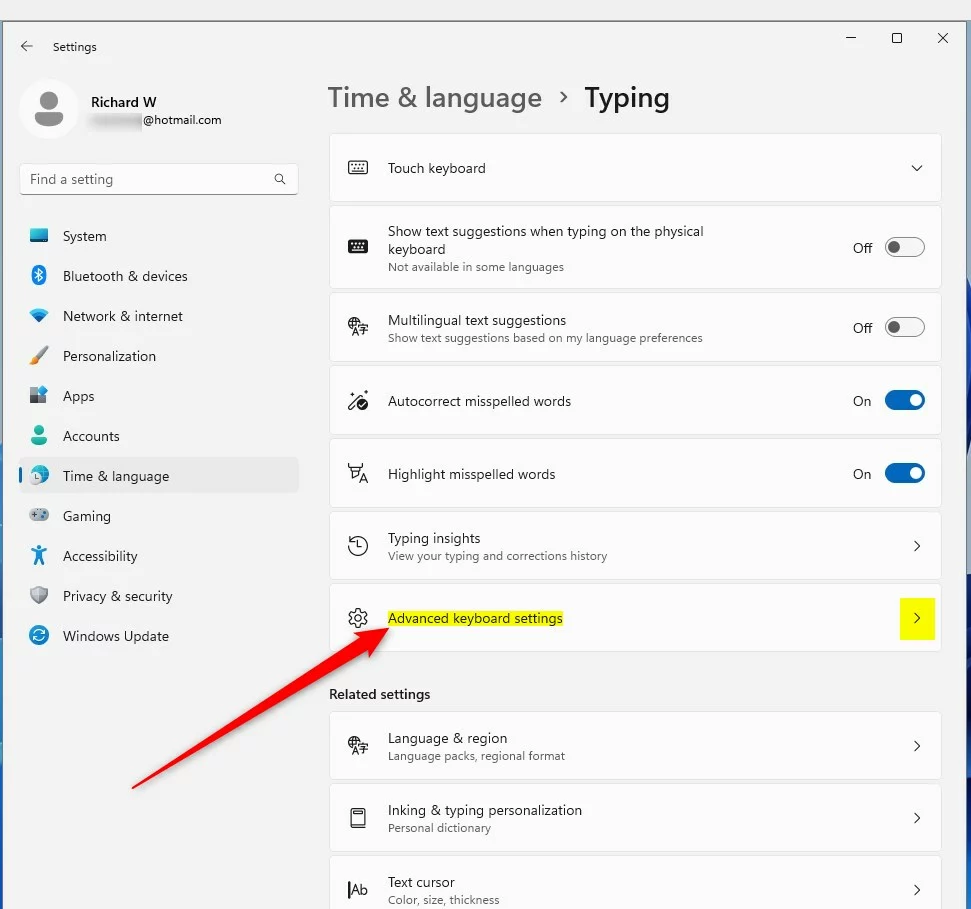
- Scroll down and click Advanced keyboard settings.
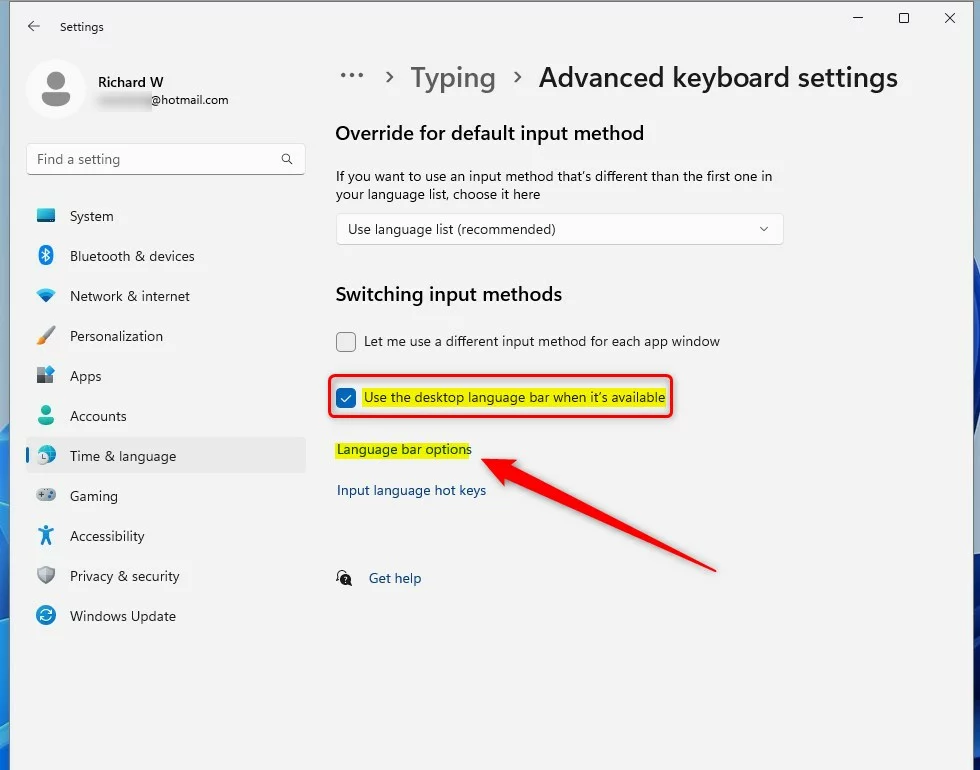
- Look for the option Use the desktop language bar when it’s available.
- Check the box to show the language bar.
- Uncheck the box to hide the language bar.
Then click on Language bar options.
- In the new window, choose one of these options:
- Floating On Desktop to show the language bar (this is the default setting).
- Hidden to remove it.
Then click OK.
- You can now close the Settings window.

Summary
The language bar helps you quickly switch between different languages and keyboards in Windows 11. You can choose to show or hide the language bar on your taskbar and sign-in screen. Follow the steps above anytime you want to change this setting. This makes it easier to work and communicate in the languages you use. Enjoy using your preferred language setup easily!


Leave a Reply