This article explains how to delete or remove environment variables in Windows 11.
Environment variables in Windows are a set of dynamic values that can affect how running processes behave on a computer.
They store configuration data and system state information that can be accessed by different software applications and services running on a Windows system.
You may need to remove environment variables in Windows 11 if you have created variables that are no longer required or are causing conflicts with other programs.
Sometimes, applications or software installations create environment variables that are no longer needed after the program is uninstalled or removed. Removing the unused environment variables can help improve system performance and stability.
Accessing Environment Variables
To begin, you need to access the environment variables window. To do that, follow the steps below.
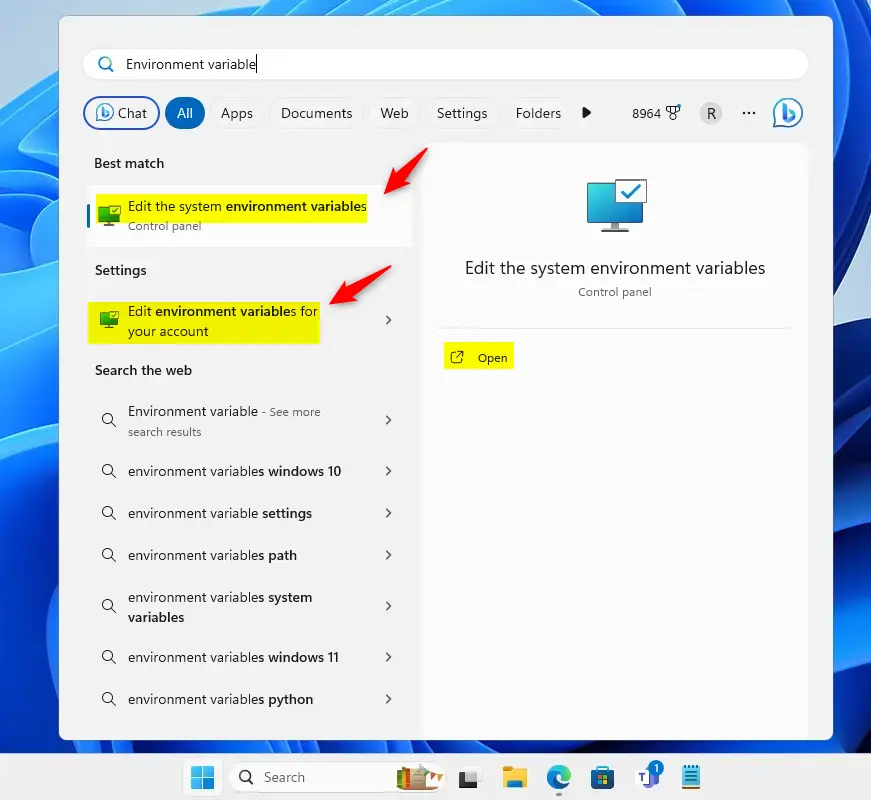
First, click on the Start button or press the Windows key on your keyboard to open the Start menu.
Then, type Environment Variables in the search box.
Click on the result that says Edit the system environment variables or Edit environment variables for your account.
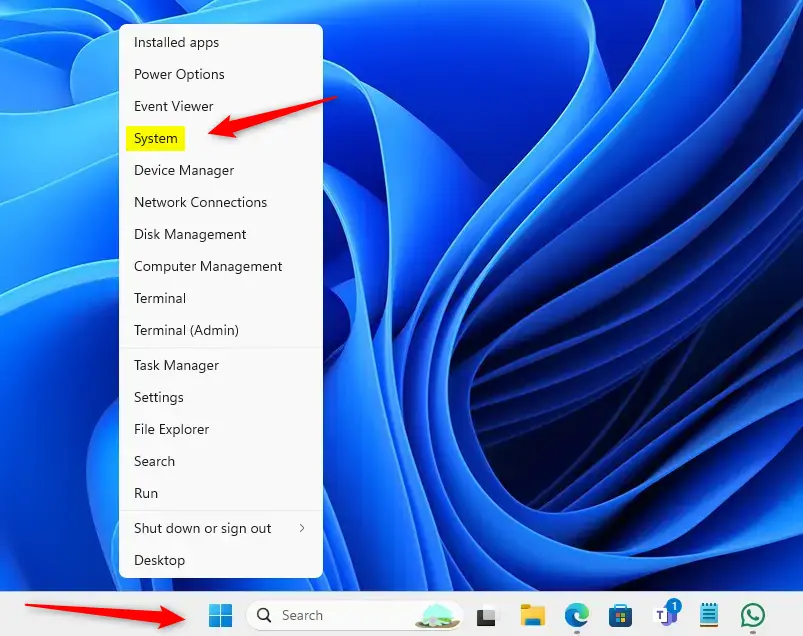
Alternatively, you can access the System Properties window directly:
Right-click on the Start button to launch the Power User menu.
Select System.
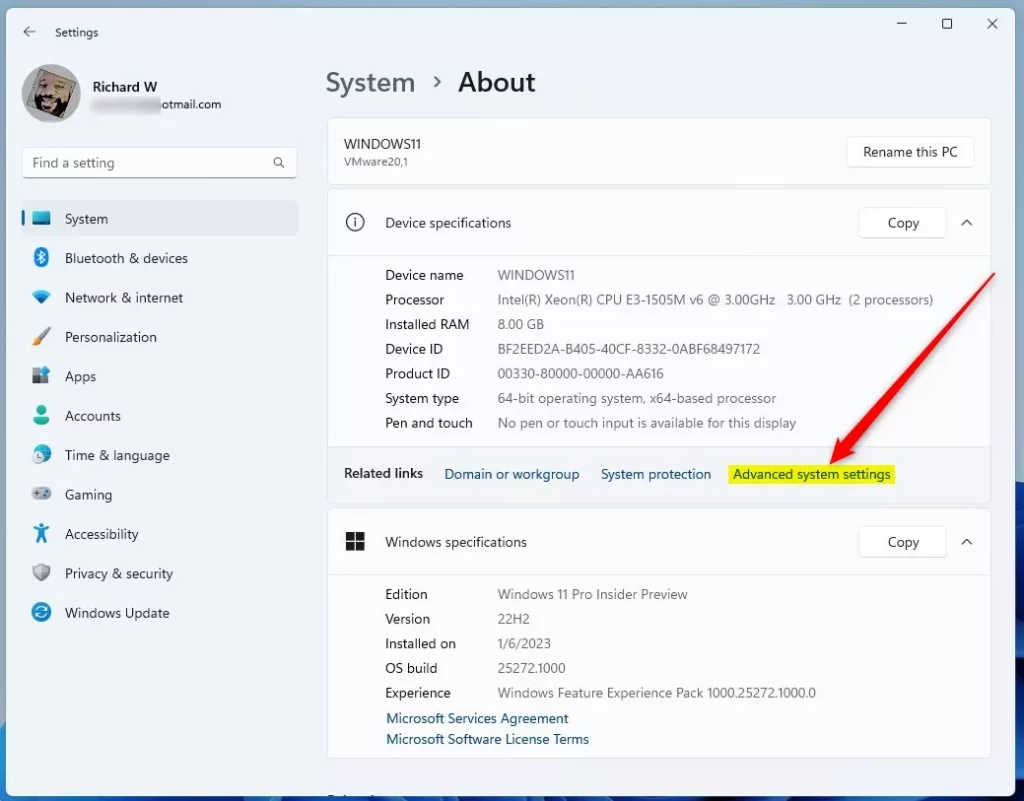
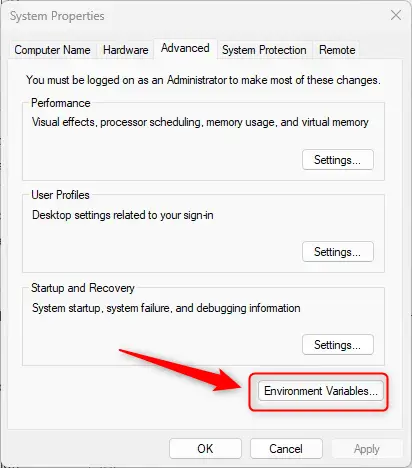
Scroll down and click on About. Under Related settings, click on Advanced system settings.
In the System Properties window that opens, go to the Advanced tab.
Click on the Environment Variables... button towards the bottom.
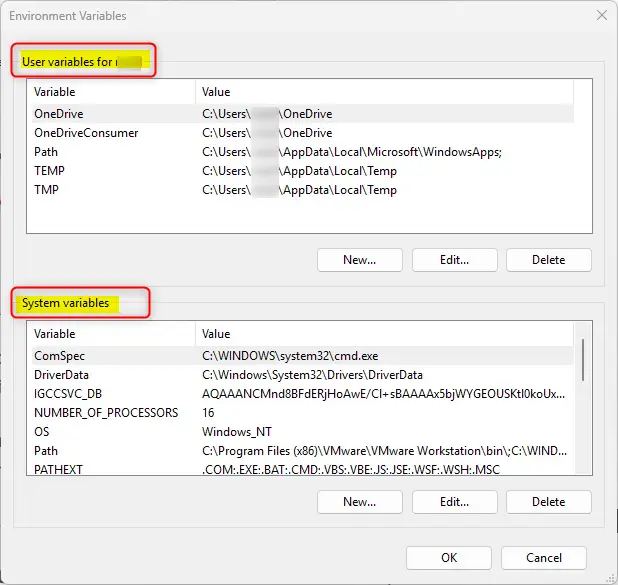
Now, you should be in the Environment Variables window.
Deleting User Environment Variables
To delete an environment variable that is only set for your user account:
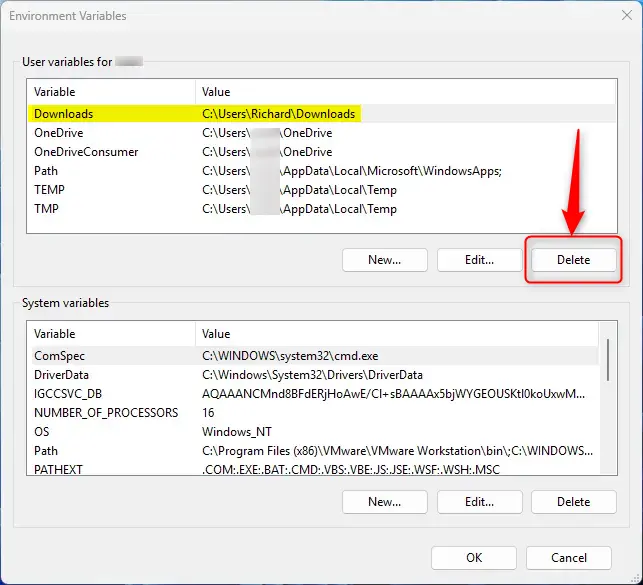
Under the User variables for [YourUsername] section, scroll through the list to find the variable you want to delete.
Click on the variable to select it. Click the Delete button below the list.
Deleting System Environment Variables
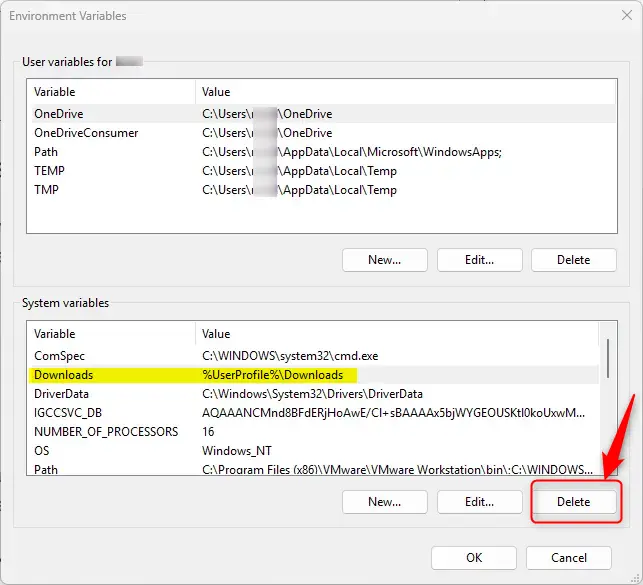
Deleting a system variable requires administrative access. Proceed with caution, as this affects all users on the system.
Under the System variables section, scroll through the list to find the variable you want to delete.
Select the variable by clicking on it. Click the Delete button below the list.
Note: You should only delete environment variables you have created or are certain are no longer required by any applications on your system. Deleting certain system environment variables can cause system instability.
After you have deleted the environment variable, click OK on the Environment Variables window to close it.
Deleting a User Environment Variables using PowerShell
You can delete environment variables using the Windows PowerShell app. Here’s how to do that.
First, open the Windows Terminal app. Then select the PowerShell tab if it isn’t opened.
Then, run the command format below to remove a user variable.
[Environment]::SetEnvironmentVariable("variable name",$null,"User")
Replace the variable name with the actual variable name you want to remove.
Example:
[Environment]::SetEnvironmentVariable("Downloads",$null,"User")
Deleting a System Environment Variables using PowerShell
To delete a system environment variable, use the steps below.
First, open the Windows Terminal app as administrator.
Then, run the command format below.
[Environment]::SetEnvironmentVariable("variable name",$null,"Machine")
Replace the variable name with the actual variable name you want to remove.
Example:
[Environment]::SetEnvironmentVariable("Downloads",$null,"Machine")
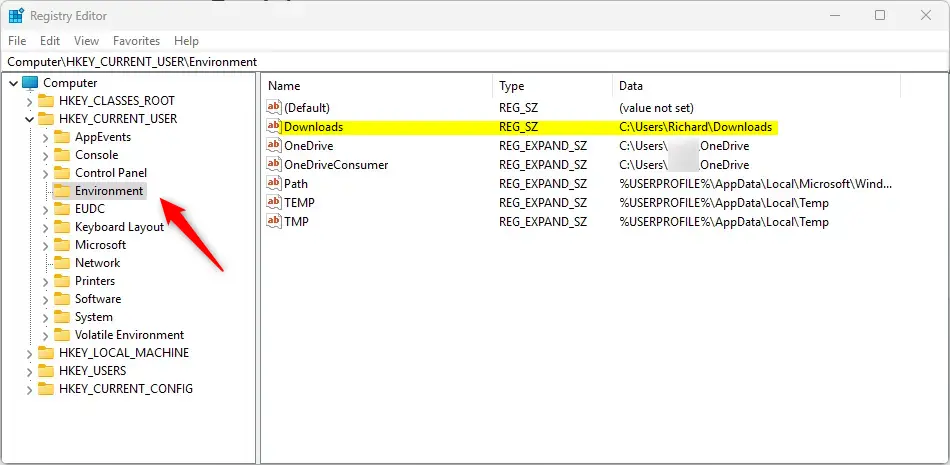
Removing User Environment Variables using Windows Registry
Another way to delete or remove User Environment Variables is to use the Windows Registry Editor.
Use the steps below to do that.
First, open the Windows Registry Editor.
Then, navigate to the key folder path below.
Computer\HKEY_CURRENT_USER\Environment
Select the variable on the list, right-click it, and delete it.
Remove System Environment Variable using Windows Registry
The system-wide Environment variables are stored in the key below.
Computer\HKEY_LOCAL_MACHINE\SYSTEM\CurrentControlSet\Control\Session Manager\Environment
Select the variable name, right-click it, and delete it

Confirming Deletion
To confirm that an environment variable has been deleted:
- Open the Command Prompt by typing
cmdin the Start menu search and click on Command Prompt. - At the command prompt, type
echo %VARIABLE_NAME%(replaceVARIABLE_NAMEwith the name of the variable you deleted). - The result should be
%VARIABLE_NAME%a blank line if the variable was successfully deleted.
Alright, you’ve successfully deleted an environment variable in Windows 11. Remember that any open applications using the variable must be restarted to reflect the change.
Conclusion:
- Deleting environment variables in Windows 11 can help improve system performance and stability by removing unused or conflicting variables.
- It’s important to proceed with caution when deleting system environment variables as it can affect all users on the system and cause system instability.
- Users may also use PowerShell or the Windows Registry Editor to delete environment variables, providing alternative methods for managing system configuration.
- After successfully deleting an environment variable, it’s essential to restart any open applications that were using the variable to reflect the change.
- This article provides comprehensive guidance on deleting environment variables in Windows 11, offering users the knowledge and tools to manage their system configuration effectively.


Leave a Reply