Windows 11 has a new feature called Snap Layouts. When you drag a window to the top of your screen, a small menu pops up to help you arrange your open windows easily. Some people find this helpful, but others may want to turn it off.
If you want to stop this Snap Layout menu from showing up when dragging windows, don’t worry! This guide will show you how to turn it off (or back on) in just a few easy steps.
How to turn off or turn on Snap Layouts when dragging a window to the top of the screen
Here’s how you can enable or disable the Snap Layouts feature on your Windows 11 PC:
Step 1: Open Windows Settings
Press the Windows key + I on your keyboard at the same time. This will open the Settings app.
Or, click the Start button (the Windows icon at the bottom left), then select Settings from the menu.

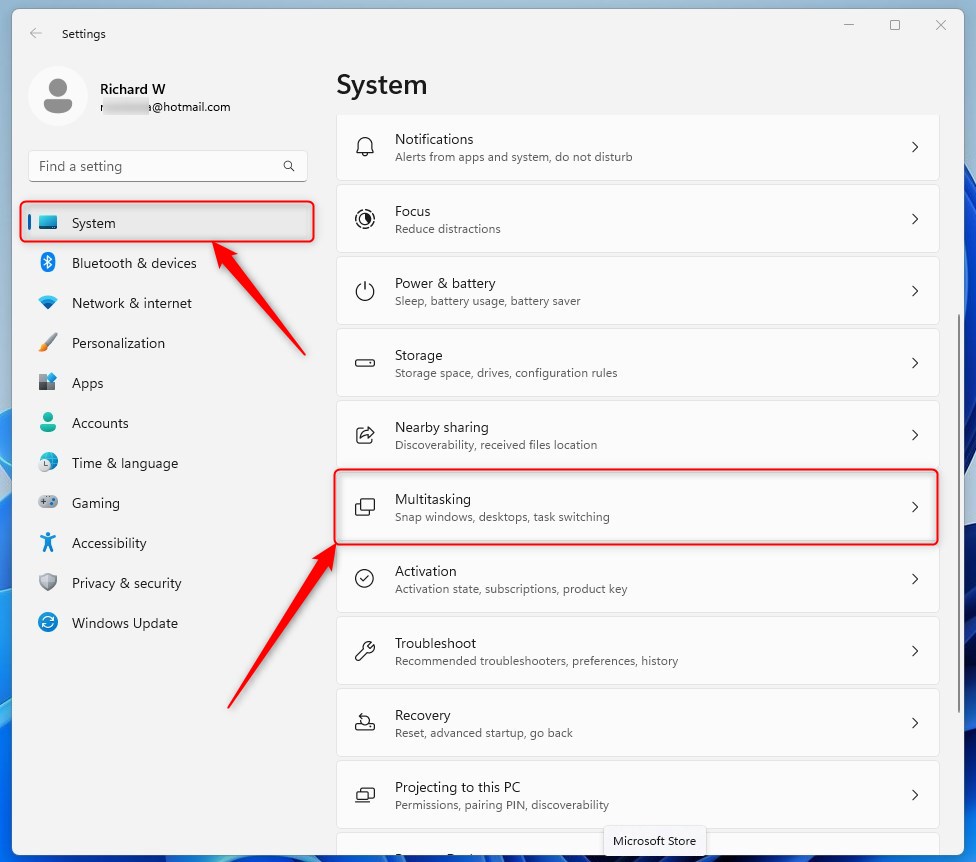
Step 2: Go to System > Multitasking
In the Settings window, click on System from the left side menu.
Then, find and click on Multitasking on the right side.
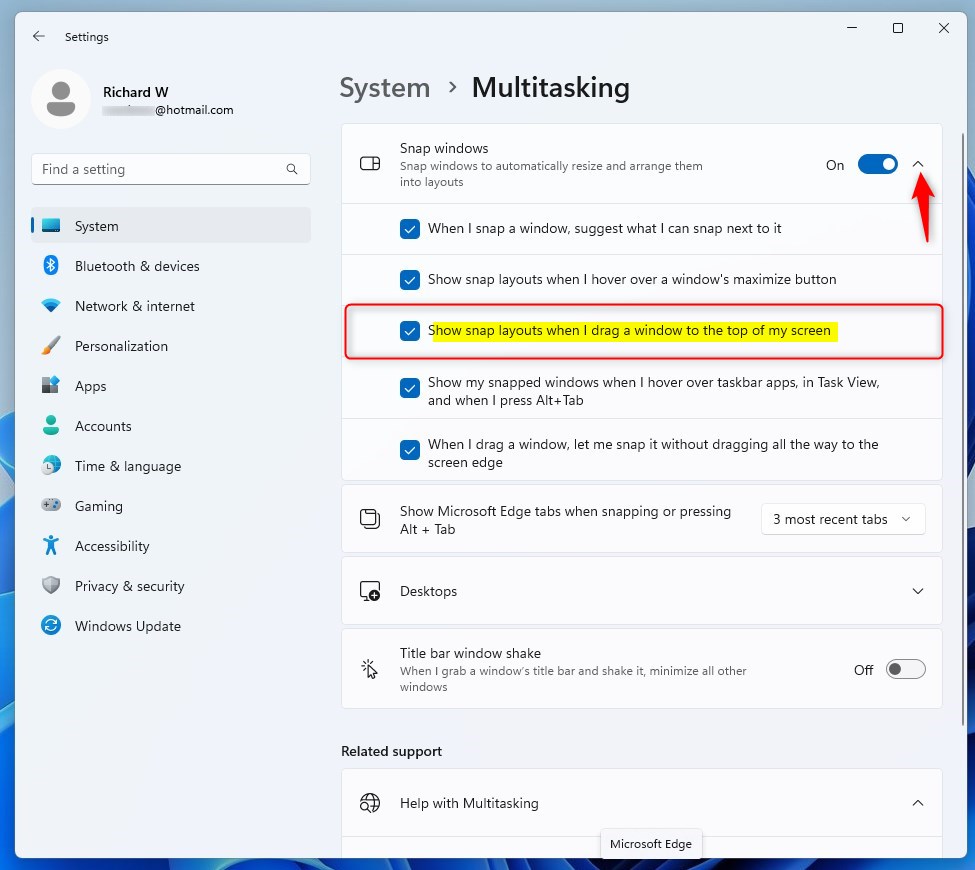
Step 3: Change Snap Layouts setting
In the Multitasking settings, look for the Snap windows section. Click the small arrow to open more options.
Here you will see a checkbox labeled “Show snap layouts when I drag a window to the top of my screen.”
- Uncheck the box to turn off the Snap Layouts menu.
- Check the box to turn it back on.
That’s it! Your change will take effect right away.
Summary
- Windows 11 shows Snap Layouts when you drag a window to the top of the screen by default.
- You can easily turn this feature off or on from the Multitasking settings.
- This helps you decide how you want to manage your windows and makes your computer feel just right for you.
If you want to learn more about Windows 11 features and tips, check out the official Microsoft support page:
Microsoft Windows Support.

Leave a Reply