
This article explains how to clear the device search history on Windows 11.
Local search history in Windows refers to recent search queries performed on your device using the Windows Search feature.
When you search for files, apps, or settings using Windows Search, your device keeps a record of your recent searches, which can help improve your search experience by providing faster and more accurate results based on your search history.
By default, Windows saves recent search history locally on the device, but you can enable or disable this feature based on your preferences.
Clearing your device search history on Windows can be helpful for various reasons. For example, it can help protect your privacy by removing traces of sensitive or personal information you may have searched for. Additionally, clearing your search history can free up disk space and improve your device’s performance.
Finally, if you share your device with others, clearing your search history can help keep your search queries confidential and prevent others from seeing what you’ve searched for.
Clear device search history
As mentioned, Windows saves your local searches on the machine by default. You can turn this feature on or off.
If you store your local search history on Windows, the steps below show you how to clear it.
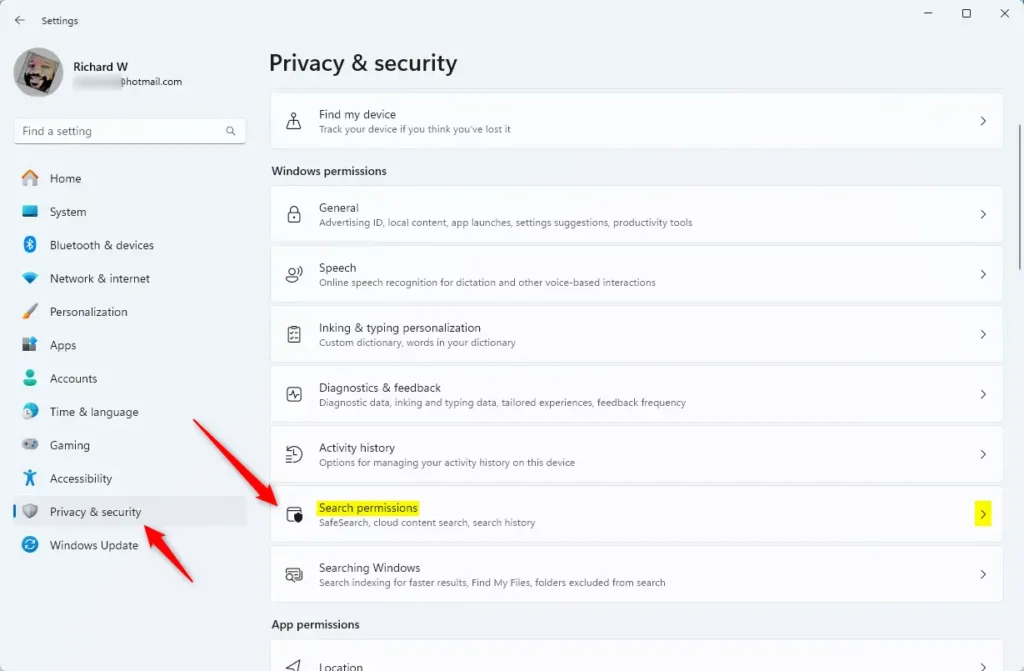
First, open the Windows Settings app.
Then, select Privacy & security on the left and the Search permissions tile on the right to expand it.
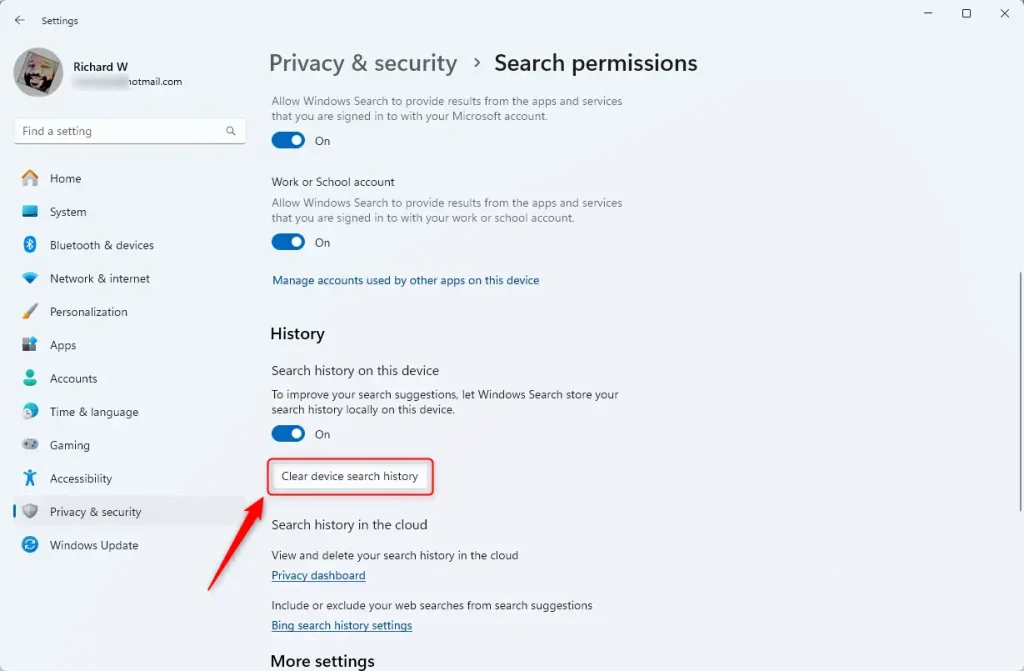
Next, click the “Clear device search history” to clear or remove your local search history.
Exit the Settings app when done.
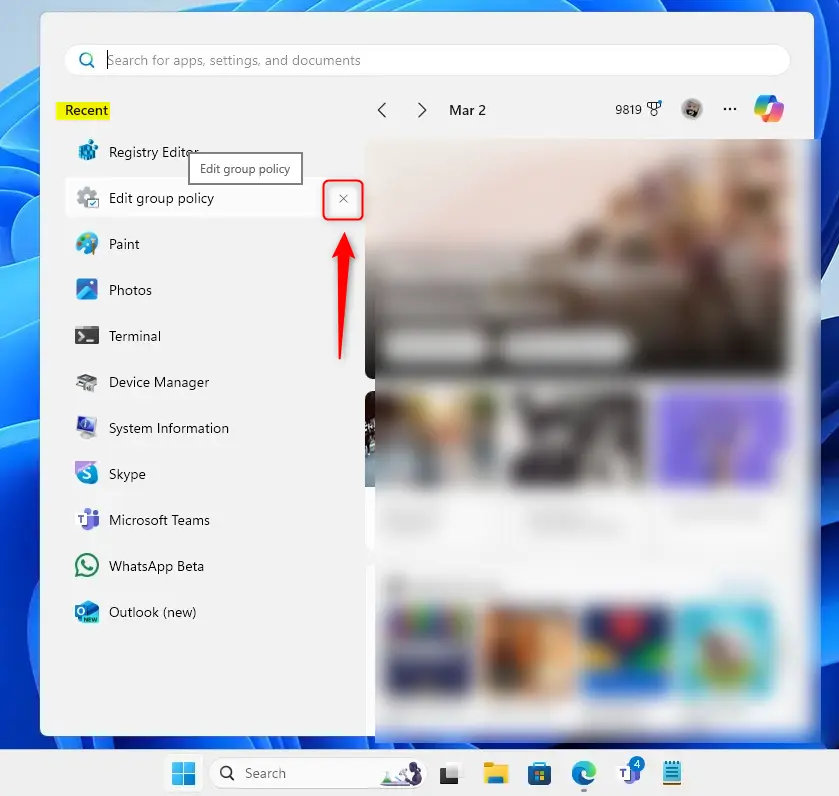
Alternatively, you can delete your search history on the Start menu (Search) by clicking the X button next to each search history.
That should do it!
Conclusion:
- Clearing your device search history on Windows 11 is essential for safeguarding your privacy and ensuring that sensitive information is not exposed.
- Regularly clearing your search history can help free up disk space and optimize your device’s performance.
- Following the simple steps outlined in this article, you can easily manage and clear your local search history on Windows 11, enhancing your privacy and your device’s efficiency.


Leave a Reply Cancel reply