How to Move Ubuntu WSL to Another Drive in Windows 11
You can move your Ubuntu WSL installation to another drive in Windows 11 to free up space or organize your storage.
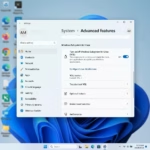
You can move Ubuntu WSL to another drive using Windows Settings or the command line. First, shut down WSL with `wsl –shutdown`. Then, use the “Move” option in the Apps settings or the `wsl –move` command.
Moving your Ubuntu environment means relocating its virtual hard disk file (VHDX), which often consumes significant space on your primary drive. This process is crucial if your C: drive is nearing capacity, allowing you to transfer it to a secondary SSD or HDD.
After the move, your Ubuntu system, including all installed applications and files, will reside on the new drive. You’ll access it just as you did before, but with more free space on your main Windows partition.
Windows Subsystem for Linux (WSL) version 2, which is standard in Windows 11, manages these Linux distributions using VHDX files.
Was this guide helpful?

About the Author
Richard
Tech Writer, IT Professional
Richard, a writer for Geek Rewind, is a tech enthusiast who loves breaking down complex IT topics into simple, easy-to-understand ideas. With years of hands-on experience in system administration and enterprise IT operations, he’s developed a knack for offering practical tips and solutions. Richard aims to make technology more accessible and actionable. He's deeply committed to the Geek Rewind community, always ready to answer questions and engage in discussions.


No comments yet — be the first to share your thoughts!