This post shows students and new users how to zip or unzip files and folders with Windows 11.
When working in Windows, your zipped or compressed files can be handled and manipulated the same way you would with uncompressed files. You can combine several files and folders inside an unzipped folder. The same can be said of zipped files.
Zipping or unzipping files in Windows 11 can be useful in several ways. For example, you can reduce the size of large files by compressing them into a zipped folder, thus making them easier to share via email or other means.
Similarly, you can unzip a compressed folder or file to access its contents and work with them like uncompressed files. Zipping and unzipping files in Windows 11 is a simple process that can help you manage your files and folders more efficiently.
To get started with managing zip and unzip files, please continue below.
To add files or folders to an unzipped folder, simply drag and drop the file into the folder. To add files or folders to a zipped folder you created earlier, drag them to the zipped folder.
How to zip or compress files in Windows 11
To zip or compress a file, simply browse and locate the file or folder you want to zip. Press and hold (or right-click) the file or folder, and select (or point to) the Compress to ZIP file as highlighted below.
You cannot zip or compress an empty folder.
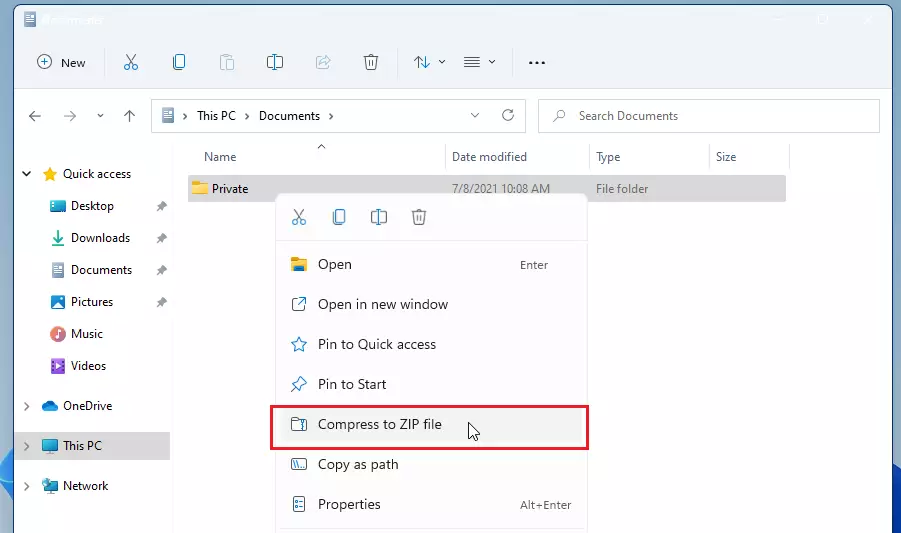
If you don’t change the name, a new zipped folder with the same name is created in the same location. If you wish to rename the zipped file, simply right-click it and select Rename. Then, type a new name.

How to unzip or uncompress files in Windows 11
To unzip or uncompress files or folders from a zipped or compressed folder, simply follow the steps below:
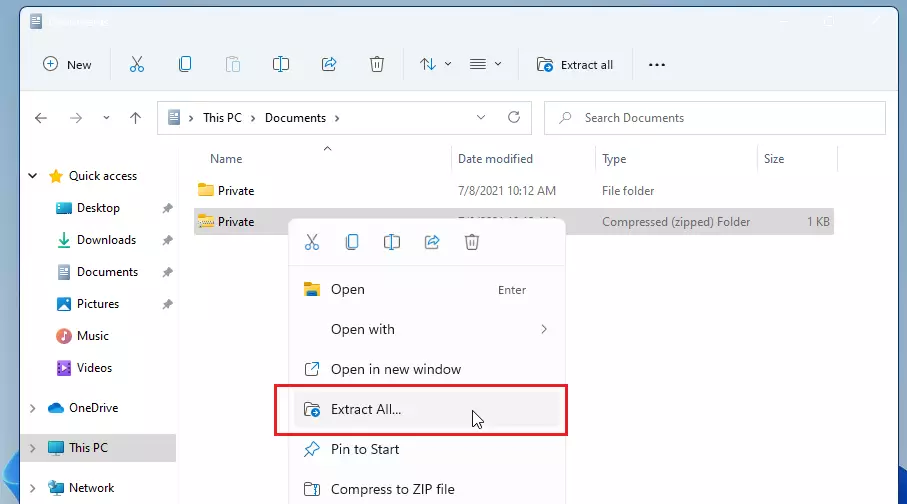
Again, browse and locate the zipped folder you want to unzip (Extract) files or folders. To unzip a single file or folder, open the zipped folder, then drag the file or folder from the zipped folder to a new location.
To unzip all the contents of the zipped folder, press and hold (or right-click) the folder, select Extract All, and then follow the instructions.
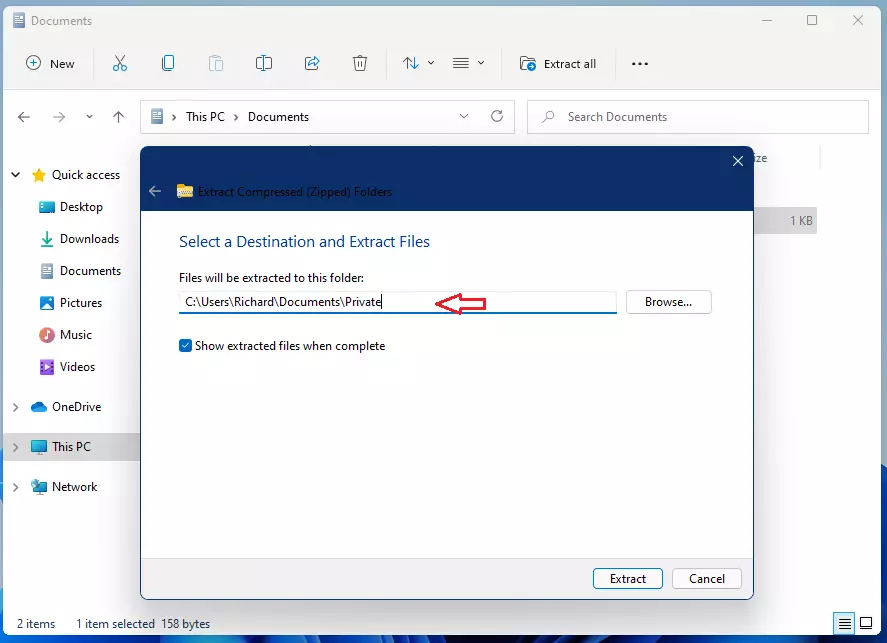
Choose the destination to extract the zipped content. The default destination is the same folder in which the zipped folder is stored. The default setting to “Show extracted files when complete” is checked.
When you’re ready, click the Extract button at the bottom right.
That should do it.
Conclusion:
- Zipping files helps reduce their size, making them easier to share or store.
- Unzipping allows users to access and manage files within compressed folders seamlessly.
- The process to zip and unzip files in Windows 11 is straightforward and user-friendly.
- Mastering file compression techniques can enhance your productivity in file management.
- By utilizing these methods, you can keep your digital workspace organized and efficient.


Leave a Reply