

This article describes the steps to view drive storage usage in Windows 11.
In Windows, one can use storage usage details to see drive storage used and how much free storage space is left. If you run out of storage space on your Windows device, you’ll be unable to save new files or sign into your computer.
Checking the storage usage of your drive in Windows 11 is essential because it helps you understand how much space is being used and how much space is left. This information helps determine whether you need to free up space by deleting unnecessary files or transferring files to an external drive.
It also helps you avoid running out of storage space, which can cause issues such as being unable to save new files or sign into your computer.
Regularly checking your drive storage usage ensures your device runs smoothly and avoids any potential storage-related problems.
How to check drive usage and how much free space is left in Windows 11
As described above, one can use storage usage details to see drive storage used and how much free storage space is left.
Here’s how to find out storage usage in Windows 11
Check storage usage in File Explorer
Windows File Explorer can provide details about drive storage usage. Open File Explorer or use the keyboard shortcut (Windows key + E) to get that.
In File Explorer standard view under This PC, right-click the Lock Disk (C:) and select Properties.
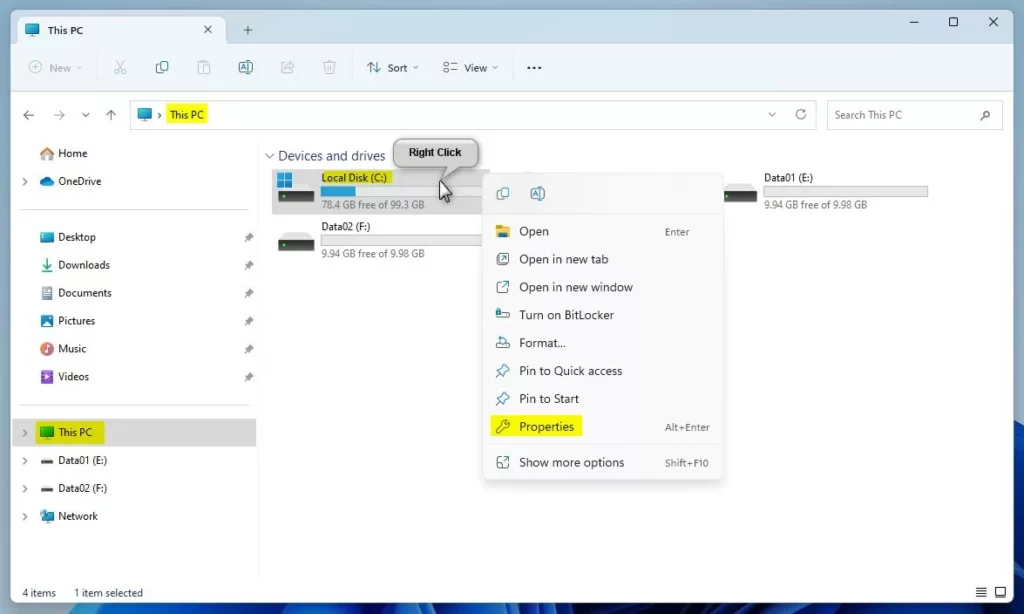
When the Lock Disk (C:) Properties window opens, click on the Details or Storage usage button under the General tab.

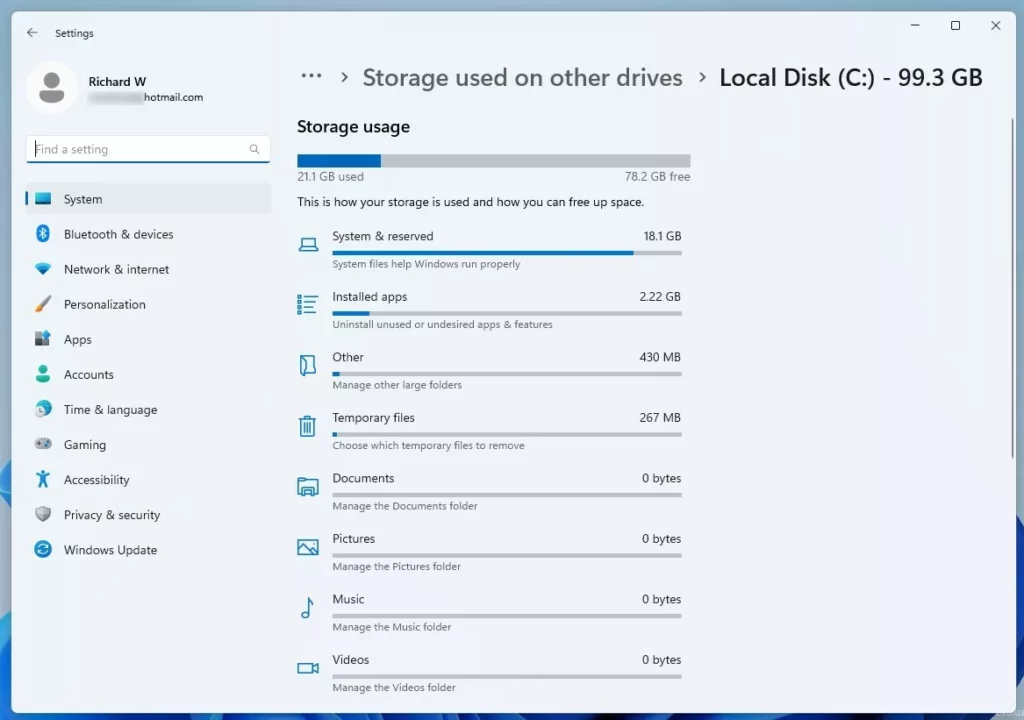
On the Storage used on other drives -> Local Disk (C:), you will see how the Storage is used. Click on the individual item to manage and possibly free up some space.
View storage usage from Windows Settings app
The same information above can be accessed via the Windows Settings app.
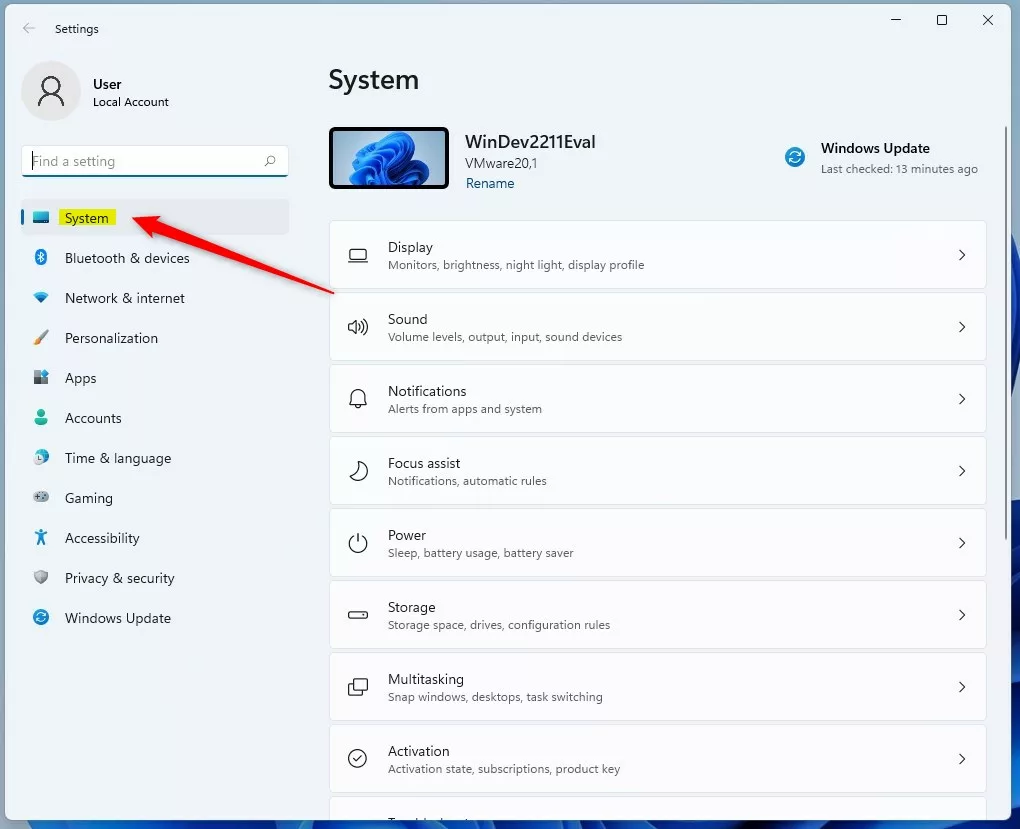
Click on the Start menu button and select Settings. You can also use the keyboard shortcut (Windows key + I) to launch the Settings app.

When the Settings app opens, click the System button on the left.
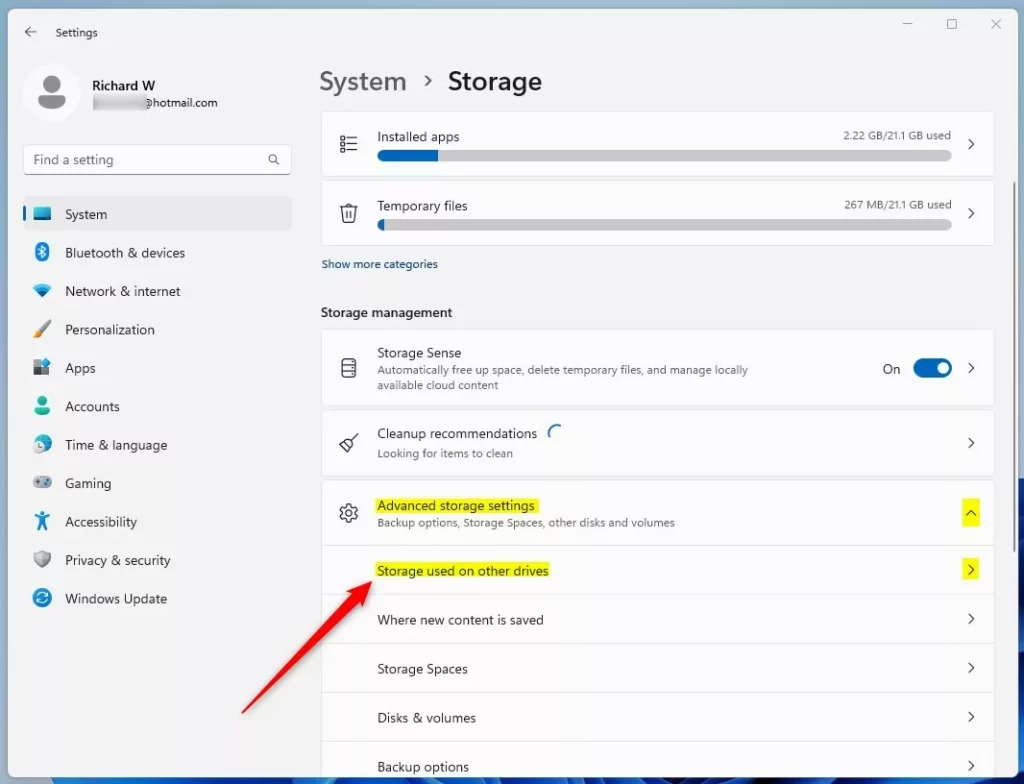
On the right, click the Storage tile to expand.

On the System -> Storage settings pane, click on the Advanced storage settings tile to expand. On the expanded tile, select Storage used on other drives tile to expand further.
Next, select the drive for which you want to view its storage usage report. In this case, click on Lock Disk (C:).
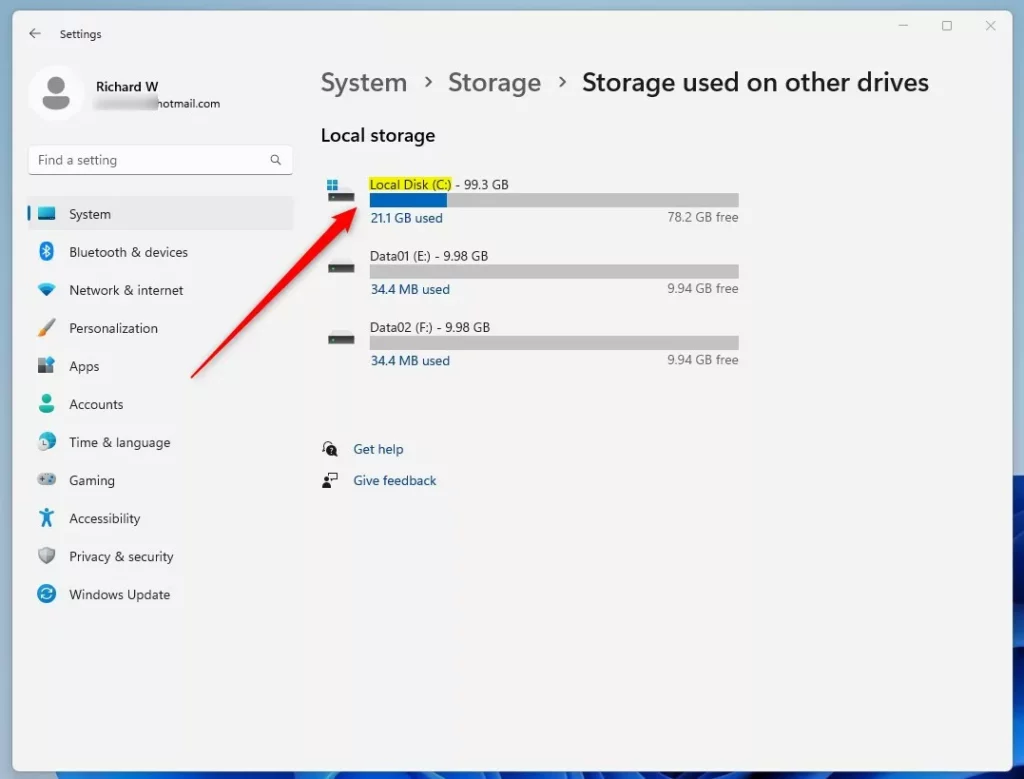
You should see how the Storage is used, similar to the previous screen above.
That should do it!
Conclusion:
- Checking the storage usage of your drive in Windows 11 is essential for understanding space utilization and ensuring smooth device performance.
- Regularly monitoring drive storage usage helps prevent storage-related issues, such as running out of space and being unable to save new files or sign into your computer.
- You can easily check storage usage in Windows 11 using File Explorer or the Settings app, allowing you to manage and free up space as needed.
- By following the steps outlined in this article, you can effectively monitor and manage drive storage usage, contributing to a more efficient and trouble-free computing experience.

Leave a Reply Cancel reply