
This article describes how to view all shared OneDrive files and folders and stop sharing them.
The OneDrive app lets you sync files and folders on your computer with Microsoft Cloud. It allows you to access them anywhere on your mobile devices and other computers using the service.
The OneDrive app comes installed on Windows 11 by default. The app lets you work with your synced files directly in File Explorer, even offline.
You can use OneDrive to share your files and folders with anyone, anywhere, and control what users see and what they can change. Once you share your files, users will have access to them until you stop sharing them.
Here’s how to view all the files and folders you shared and how to stop sharing them.
View all shared OneDrive files and folders.
As mentioned above, when you share your OneDrive files and folders with others, you can view all the shared documents from your OneDrive online portal.
You can also stop sharing your documents using the OneDrive online portal.
Here’s how to do that.
First, go to your Microsoft OneDrive portal online and sign in if you have not already. Then, on the Shared link in the left menu panel.
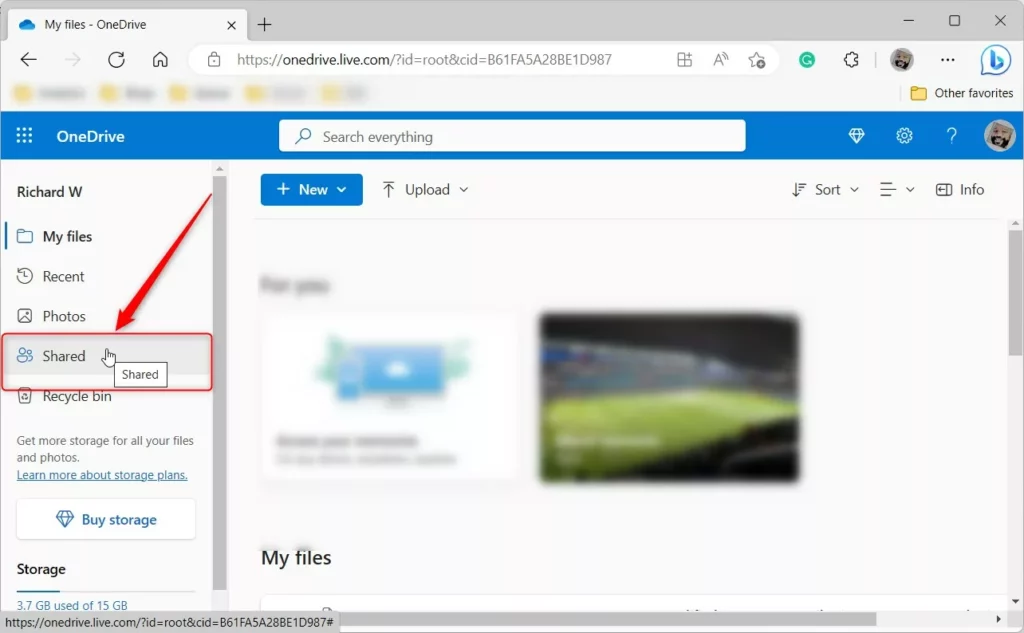
Next, select the Shared by you link at the top to view all the documents you have shared with others.
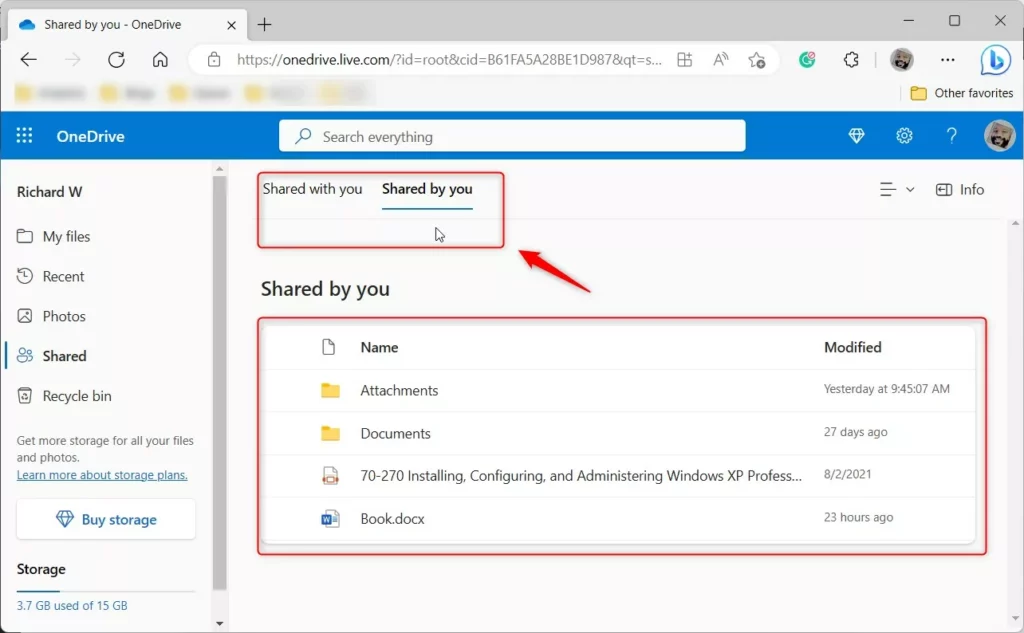
That’s how to view all your shared documents in the OneDrive online portal.
Stop shared OneDrive documents
Now that you have identified all the documents you are sharing, if you want to stop sharing, the steps below show you how.
Go back to your Microsoft OneDrive portal online, and sign in if you are not already. Then click on the Shared link on the left menu. Next, select the Shared by you link at the top to view all the documents you have shared with others.
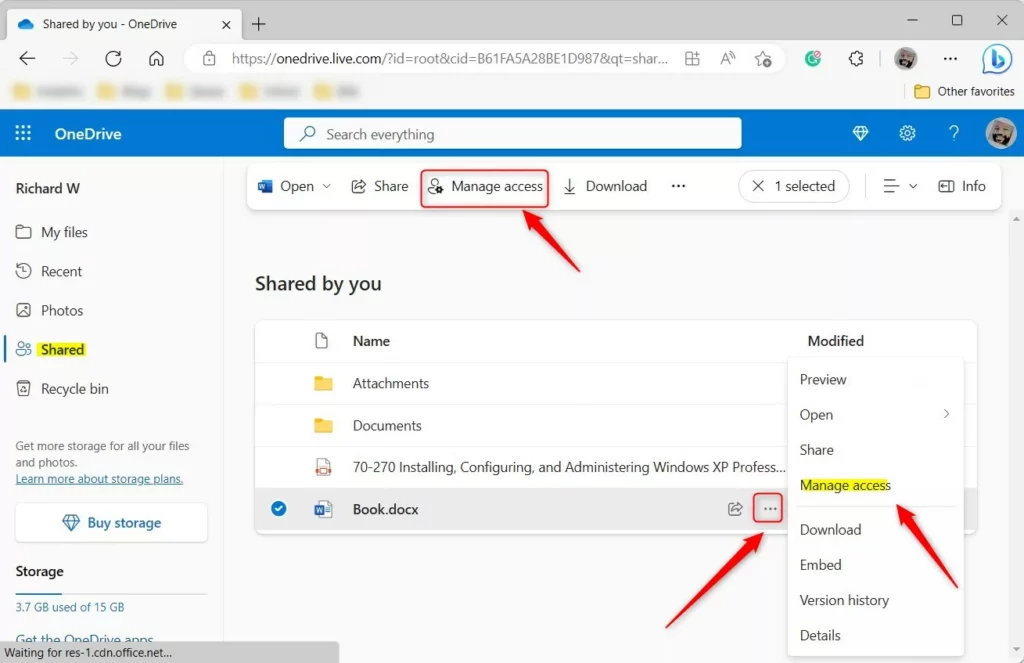
On the page with all the documents Shared by you, locate and select the file or folder you want to stop sharing.
There’s a Manage Access option window that you can use to manage access. There are two ways to access the “Manage access” options window.
- Select the file or folder, then click on Manage Access on the top menu bar.
- Select the file or folder, click the Show more options ( three dots ) button, and select the “Manage access” link.
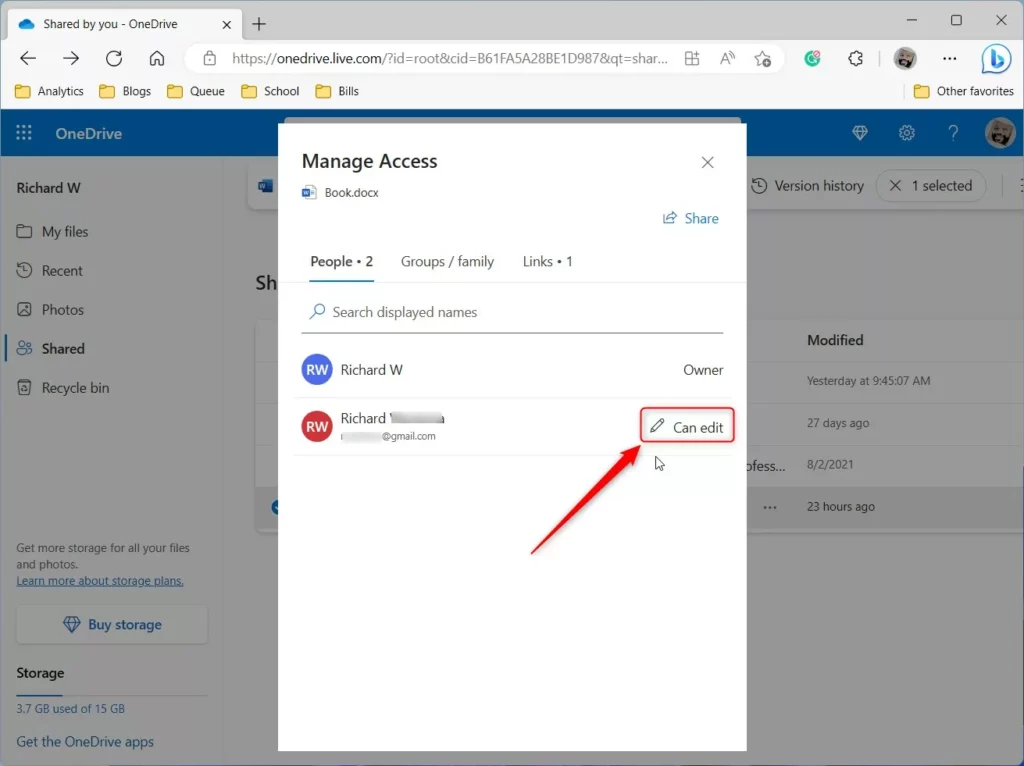
On the Manage Access pop-up window, under the People link, click the Pencil icon to Manage Access to the document for the people or group listed.
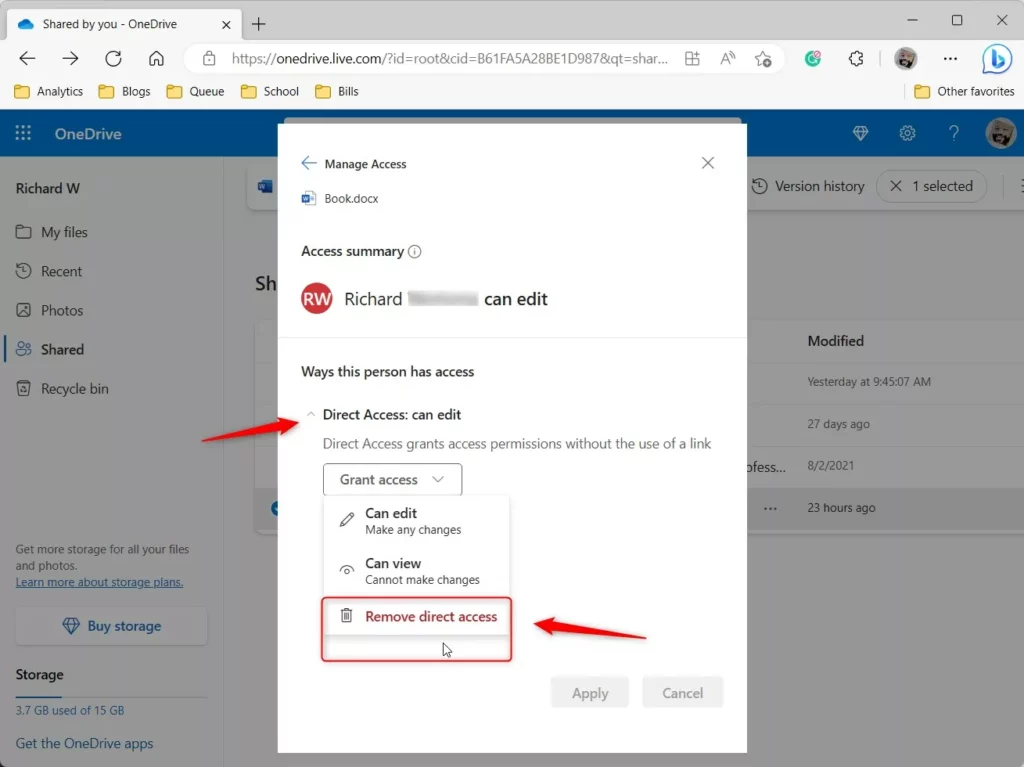
Next, expand Direct Access, then click “Remove direct access” to remove an individual or group access to the document.
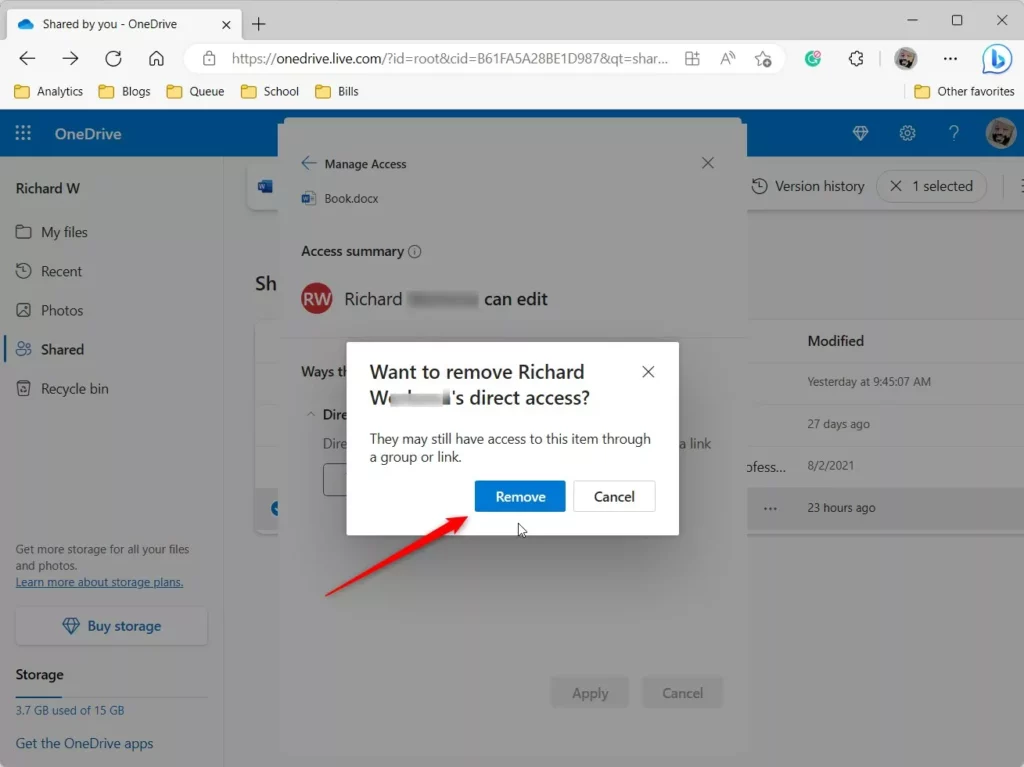
Click the Remove button to remove all Access to the document.
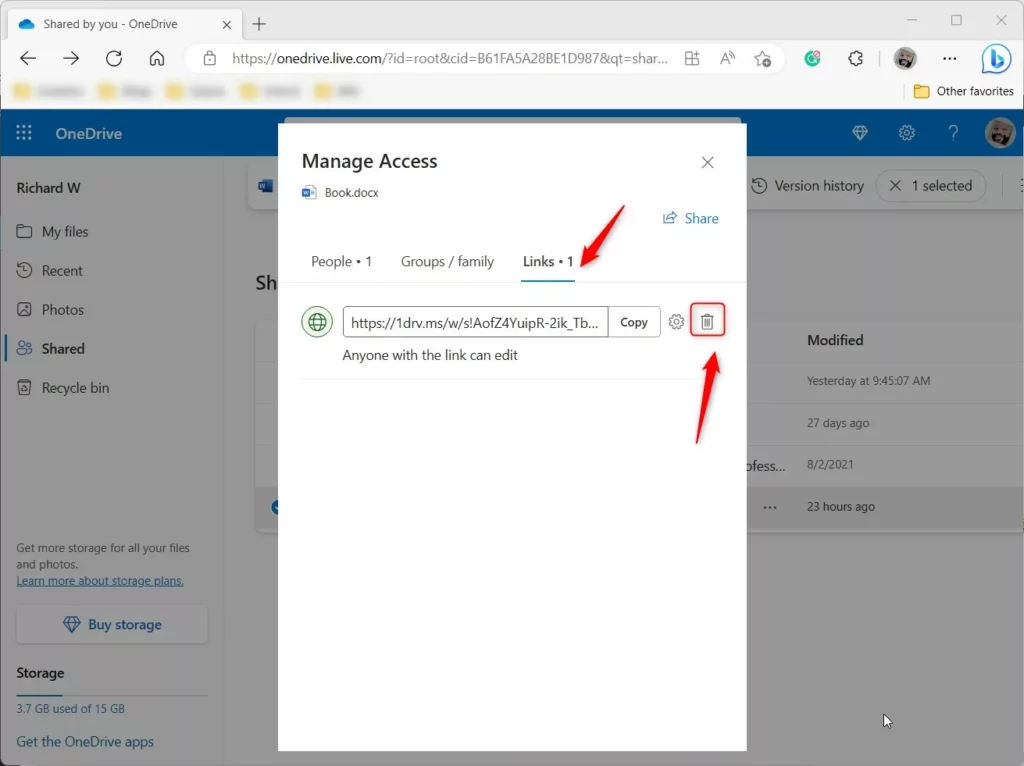
Finally, click on the Links menu on the Manage Access window, then click the Delete button to delete the shared link if you no longer need it.
That should do it!
Conclusion:
- Review the shared documents on OneDrive to ensure you have oversight of your shared content
- Safely manage access to your documents using the OneDrive online portal
- Utilize the provided steps to stop sharing specific files and folders as needed
- Feel free to leave any feedback or additional insights using the comments section below
Leave a Reply